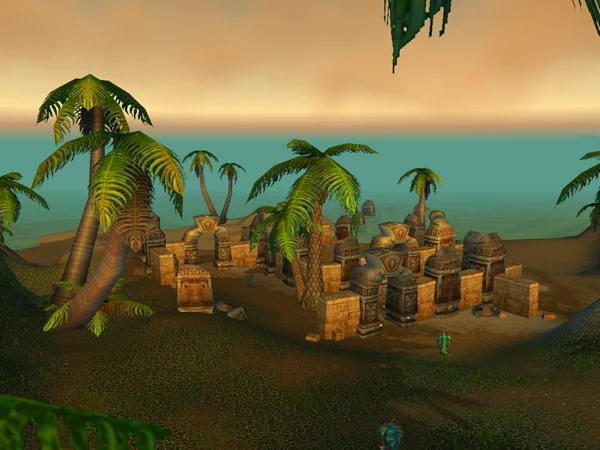
This is a list of all Thousand Needles quests in table format (arranged by level).
For a questing guide detailing the best order to obtain and complete quests in Thousand Needles, see Thousand Needles questing guide.
Quest Tables
Quests which take place in Thousand Needles are denoted by a ![]() .
.
The other quests listed either send the player out of the zone; or are in quest chains related to Thousand Needles, categorized as such, but take place out of the zone.
 Alliance Quests
There are very few Alliance-only quests in Thousand Needles, as there is no Alliance town here. Most Alliance players shouldn't come to Thousand Needles until level 30, when they can partake of the wealth of neutral quests from the Mirage Raceway.
| Quest Name | Quest Giver | Subzone | |
|---|---|---|---|
| Ironforge | |||
| The Great Lift | |||
| Ironforge | |||
| Template:Race Icon NightElf Male Small |
Mirage Raceway | ||
| Template:Race Icon NightElf Male Small |
Mirage Raceway | ||
Horde Quests
Horde quests in Thousand Needles begin at level 25, and mostly come from Freewind Post and Whitereach Post. Once players reach level 30, they will be doing mostly the neutral quests from the Mirage Raceway.
Neutral Quests
The Mirage Raceway is full of neutral quests involving the racers there, and the scheming Kravel Koalbeard sends players on errands even after they have outgrown the mobs of this zone. Though Thousand Needles questing ends around level 35, Mirage Raceway has quests for players into their mid-40s.
Class Specific Quests
Two mage quests can also be obtained in Thousand Needles.
| Quest Name | Quest Giver | Zone Location | |
|---|---|---|---|
| Template:Questclass | Template:Race Icon Human Male Small |
Mirage Raceway | |
| Template:Questclass (Dungeon) | Template:Race Icon Human Male Small |
Mirage Raceway | |
Notable Quest Chains
The following quest chains occur in Thousand Needles. Chains have been included if they are more than three quests long or are specially significant in some way.
Freedom for All Creatures Chain
- Main article: Freedom for All Creatures quest chain
The subject of this article was removed in patch 4.0.3a but remains in World of Warcraft: Classic.
|
 | |
| Level range | 41-48 |
| Zones |
Feralas Thousand Needles Hinterlands |
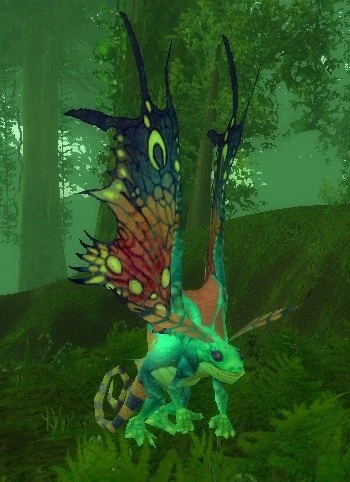
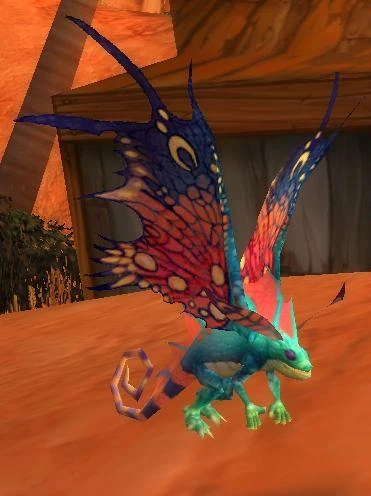
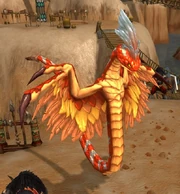
Freedom for All Creatures is an Alliance-only quest chain in which players rescue and eventually hatch a ![]() [Sprite Darter Egg]. This has caused no end of jealousy from Horde players who want the pet, as the egg is Bind on Pickup. However, as of patch 3.1, Horde players can slay Sprite Darters in Feralas to receive this pet.
[Sprite Darter Egg]. This has caused no end of jealousy from Horde players who want the pet, as the egg is Bind on Pickup. However, as of patch 3.1, Horde players can slay Sprite Darters in Feralas to receive this pet.
This chain has a round-about way of offering quests, which is the reason many people do not complete it. For example, one quest ends at Tyrande in Darnassus but the next starts back in Feralas. However the quests themselves are not high in difficulty, so with this guide an Alliance player can easily acquire their Sprite Darter Hatchling.
Protecting the sprite darters

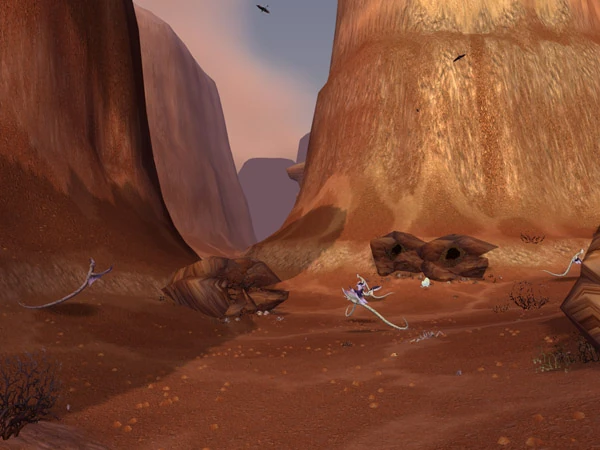
The two night elves are on the ridge overlooking the compound.
In wild Feralas, the Grimtotem tauren are wreaking havoc on the local sprite darter population. Kindal and Jer'kai Moonweaver, two night elves from Darnassus, are the only ones trying to protect these rare and extraordinary creatures. Unfortunately, the job is turning out to be too large for just the two of them.
![]() [47] Freedom for All Creatures
[47] Freedom for All Creatures
Kindal Moonweaver needs help. The Grimtotems have captured a large number of sprite darters and are holding them captive in the Grimtotem Compound, below the ridge where Kindal and Jer'kai stand watch. Kindal wants to set the creatures free, and even has the key to the cage, but she needs help to do it. That's where you come in. Kindal needs you to protect her and the sprite darters while they escape.
![]() [47] Doling Justice
[47] Doling Justice
Now that the sprite darters have been freed, Jer'kai Moonweaver wants you to make sure they are not captured again. To that end, the night elf solemnly asks you to as much damage to the tauren of the Grimtotem Compound as possible, while she and Kindal do the same.


Tyrande Whisperwind
![]() [47] Doling Justice
[47] Doling Justice
Jer'kai is so impressed with your deeds that she gives you her signet ring and sends you to report to Tyrande in Darnassus. Tyrande, hearing the report, praises your deeds and rewards you handsomely, giving you a choice between a pair of [Firwillow Wristbands] or a [Nightscale Girdle (Classic)].
The orphan egg
Having delivered the message to Tyrande, your mission is complete. However, whether due to curiosity or concern, you decide to check back in on Kindal and Jer'kai in Feralas - perhaps they have further need of your aid.
![]() [47] An Orphan Looking For a Home
[47] An Orphan Looking For a Home
It turns out Kindal and Jer'kai have managed to save a clutch of sprite darter eggs, though the mother died. In recognition of your service to these creatures, Kindal gifts you with one of the eggs, instructing you to seek out a kaldorei named Quentin at the Mirage Raceway in Thousand Needles.
![]() [47] A Short Incubation
[47] A Short Incubation
Quentin needs some [Elixirs of Fortitude] to check the health of the egg. Alchemists craft these elixirs, so you manage to get some without too much trouble. Using the elixirs, Quentin discovers that the egg is fragile but healthy, and will soon hatch. However, it will need special care, care which he is unable to provide.

Agnar Beastamer
![]() [47] The Newest Member of the Family
[47] The Newest Member of the Family
You must hurry to bring the fragile egg to Aerie Peak in the Hinterlands, where the dwarf Agnar Beastamer, in the basement of Wildhammer Keep, can be of further assistance. Quentin knows this dwarf is wise in the ways of animals, and will be able to guide you in the final steps of the incubation.
![]() [47] Food for Baby
[47] Food for Baby
After racing against the clock to reach Aerie Peak before it is too late, you at last speak with Agnar. The dwarf indeed knows just what the new baby will need - food, and lots of it! He sends you out to collect meat from the Silvermane Stalkers who prowl the eastern Hinterlands. The wolves are dangerous and crafty, but you manage to collect enough, rushing back to Aerie Peak laden with wolf flanks. And just in time - it appears the egg is about to hatch!
![]() [48] Becoming a Parent
[48] Becoming a Parent
The tiny sprite darter emerges from its egg, and you and Agnar quickly provide it with the food it needs. The creature seems to instantly take a liking to you - once it is able to fly, it begins following close behind you. Agnar tells you to keep the egg as a symbol of the relationship: you can always use it to call or send away the little Darter.
Rewards

The baby sprite darter will follow you as long as you possess its egg.
If the player follows the entire quest chain from beginning to end, he or she will receive:
- One of the following:
Notes
If planning to do the quests all at once, it would be pertinent to get the 2 [Elixir of Fortitude] needed for ![]() [47] A Short Incubation ahead of time. These can be crafted by alchemists, and can sometimes be found in the Auction House.
[47] A Short Incubation ahead of time. These can be crafted by alchemists, and can sometimes be found in the Auction House.
Summary
 [47] Freedom for All Creatures
- [47] Doling Justice
- [47] Doling Justice
- [47] An Orphan Looking For a Home
- [47] A Short Incubation
- [47] The Newest Member of the Family
- [47] Food for Baby
- [48] Becoming a Parent
Patch changes
- Patch 4.0.3a (2010-11-23): Removed.
Arikara Chain
- Main article: Arikara quest chain
The subject of this article was removed in patch 4.0.3a but remains in World of Warcraft: Classic.
|
| Level range | 26-28 |
|---|---|
| Zones |
Thousand Needles Thunder Bluff |
Arikara is a Horde-only quest chain involving the serpent of vengeance, Arikara. Though it is somewhat debated, it seems to be implied that this serpent is not after Cairne Bloodhoof as Magatha Grimtotem suggests. Instead, the serpent may in fact be seeking vengeance against her.
Arikara, serpent of vengeance
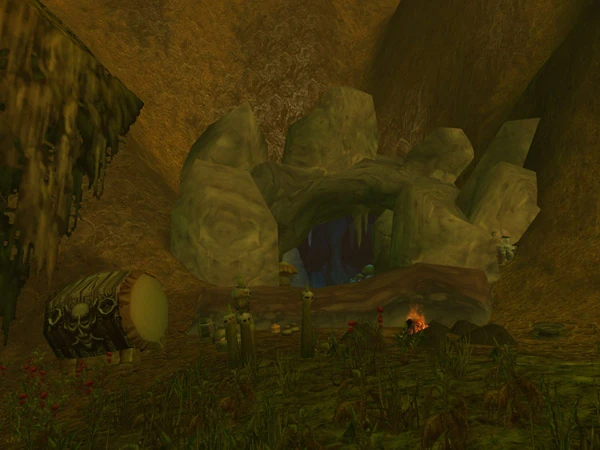
Windbreak Canyon, home to many serpents
Rumors have been spreading among the tauren of Freewind Post - a strange, alien egg has been sited in the nests of the Thousand Needles serpents.
![]() [26] Alien Egg
[26] Alien Egg
Hagar Lightninghoof has heard of the alien egg, and wants to examine it himself. For this, he seeks your aid - the egg is guarded by serpents in one of their dens, and he cannot leave his post. You agree, and return the egg to him after fighting through its serpent guards.
But as Hagar examines the egg, it suddenly breaks apart, and a strange red serpent emerges. The serpent kills a nearby dog and then flies away, out of reach.
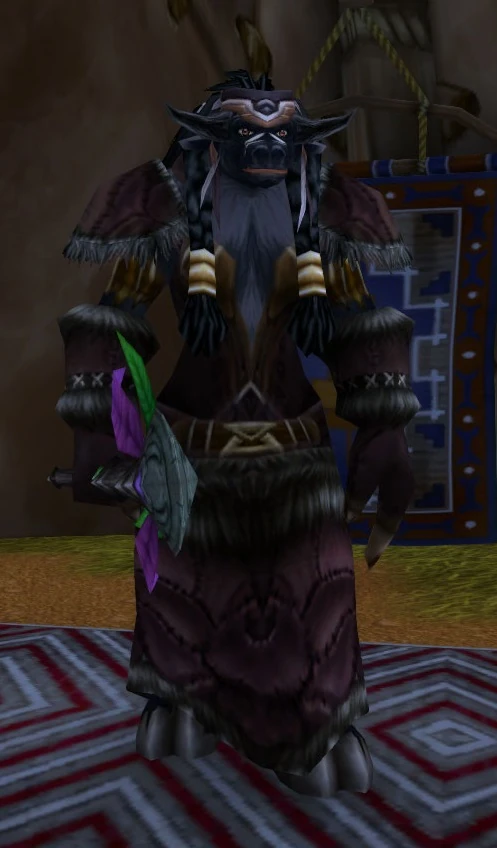
Magatha Grimtotem
![]() [26] Serpent Wild
[26] Serpent Wild
Hagar seems shaken by this event, and makes a cryptic comment that "Vengeance has come to Thousand Needles!" He asks you to seek out Motega Firemane to the west for further instructions.
![]() [27] Sacred Fire
[27] Sacred Fire
Motega does, in fact, know what to do. The creature is called Arikara, a serpent of vengeance, who must be killed swiftly before she gains power. To that end, Motega asks you to gather ![]() [Incendia Agave] plants from the lake near Darkcloud Pinnacle, then visit Magatha Grimtotem in Thunder Bluff. With some trepidation, you do so, though you are plagued by steam elementals as you gather the plants.
[Incendia Agave] plants from the lake near Darkcloud Pinnacle, then visit Magatha Grimtotem in Thunder Bluff. With some trepidation, you do so, though you are plagued by steam elementals as you gather the plants.
When you reveal that Arikara is abroad, Magatha looks around suspiciously, as if she fears being overheard. She mentions that Arikara is born only to seek vengeance against those who have committed "heinous acts".

![]() [28] Arikara
[28] Arikara
Motega enchants the ![]() [Incendia Agave] which you brought to her, and instructs you to throw it on the sacred fire of life in the Grimtotem village of Darkcloud Pinnacle. In an urgent voice, she adds that Arikara may be stalking Cairne Bloodhoof for his alterations to tauren lore. You head out immediately for Darkcloud Pinnacle.
[Incendia Agave] which you brought to her, and instructs you to throw it on the sacred fire of life in the Grimtotem village of Darkcloud Pinnacle. In an urgent voice, she adds that Arikara may be stalking Cairne Bloodhoof for his alterations to tauren lore. You head out immediately for Darkcloud Pinnacle.
Gathering a few trusted companions to help in the fight, you battle your way through the Grimtotem tauren to the sacred fire and throw down the enchanted incendia agave. You don't have to wait long before the serpent appears. She is strong, but with your companions you manage to defeat her.
You bring Arikara's skin to Motega Firemane. The tauren looks confused when he hears what Magatha said - he can't understand why Arikara would have been after Cairne. Though now suspicious of the Grimtotem shaman, you gladly claim your reward from Motega, and the matter is, for now, closed.
Rewards
If the player follows the entire quest chain from beginning to end, he or she will receive:
| [Brute Hammer] | [Stingshot Wand] | |||
| [Clink Shield] |
- Roughly (from quest turn-ins only):
- 7,650 XP
- Thunder Bluff +500 Rep
- 62
Summary
- [26] Alien Egg
- [26] Serpent Wild
- [27] Sacred Fire
- [28] Arikara
Test of Faith Chain
- Main article: Test of Faith quest chain
- [26] Test of Faith
- [29G] Test of Endurance
- [30] Test of Strength
- [30] Test of Lore
- [30] Test of Lore
- [30] Test of Lore
- [30] Test of Lore
- [36D] Test of Lore
- [30] Test of Lore
- [36] Final Passage
Goblin Sponsorship Chain
- Main article: Goblin Sponsorship quest chain
The subject of this article was removed in patch 4.0.3a but remains in World of Warcraft: Classic.
|
 | |
| Level range | 30-41 |
| Zones |
Thousand Needles The Barrens Stranglethorn Vale Dustwallow Marsh Tanaris |
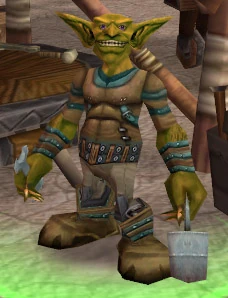
Goblin Sponsorship is a very long neutral quest chain which is based in the Shimmering Flats of Thousand Needles but sends players to Booty Bay and other distant locations. Two of the goblin team at the Mirage Raceway are the primary questgivers: the mechanic Pozzik and the pilot Razzeric.
This quest is of particular note because the final rewards are on par with level 41 items, but all the quests can technically be received by players as low as level 29. This means that this quest is a must-do for ambitious leather and cloth wearing twinks in the 20-29 PvP bracket.
Sponsoring Goblins
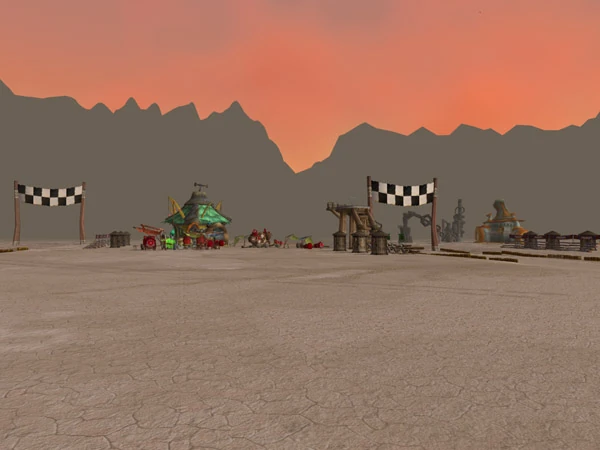
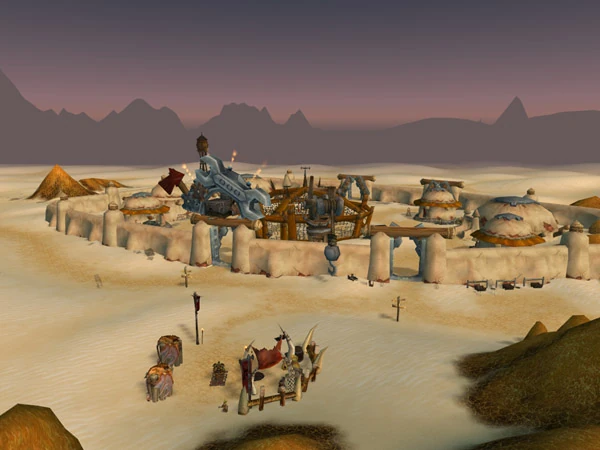
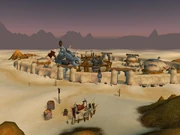
The competition of the racers on the Mirage Raceway in Thousand Needles is for more than just fame and fortune. It is a racial conflict. Goblins and gnomes have always vied against each other, their love of tinkering and engineering rivaled by no other race. Each seeks to prove themselves superior to the other. To that end, each team seeks powerful sponsors to provide the funding and parts they need.

Mirage Raceway, where the goblins and gnomes race head-to-head in their custom rocket cars.
![]() [30] Load Lightening
[30] Load Lightening
Pozzik the goblin mechanic is offering a good price for vulture bones. Since you are running errands around the flats anyway, you agree to bring him some. Little did you know, this is the first step to becoming heavily involved with the goblin racing team...
![]() [37] Goblin Sponsorship
[37] Goblin Sponsorship
A little while after buying the bones, Pozzik offers you another job: A special part, a fuel regulator, that the goblins had ordered failed to arrive. Pozzik wants you to go to Ratchet and try to track it down. He promises good money if you succeed, so you agree and set off for the port town.
![]() [37] Goblin Sponsorship
[37] Goblin Sponsorship
In Ratchet, the famous goblin Gazlowe (and incidentally a backer of the goblin racer team), explains that the part never reached him - Baron Revilgaz, the top goblin in Booty Bay, said he would ship it but it never came. Gazlowe suggests you head to Booty Bay to track it down. Realizing that this was becoming more of a headache than you had originally anticipated, but not wanting to quit now, you follow his advice.
![]() [37] Goblin Sponsorship
[37] Goblin Sponsorship
On the docks of Booty Bay, you question the wharfmaster about the missing shipment. But he claims to have never seen it. The only thing left to do is to speak to Revilgaz himself.

The Venture Co. have their base of operations on the shore of Lake Nazferiti
![]() [37] Goblin Sponsorship
[37] Goblin Sponsorship
Revilgaz, it turns out, never had the fuel regulator in the first place. He had sent word to the goblins because he thought he could steal the blueprints for a new design of the part from the Venture Company, who has a base of operations in northern Stranglethorn Vale. But the venture company resistance was stronger than he expected. It seems the only way to get that part is to steal the blueprints yourself, and Revilgaz offers you a hefty bag of silver to do just that.
Heading up to the lake the baron mentioned, you manage to defeat the gnome who is in charge of the place and steal his keys, then return to his house and pilfer the blueprints from his lockbox. At last, with the blueprints in hand, you return to Revilgaz and receive payment.
![]() [37] Goblin Sponsorship
[37] Goblin Sponsorship
All that is left to do is return to Pozzik a the racetrack and deliver the blueprints. At first he seems disappointed that the fuel regulator was not already assembled, but as he mumbles to himself he begins to get more and more excited, as new tweaks and modifications to the design come to him. Thanking you, he wanders off to begin his work.
Razzeric the Pilot

Razzeric the eighteenth pilot
Rocket car pilots are not known for growing to a ripe old age... in fact, they are better known for exploding in giant fireballs. Razzeric is no exception - he plans to go as fast as possible, no holds barred, no safety precautions taken. But to do it, he is going to need help.
![]() [37] The Eighteenth Pilot
[37] The Eighteenth Pilot
After receiving the fuel regulator blueprints, Pozzik sends you to speak with his pilot, Razzeric.
![]() [41] Razzeric's Tweaking
[41] Razzeric's Tweaking
Razzeric has another job for you: he's gone and ordered his own special part, one Pozzik doesn't know about. You gather from his description that it is some sort of turbo booster. But the zeppelin carrying the part crashed in Dustwallow Marsh and, you guessed it, he needs you to go get it. Yet again you are promised good compensation, and so off you go.
The marsh is full of nasty, powerful creatures; crocolisks and spiders and other such beasties. Finally, after slogging through who knows how much slime and goo, you at last discover the crashed zeppelin site. Once there, the booster isn't hard to find. The part in hand, you book it out of the swamp as fast as your legs can carry you.
![]() [41] Safety First
[41] Safety First
Gadgetzan, an engineering hotspot for goblins and gnomes alike
Razzeric is delighted at the recovery of the part - at first. But then he discovers a safety was left on. And he wants you to take it to Gadgetzan and get it released. Grumbling, you wonder why he didn't just make a trip to Gadgetzan to get the part in the first place, as it is just south of the flats... but as he is paying you for an easy trip, you agree.
The goblin Shreev in Gadgetzan shakes his head in exasperation when you explain what Razzeric wants - it seems there is no safety on the device, it has actually been modified to deliver even more boost than normal.
![]() [41] Safety First
[41] Safety First
Despite his misgivings, Shreev modifies the booster further, muttering that he hoped Razzeric didn't kill himself with it - who knew if the nineteenth pilot would be as good? At last you return to Razzeric with the finished part, and he is ecstatic, rewarding you with your choice of his very own seat belt (which he never uses anyway) or his prize racing gloves.
Rewards
If the player follows the entire quest chain from beginning to end, he or she will receive:
| [Razzeric's Customized Seatbelt] | [Razzeric's Racing Grips] |
- Roughly (from quest turn-ins only):
- 12,330 XP
- Ratchet +25
- 1 20
Summary
- [30] Load Lightening
- [37] Goblin Sponsorship
- [37] Goblin Sponsorship
- [37] Goblin Sponsorship
- [37] Goblin Sponsorship
- [37] Goblin Sponsorship
- [37] The Eighteenth Pilot
- [41] Razzeric's Tweaking
- [41] Safety First
- [41] Safety First
Errands for Kravel Chain
- Main article: Errands for Kravel quest chain
The subject of this article was removed from World of Warcraft in patch 4.0.3a.
|
 | |
| Level range | 31-44 |
| Zones |
Thousand Needles The Barrens Stranglethorn Vale Swamp of Sorrows |
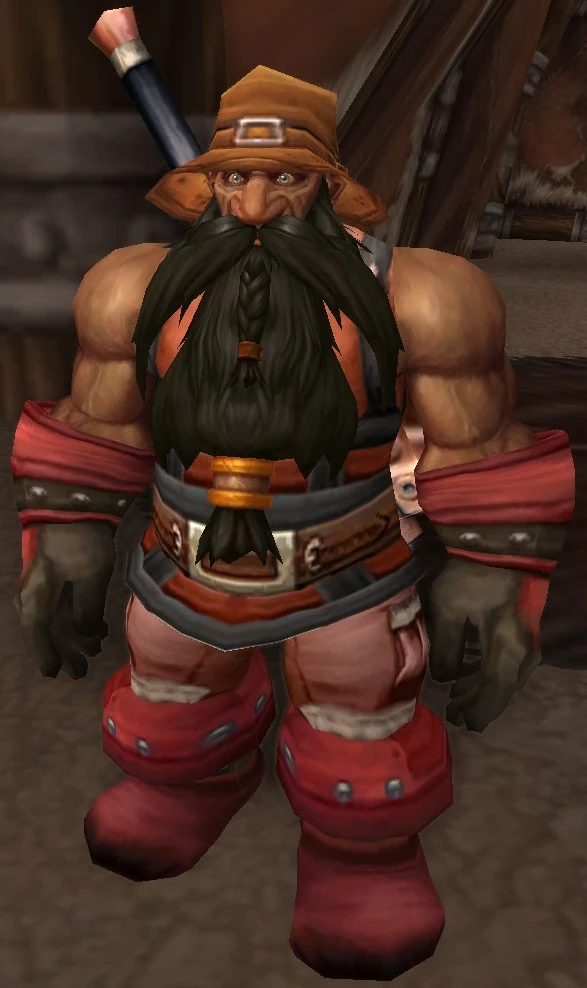
Errands for Kravel was a very long neutral quest chain which was based in the Shimmering Flats of Thousand Needles but sent players to Booty Bay quite often. The primary quest giver was Kravel Koalbeard, a dwarf who makes profit from the races of Mirage Raceway and has many contacts in Booty Bay.
This chain was rather long with arguable benefits for its length. Especially disappointing was the final quest, which seemed like it should have had a follow up but went nowhere. However, most of the quests were very simple and essentially gave free XP, so for players traveling to those areas anyway, this chain was an attractive option to level quickly.
Gnomish Deliveries
Kravel Koalbeard is a shrewd and cunning dwarf who knows how to make a profit in any situation. Rivaling a goblin in his eye for opportunities to make money, Kravel has traveled to the Mirage Raceway on the Shimmering Flats of Thousand Needles to pursue fame and fortune - or at least fortune. Kravel uses his position as a neutral supplier to both the gnome and goblin teams to gain leverage and support against each. And he is always looking for seasoned adventurers to do his dirty work.
![]() [31] Rocket Car Parts
[31] Rocket Car Parts
Kravel has hatched a scheme: to sell the gnomes and goblins their own parts back to them. He hires you to scour the flats for rocket car parts left behind by crashed vehicles. Since you were running errands around the flats anyway, you agree. The unscrupulous dwarf is delighted by your finds and rewards you accordingly.

Ratchet
![]() [36] Wharfmaster Dizzywig
[36] Wharfmaster Dizzywig
After your success on your previous job, Kravel hires you again, this time to check up on a parts order from Ratchet. These parts will go to the gnomes, and Kravel needs to keep his clients happy. You agree, provided he pays you well, and head off to see Wharfmaster Dizzywig in the goblin settlement.
![]() [36] Parts for Kravel
[36] Parts for Kravel
It turns out Dizzywig has the parts on hand, and the transfer occurs without a hitch. Kravel pays you well, again, but you notice him removing something from the box. However, when asked about it, Kravel dismisses the item he removed as worthless - the gnomes surely won't notice.
Kravel wants you to give the box to the gnomes personally. Figuring you can get a few extra silver pieces from them for your trouble, you agree, though you wonder secretly if he's pushing the blame for the missing bit he took onto you. But the gnomes seem ecstatic about the new parts, and indeed pay you ten extra silver for your trouble. All in all, the job went quite well.
Digging up Dirt on the Goblins
They say there's no rest for the wicked, and certainly Kravel seems to agree. It looks like he has another job for you.

Booty Bay
![]() [36] The Rumormonger
[36] The Rumormonger
Kravel has decided it's time to do something for the goblins. But that something doesn't appear to be a favor. Kravel is hiring you to go to Booty Bay and meet one of his many contacts there, to find out about the secret past of the goblin racing pilot. Depending on the juiciness of the secret, the rewards could be staggering.
With some misgivings, you set out to the far off Booty Bay. There you meet Krazek, Kravel's contact who knows who is who in the goblin society. But Krazek isn't talking... for free.
The dragon whelps near Itharius' Cave drop dream dust.
It turns out Krazek is partial to Dream Dust, a drug of sorts found on green dragons in the Swamp of Sorrows. If you want the dirt on the goblin pilot, you need to get him some of that dust. Wondering if this is really even worth your time, you nevertheless travel to the swamp and hunt the baby dragons there. When you return, Krazek has found the information Kravel wanted.
![]() [36] Rumors for Kravel
[36] Rumors for Kravel
Now you need only return the letter to Kravel for your reward. Feeling a little like a snoop but wanting to know just what kind of trouble you were getting the goblin pilot into, you take a peek at the contents of the letter. Turns out, the goblin Nazz is in reality the son of a merchant prince, who stole some of his family's fortune and ran away to the flats to race. Were his father to learn of his whereabouts, Nazz would be dragged home and never race again.
Upon receiving the note, Kravel seems pleased, and pays you well, once again. Somehow you suspect this will not be the last you see of him, however...
The Fool's Stout
As you suspected, Kravel soon has need of your services again. It seems he has come to find you quite dependable.
![]() [43] Back to Booty Bay
[43] Back to Booty Bay
Kravel has hatched yet another plot, though this time he is being very secretive about it. He seems to think this is the "big one", though, and sends you to speak with another of his goblin contacts in Booty Bay. When you deliver Kravel's message, the goblin mumbles to himself, and you catch the word "Zanzil" amidst his muttering. For some reason, the name makes you shudder.

Zanzil's mixture can be found on zombies which inhabit the Ruins of Aboraz
![]() [10-30] Zanzil's Secret
[10-30] Zanzil's Secret
Fizzlebub, Kravel's contact, suddenly asks you to bring him some samples of [Zanzil's Mixture], from the zombies in the lower ruins of Stranglethorn Vale. He mentions that the mixture can be used for controlling people. Though he doesn't say why he should need it, you begin to understand what Kravel may have had in mind. Besides, the goblin is offering very good compensation for the task, in addition to a nice belt.
You set out to collect the mixture, killing many zombies since not all of them have samples of the liquid on them. Finally you have it all, and return to Fizzlebub to collect your payment and to see what he can cook up for Kravel. In addition, he throws in a [Belt of Corruption] as a bonus.
![]() [44] Zanzil's Mixture and a Fool's Stout
[44] Zanzil's Mixture and a Fool's Stout
Fizzlebub has concocted an alcoholic drink made from the mixture of Zanzil. The goblin thinks this is just what Kravel needs. He warns that the drink is so strong it has become unstable, and will lose it's potency if not used quickly.
Hurriedly you return to Thousand Needles with the so-called [Fool's Stout]. You deliver it to Kravel and relay Fizzlebub's explanation. Kravel smiles, saying that this should work just fine.
Mirage Raceway
![]() [44] Get the Gnomes Drunk/
[44] Get the Gnomes Drunk/![]() [44] Get the Goblins Drunk
[44] Get the Goblins Drunk
Kravel tells you to quickly pick a team and deliver the stout to them. You choose the team you like the least and give the crew the stout. The crew seems delighted, and the stout is passed around. Your task completed, you return to Kravel, expecting a reward.
It seems Kravel has placed a bet on the other team, and expects it to come through quite well. In the meantime, he wants you to return to Fizzlebub and tell him the good news. A little miffed that you had not yet been paid, you nevertheless agree, and head back to Booty Bay.
![]() [44] Fool's Stout
[44] Fool's Stout
Fizzlebub informs you that he can make of the stout if you want it. Assuming Kravel will want to try the stunt again since it was so successful, and expecting a bonus for your trouble, you gather more Zanzil's mixture and have Fizzlebub brew it into another Fool's Stout. However, upon returning to Mirage Raceway, Kravel refuses to talk to you. Not only had you been stiffed, you had gone out of your way to get more of the stout for nothing. It seems it really was a Fool's Stout.
Rewards
If the player follows the entire quest chain from beginning to end, he or she will receive:
- Roughly (from quest turn-ins only):
- 24,180 XP
- Booty Bay +250
- Bloodsail Buccaneers -250
- 2
Summary
- [31] Rocket Car Parts
- [36] Wharfmaster Dizzywig
- [36] Parts for Kravel
- [36] Delivery to the Gnomes
- [36] The Rumormonger
- [36] Dream Dust in the Swamp
- [36] Rumors for Kravel
- [43] Back to Booty Bay
- [44] Zanzil's Secret (optional; does not require prior chain)
- [44] Zanzil's Mixture and a Fool's Stout
- One of the following:
- [44] Get the Gnomes Drunk
- [44] Get the Goblins Drunk
- [44] Report Back to Fizzlebub
- [44] Fool's Stout