m (→History) |
(→Tactics: removed ood section) |
||
| Line 1: | Line 1: | ||
| − | {{capital}} |
||
| − | {{For|the faction|Thunder Bluff (faction)}} |
||
{{Infobox zone |
{{Infobox zone |
||
| + | |faction= |
||
| − | | name = Thunder Bluff |
||
| + | |name=Strand of the Ancients |
||
| − | | type = Capital |
||
| + | |ss=Strand of Ancients loading screen.jpg |
||
| − | | ss = Thunder Bluff TCG.jpg |
||
| + | |capital= |
||
| − | | faction = Horde |
||
| + | |race={{Race|Human}}<br />{{Race|Tauren}}<br />{{Race|Dwarf}} |
||
| − | | lpop = 6,000 |
||
| + | |level=65-85 |
||
| − | | races = {{Race|Tauren}} (5,280)<br/>{{Race|Orc}} (300)<br/>{{Race|Forsaken}} (240)<br/>{{Race|Jungle Troll}} (180) |
||
| + | |loc=[[Dragonblight]] |
||
| − | | languages = [[Taur-ahe]], [[Common (language)|Common]], [[Orcish]], [[Zandali]] |
||
| − | | faiths = [[Shamanism]], [[Druidism]], [[Earth Mother]], [[An'she]] |
||
| − | | loc = Northern [[Mulgore]] |
||
| − | | government = Spiritual hierarchy |
||
| − | | rulers = {{NPC||Baine Bloodhoof||High Chieftain Baine Bloodhoof|icon=Baine}} |
||
| − | | affiliation = [[Horde]] |
||
| − | | resources = |
||
| − | | rewards = {{MountIcon|Kodo}} [[Kodo]] mounts |
||
| − | | source = ''[[Lands of Mystery]]'', 46 |
||
}} |
}} |
||
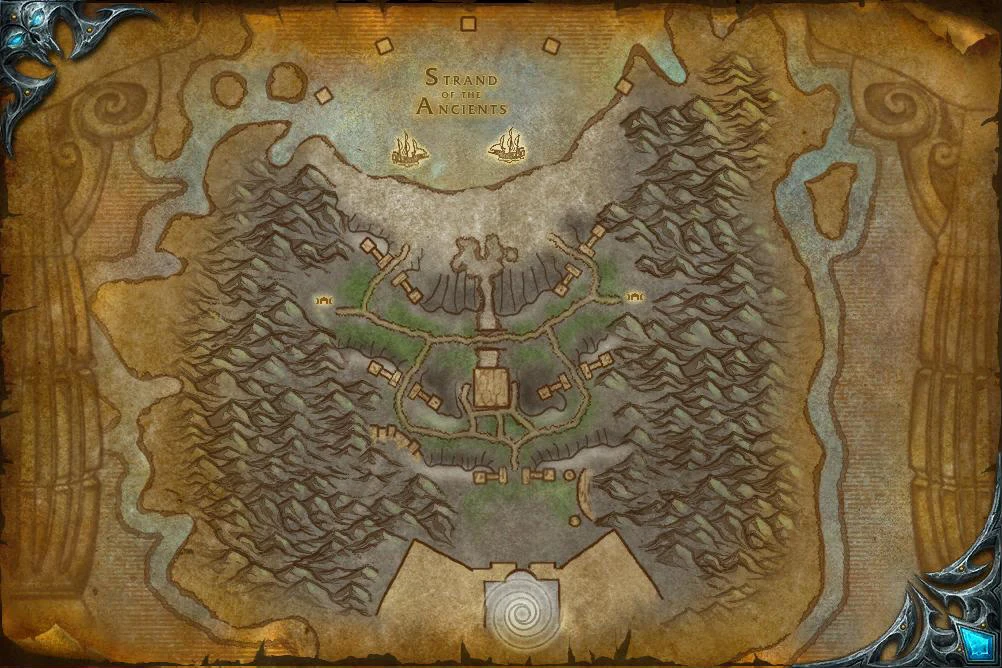
| + | [[Image:WorldMap-StrandoftheAncients.jpg|thumb|Map]] |
||
| − | '''Thunder Bluff''' is the [[tauren]] capital [[city]] located in the northern part of the region of [[Mulgore]] on the continent of [[Kalimdor]]. The entire city is built on bluffs several hundred feet above the surrounding landscape, and is accessible by elevators on the southwestern and northeastern sides. |
||
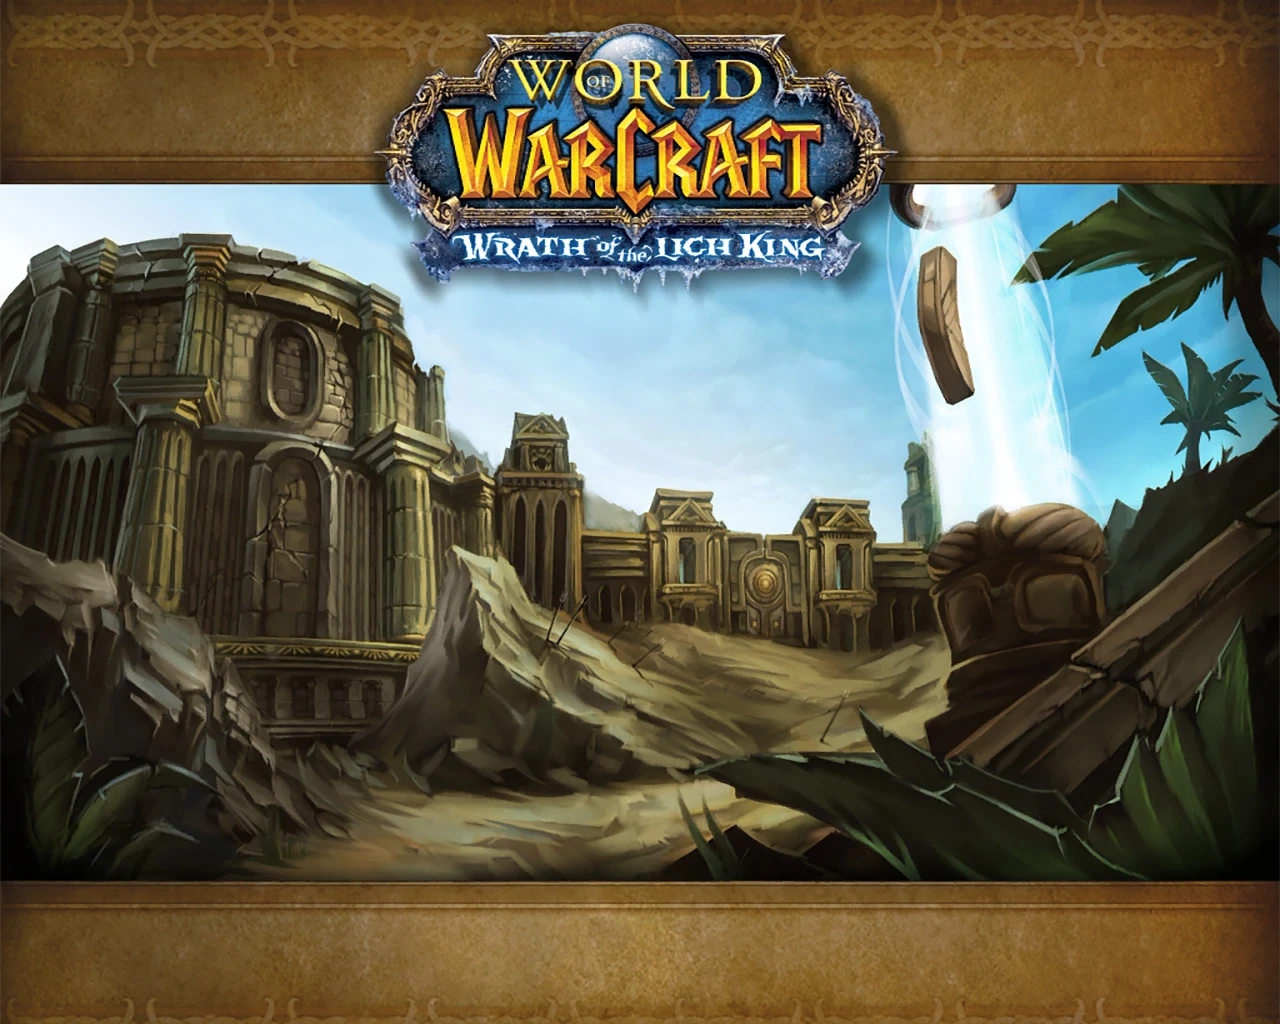
| + | '''Strand of the Ancients''' ('''SotA''' for short, originally called '''Sands of Ulduran''', but sometimes spelled '''Sands of Alduran'''), is a [[battleground]] located off the southern coast of the [[Dragonblight]]. It may be synonymous with the [[Northern Islands]], though this is speculation. It was introduced in ''[[Wrath of the Lich King]]''. This battleground consists of 3 walls which have to be destroyed to continue, capture points and a graveyard after each wall. The overall goal is to be the faster team to break through the last wall and capture the relic inside. |
||
| − | == |
+ | == Overview == |
| + | === Goal === |
||
| − | [[File:bethunderbluff.jpg|thumb|Overhead view of Thunder Bluff]] |
||
| + | Strand of the Ancients is played in two rounds, each lasting up to 10 minutes. Each team has a maximum of 15 players; a team will be assigned to be either the attacking team or the defending team. Attackers prepare for battle split into two boats that approach the northern end of the strand, while defenders spawn at the southern graveyard and should move toward defensive positions. |
||
| + | The attacking team lands on the island at the start of the battleground and will use siege weapons to break through the island's walls and capture graveyards along the way. After the first team captures the relic, or 10 minutes have elapsed, the factions will switch, so the attacking team will become the defending team and vice versa<ref>{{ref web |
||
| − | The centaur were driving the tauren out of their homeland around the time of the [[Third War]]. When [[Thrall]] and his Horde arrived on the [[continent]], an alliance was forged between the Horde and the tauren. Following the defeat of [[Archimonde]] and the end of the war, Thrall helped the tauren rout the centaur and reclaim their land. Shortly thereafter the tauren founded the city of Thunder Bluff and began the process of settling into their old surroundings and repairing the ecological damage the centaur had wrought. Thunder Bluff grows and expands at a tremendous rate.<ref name="LoM 48">''[[Lands of Mystery]]'', pg. 48</ref> |
||
| + | |url=http://www.wowinsider.com/2008/06/29/wwi-08-notes-from-the-pvp-panel |
||
| + | |author=[http://www.wow.com/bloggers/elizabeth-harper/ Elizabeth Harper] |
||
| + | |title=WWI '08 Notes from the PvP panel |
||
| + | |date=2008-06-29 7:35AM |
||
| + | |accessdate=2009-06-20 |
||
| + | |publisher=WoW.com}}</ref>. It is described as a "[[wikipedia:Invasion of Normandy|D-day invasion]] scenario".<ref>{{ref web |
||
| + | |url=http://www.eurogamer.net/article.php?article_id=138018&page=2 |
||
| + | |title=World of Warcraft: Wrath of the Lich King |
||
| + | |author=[http://www.eurogamer.net/archive.php?author=256 Oli Welsh] |
||
| + | |date=9 May 2008 |
||
| + | |accessdate=2009-06-20 |
||
| + | |publisher=MMO Eurogamer}}</ref> |
||
| + | In [[patch 3.2.0]] a "coin toss" was implemented for Strand of the Ancients, which randomizes which faction starts on offense and which starts on defense.<ref>{{ref web |
||
| − | Thunder Bluff was settled fairly recently by the tauren, who successfully drove out the marauding [[Centaur]] from their lands. Thunder Bluff is the first city of its kind; for centuries, the tauren wandered the plains as nomads, unable to claim a permanent home. All [[Horde]] visitors are welcome here, and the expertise of the tauren in professions ranging from [[leatherworking]] to [[shamanism]], [[druidism]] to hunting are all practiced and taught here. Unfortunately, the central location of the Thunder Bluff also makes it easily accessible to members of the [[Alliance]]. Thus, it is often one of the easier Horde capitals for Alliance players to [[raid]], with Baine being killed long before Horde reinforcements even become an issue. |
||
| + | |url=http://forums.worldofwarcraft.com/thread.html?sid=1&topicId=17779490786&pageNo=1&ST=US-303536-VkE0jF22mfRHo6ecB6BFafM4ZcNR5ZEtlnM#5 |
||
| + | |archiveurl=http://blue.mmo-champion.com/1/17779490786-strand-of-the-alliance.html |
||
| + | |archivedate=2009-06-16 |
||
| + | |author={{Blizz}} [[Zarhym]] |
||
| + | |date=2009-06-16 00:38:05 |
||
| + | |title=Re: strand of the alliance |
||
| + | |accessdate=2009-06-20 |
||
| + | }}</ref> Prior to this coin toss, the Alliance team always started on offense. |
||
| + | === Entrance === |
||
| − | In order to gain access to Thunder Bluff, visitors must either ride [[wyvern]]s to the top one of the four towering mesas, use the zeppelin from Orgrimmar or be lifted via rope and wood elevators, an invention unique to the tauren.<ref name="LoM 46">''[[Lands of Mystery]]'', pg. 46</ref> |
||
| + | Players must be at least level 65 to be eligible to join the Strand of the Ancients Battleground. Brackets are 65-69, 70-74, 75-79, 80-84 and 85. As of patch 3.1.0, players can enter all battlegrounds via the "Battlegrounds" tab in the "Player vs. Player" window. Before then, players had to interact with a battlemaster to join Strand of the Ancients. Battlemasters are located in all capitals back in [[Azeroth (world)|Azeroth]], [[Shattrath City]] in [[Outland]]'s [[Terokkar Forest]] and [[Dalaran]] in [[Northrend]]'s [[Crystalsong Forest]]. There is no known physical entrance at the moment. It is possible that an entrance will be at [[Moa'ki Harbor]] and/or [[The Forgotten Shore]], even though this is very unlikely. |
||
| + | As of [[patch 3.1.0]], a player may queue up for the Strand of the Ancients anywhere in the world by going to the battlegrounds tab of the Player vs. Player window. They will return to the location they chose to enter the battleground, not the queue, when the game ends. |
||
| − | ==People and Culture== |
||
| − | Although some of the historically nomadic tauren probably miss their itinerant lifestyle, they are intensely proud of their permanent home and spend much of their time trying to make it better. They gladly accept the help of the [[orc]]s and [[troll]]s that help them, but are somewhat less enthusiastic at the presence of the [[Forsaken]], whom they only grudgingly tolerate because of their membership in the Horde. Tauren place a strong emphasis on the value of life, and the unlife of the Forsaken stands as an affront to their beliefs,<ref name="LoM 46-47">''[[Lands of Mystery]]'', pg. 46-47</ref> not to mention the less than honorable activities the Forsaken carry out. |
||
| − | == |
+ | === Basic Rules === |
| + | * The attacking team starts off-shore on two boats, splitting the attacking team, and moves south toward the relic. |
||
| − | Thunder Bluff is composed of four towering mesas, or rises. The only entrances from the plains below are elevators leading to the central platform. The central rise is connected to the others through large wooden bridges. |
||
| + | * The defending team starts at South Graveyard and moves to defensive positions on the beach or on the turrets next to the walls. |
||
| + | * There are a total of 6 walls. There are 2 sets of 2 on each side, and then 2 in the middle line to block the way to the end. |
||
| + | * There are Siege weapons which will help you destroy the walls, buildings and enemy players. |
||
| + | * Graveyards are captured by clicking on them and completing a channeled effect, much like [[Arathi Basin]]. |
||
| + | * As you capture graveyards on both sides, more siege engines will spawn at the depots behind the first gates. This will allow faster attacks on the remaining 2 gates. |
||
| + | * Graveyards '''cannot''' be re-captured by the defending team once they have been capped. |
||
| + | * Defenders can make use of the turrets on the walls to destroy siege vehicles and kill enemy players. |
||
| + | * The faction who reaches the relic in the quicker amount of time wins. The second round attackers have as much time to capture the relic as the opposing team took to attain it, making it (at max) a 20 minute game. |
||
| + | * If neither team captures the relic, the game is considered a tie. |
||
| + | == Honor Reward System == |
||
| − | Thunder Bluff is located in the far north of Mulgore, among the sprawling flatlands of the [[Golden Plains]]. The weather is almost always warm and sunny, with intermittent breezes carried in from The Barrens.<ref name="LoM 47">''[[Lands of Mystery]]'', pg. 47</ref> |
||
| + | Strand of the Ancients items are available by spending honor accumulated. |
||
| + | Before [[Patch 3.3]], [[Strand of the Ancients Mark of Honor]]s were awarded to the players of the battleground. Three marks were awarded to the winning team, and one mark awarded to the losing team. If neither side breaches the final gate, all participants only receive a single mark. |
||
| − | ===Rises=== |
||
| − | <div class="ZoneMap" style="position:relative;float:right;width:501px;height:{{#expr:501 * 2/3 round 0}}px; margin: 0 0 1em 1em"> |
||
| − | [[Image:WorldMap-ThunderBluff.jpg|501px|Thunder Bluff]] |
||
| − | {{Zone Map Note|47|59|Banker|Thunder Bluff Bank}} |
||
| − | {{Zone Map Note|44|60|Mailbox|Mailbox}} |
||
| − | {{Zone Map Note|46|65|Inn|Inn}} |
||
| − | {{Zone Map Note|45|63|StableMaster|Stable Master}} |
||
| − | {{Zone Map Note|47|50|FlightMaster|Wind Rider Master}} |
||
| − | {{Zone Map Note|57|77|BattleMaster|Battle Masters}} |
||
| − | {{Zone Map Note|39.5|51|Auctioneer|Auction House}} |
||
| − | {{Zone Map Note|19|28|POI143|Zeppelin}} |
||
| − | {{Zone Map Note|57|88|ClassTrainer|Warrior Trainer}} |
||
| − | {{Zone Map Note|59|86|ClassTrainer|Hunter Trainer}} |
||
| − | {{Zone Map Note|63|79|ClassTrainer|Paladin Trainer}} |
||
| − | {{Zone Map Note|75|26|ClassTrainer|Druid Trainer}} |
||
| − | {{Zone Map Note|22|19|ClassTrainer|Shaman Trainer}} |
||
| − | {{Zone Map Note|25|18|ClassTrainer|Mage Trainer - Pools of Vision}} |
||
| − | {{Zone Map Note|25|23|ClassTrainer|Warlock Trainer - Pools of Vision}} |
||
| − | {{Zone Map Note|27|21|ClassTrainer|Priest Trainer - Pools of Vision}} |
||
| − | </div> |
||
| − | The various rises in Thunder Bluff act a bit like neighborhoods or quarters in a human city <ref name="LoM 47" />, or the valleys and keeps of the orcish city [[Orgrimmar]]. |
||
| + | === Bonus Honor === |
||
| − | Thunder Bluff has a central mesa divided into three rises, surrounded by three additional mesas with distinct names: |
||
| + | Bonus honor is awarded as follows (level 80): |
||
| − | *[[Central Rise]] (In-game is split in to the Lower Rise, Middle Rise and High Rise) |
||
| + | ''Attacking Team'' |
||
| − | **'''[[Lower Rise]]''' (southwestern lifts from main north road) |
||
| + | * 62+19 honor for each gate destroyed. Note: for gates that are in pairs (blue/green or red/purple) honor is only awarded for the destruction of one of these gates. |
||
| − | **'''[[Middle Rise]]''' (northeastern lifts from plains) |
||
| + | * 62+19 honor for capturing the relic. |
||
| − | **'''[[High Rise]]''' (east from wind rider roost) |
||
| + | ''Defending Team'' |
||
| − | *'''[[Elder Rise]]''' (rope bridges from middle and high rise) |
||
| + | * 62+19 honor for each gate not destroyed. Note: for gates that are in pairs (blue/green or red/purple) honor is only awarded if both gates are intact. |
||
| − | *'''[[Hunter Rise]]''' (rope bridges from lower and high rise) |
||
| + | * 62+19 honor if the relic is not captured. |
||
| − | *'''[[Spirit Rise]]''' (rope bridges from lower and middle rise) |
||
| + | ''End of Game'' |
||
| − | **'''[[Pools of Vision]]''' (cave entrance from Spirit Rise) |
||
| + | * 124+124 honor at the completion of the game for losing. |
||
| + | * 248+124 honor at the completion of the game for winning. |
||
| − | === |
+ | === Reputation === |
| + | The [[Valiance Expedition]] is the Alliance faction for the battleground, and the [[Warsong Offensive]] is the Horde faction. However, no reputation is earned by competing in this battleground. |
||
| − | *The [[Bank]] is on the southeastern side of the Lower Rise. |
||
| − | *The [[Wind Rider]] Master [[Tal]] is located on the top of the wind rider roost in the central totempole. |
||
| − | *The [[inn]] is on the southern part of the Lower Rise. |
||
| − | *The [[Auction House]] is located on the Lower Rise, just west of the entrance to the wind rider roost. |
||
| − | *The [[mailbox]] is located just outside the bank. (There's only one mailbox in TB.) |
||
| − | *The [[Fishing hole]] is located on the lower rise smack dab in the middle. |
||
| − | *The [[zeppelin]] dock is located on the west of [[Spirit Rise]]. |
||
| + | == Siege Weapons == |
||
| − | ==Notable Characters== |
||
| − | {{ |
+ | {{Main|Siege weapon}} |
| + | === The Demolisher === |
||
| − | The new Chief of the Bloodhoof clan, [[Baine Bloodhoof]] has become the High Chieftain of the tauren race in wake of his father's death. He watches over Thunder Bluff, and over his people in an ever-darkening world. Baine can be found in the Chieftain's Tent in the eastern Main City, and is accompanied by his Honor Guards. |
||
| + | *The Demolisher has a short-range attack (a ram with knockback) and a long-range attack (boulder throw). |
||
| + | *It is meant to destroy walls up close with its ram attack. Since it is slow to turn and the boulder throw takes time to hit, it is less effective against enemy players. |
||
| + | *It can hold up to 3 passengers, including the driver. Passengers are exposed and can be targeted individually. However, the side passengers can cast while the vehicle is moving if they're in it. |
||
| + | *Although it is very powerful, it is slow and not easily maneuverable. It is about as fast as running speed, and has a fixed turning speed. |
||
| + | *The Demolisher has 80,000 HP at level 80. |
||
| + | == Other Weapons == |
||
| − | [[Hamuul Runetotem]] is the elder druid of Thunder Bluff, and a childhood friend of Cairne. As of the Cataclysm he had left his home at some point to save the World Tree of Hyjal. |
||
| + | === Turret === |
||
| + | * Shoots an explosive in the targeted area for 6,000 or so damage on demolishers and about 4,000 on players in the 80 bracket. (2 second CD) |
||
| + | * The Turret has 60,000 HP at level 80. |
||
| + | === Seaforium Charges === |
||
| − | ==Travel connections== |
||
| + | * Players on the attacking team can pick these up at the docks, at the vehicle emporiums, at the southern graveyard, and in a pile near the relic chamber, to the northwest of it. |
||
| − | [[File:thunderbluffcomic.jpg|thumb|Thunder Bluff as seen in ''[[World of Warcraft: The Comic]]'']] |
||
| + | * When laid, they explode after ten seconds, doing about 25% of the walls' HP. |
||
| − | [[File:thunderbluffcomic2.jpg|thumb|Thunder Bluff as seen in ''[[World of Warcraft: The Comic]]'']] |
||
| + | * Defending players can defuse these, and it is imperative they do. |
||
| − | ===Flight=== |
||
| + | * When a player dies while holding one, a barrel will spawn, allowing it to be carried on. |
||
| − | ;{{Horde}} [[Orgrimmar]] |
||
| + | * You are allowed to mount while holding a charge. |
||
| − | ;{{Horde}} [[Valormok]] |
||
| − | ;{{Horde}} [[Sun Rock Retreat]] |
||
| − | ;{{Horde}} [[The Crossroads]] |
||
| − | ;{{Horde}} [[Camp Taurajo]] |
||
| − | ;{{Horde}} [[Shadowprey Village]] |
||
| − | ;{{Horde}} [[Brackenwall Village]] |
||
| − | ;{{Horde}} [[Camp Mojache]] |
||
| − | ;{{Horde}} [[Freewind Post]] |
||
| − | ;{{Neutral}} [[Gadgetzan]] |
||
| − | == |
+ | == Tactics == |
| + | Some common tactics include rushing walls with charges, leaving so many charges at the wall makes it hard to defuse them before they all go off, Vehicle assault with melee defending the demolishers, or a combination of the two. |
||
| − | ;{{Horde}} [[Orgrimmar]] |
||
| + | Defenders should make use of the turrets and pick off rushers as they run in. Paladins on a mount with crusader aura make this very difficult, but noticing the rush can save the wall. |
||
| − | ==Notes== |
||
| + | Also, try to take out demolishers unless a rusher gets your attention; most of the time, you will be in a lot more trouble against demolishers than a single mage targeting your turret. |
||
| − | *[[Rumstag Proudstrider]] has the Thunder Bluff repeatable [[Runecloth]] quest used by non-tauren [[Horde]] players to obtain the right to ride [[kodo]]s. |
||
| − | *It's a bad idea to jump from the top of one of the bluffs, as the fall is generally fatal without some sort of slowing effect. If you want to save time, you can jump on the platform under the main elevators. The fall damage may not kill you, but will reduce your health significantly. |
||
| − | *Thunder Bluff is most likely the optimal place for flying in Kalimdor for the Horde, as it is located in almost the center of the continent. |
||
| − | *A single Balance Druid or Elemental Shaman can easily stop an entire raid on Thunder Bluff. Just stand in front of the elevator, and when the Alliance comes up, use [[Typhoon]] or [[Thunderstorm]]. |
||
| − | *Thunder Bluff is the only capital city in which player [[duel]]s are permitted, becoming available when within the Hunter Rise. |
||
| + | ===Graveyards=== |
||
| − | [[File:Thunder Bluff in the distance.jpg|thumb|Thunder Bluff after the Cataclysm]] |
||
| + | As stated above, graveyards are captured via clicking on them and completing a channeled effect similar to the various capturable points in [[Arathi Basin]] and [[Alterac Valley]]. |
||
| + | On offense, you want to capture the Eastern and Western Graveyards as soon as possible in order to gain the additional demolishers. Some people argue that the Southern Graveyard shouldn't be captured until the relic door has been destroyed because doing so makes your team respawn away from tanks and bombs which slows down your team's ability to get new tanks back into the fight. However, capturing the Southern Graveyard makes your enemies spawn further away from the Yellow Gate which allows your tanks and bomb carriers to approach the gate unharmed. |
||
| − | ==Patch changes== |
||
| − | *{{Patch 1.4.0|note= |
||
| − | **The Rainsticks sign in Thunderbluff is no longer floating. |
||
| − | **Patrolling scouts that can see through stealth and invisibility have been added to Thunder Bluff.}} |
||
| − | *{{Patch 1.3.0|note=You can now design guild tabards in Thunder Bluff.}} |
||
| + | On Defense, defend your east and west GY's with a furor. The turrets on the Red and Purple walls can shoot players that are trying to capture them making it very easy for 1 person to defend a GY. Let the Offense cap the south GY if the walls are still up, it will slow them down. |
||
| − | ==References== |
||
| − | {{Reflist}} |
||
| + | ===Turrets=== |
||
| + | Use Turrets to destroy tanks and defend East and West GYs. A tag team of turret operators at a gate can kill a tank before it reaches the wall. The closer the target is to where the rocket lands the more damage it will take. Up to 6000 dmg against a tank and 3000 against a player. Note that the turret projectile has a significant travel time. When taking out a moving target, you must anticipate where it will be in the 1–2 seconds it takes for the rocket to explode. When firing on moving demolishers, target the ground about one tank-length in front of it. Demolishers move and turn slowly compared to players, so it is much easier to use the turrets on them. Additionally, enemy players tend to crowd around the demolishers, and will take damage as well. |
||
| − | {{Thunder Bluff}} |
||
| − | {{Mulgore}} |
||
| − | {{Kalimdor}} |
||
| + | The turrets cannot hit targets beneath them, so a tank that is left or right justified on the wall can only be hit by 1 of the turrets. |
||
| − | [[Category:Thunder Bluff| ]] |
||
| + | |||
| − | [[Category:Tauren territories]] |
||
| + | ===Tanks=== |
||
| − | [[Category:Horde cities]] |
||
| + | |||
| − | [[Category:Lands of Mystery]] |
||
| + | Some people argue that Tanks are the best means of winning this fight. Always capture the Eastern and Western Graveyards to increase tank supply and reduce travel time. Tanks should operate in groups, never go in one at a time. You will get 1) Owned 2) Yelled At 3) Laughed at by opposing team. Tanks spawn two at a time at each workshop, so jump in one and wait for another player to jump in the other before rolling out. |
||
| + | |||
| + | A note on tanks: ALWAYS DRIVE THEM TO THE WALL. NEVER USE A TANK TO ATTACK PLAYERS. It's pointless to attack players with a tank, just keep the tank moving to the wall and always use the Ram (2 button) and alternate in the Cannon (1 button). Ram does more damage. |
||
| + | |||
| + | While tanks are very effective at breaking through the walls, they are slow and vulnerable. Other players need to provide support for the tanks, by killing or CCing enemy players who are attacking them. Snares and roots are effective at keeping melee away. Ranged classes should take passenger seats on the demolishers and take care of anyone that is attacking the demolisher. |
||
| + | |||
| + | ===Bombs=== |
||
| + | |||
| + | Seasoned players have discovered that Bombs are the most effective way to destroy walls for several reasons: |
||
| + | |||
| + | * Multiple Bombs can be placed at a single time on a single target |
||
| + | * Bombs must be disarmed |
||
| + | * Bombs can't be destroyed by Turrets |
||
| + | * Bombs can be carried while mounted |
||
| + | * Bombs can be carried while stealthed or invisible |
||
| + | * Bombs can be easily defended |
||
| + | |||
| + | Seaforium bombs can be found near almost any graveyard. They can be picked up while mounted, and carried while mounted, stealthed or invisible. After resurrecting, always grab a bomb, even if you aren't planning on using it immediately. It will come in handy if you make it to a wall. |
||
| + | |||
| + | Defenders should be on the lookout for enemies that try to sneak by towards a wall - they are probably carrying seaforium. |
||
| + | |||
| + | == Strategies == |
||
| + | === Offensive === |
||
| + | The primary goal of the offense is to get through all the gates to the ancient relic in the keep at the end of the battlegrounds. The gates can only be brought down through seaforium charges and demolishers. When you are coming off the beach, take a seaforium charge if you intend on using it on the gate. This comes useful when you're going against a defensive group that doesn't like to be out further than the gate and therefore wouldn't be able to disarm the charge in time. The defense will probably be waiting by the demolisher on the beach ready to attack it and destroy it before you have a chance to use it. Here and all throughout the game you have to make sure that opposing players on foot can't damage your demolishers, otherwise they'll never make it to the gates they have to knock down. |
||
| + | Any players that can do slowing effects and damage from the passenger spots should join the demolishers: |
||
| + | |||
| + | * Mages can [[Frost Nova]], [[Cone of Cold]], and [[Slow]]. If spec'd for PvP, [[Reactive Barrier]] may also help if taking ranged damage. |
||
| + | * Druids can use [[Cyclone]], [[Entangling Roots]] and [[Typhoon]]. |
||
| + | * Rogues can use [[Fan of Knives]] with [[Crippling Poison]] applied or specced into [[Deadly Brew]]. |
||
| + | * Warriors can [[Intimidating Shout]] or [[Piercing Howl]]. |
||
| + | * Warlocks can [[Curse of Exhaustion]], [[Howl of Terror]], single target [[Fear]], and [[Shadowflame]] when augmented by [[Glyph of Shadowflame]]. |
||
| + | * Death Knights can use [[Desecration]], [[Hungering Cold]], and [[Chains of Ice]]. |
||
| + | * Priests can use [[Psychic Scream]], [[Mind Flay]] and [[Psychic Horror]]. |
||
| + | * Hunters can use [[Concussive Shot]]. |
||
| + | * Paladins can use [[Hammer of Justice]], and if spec'd with [[Glyph of Dazing Shield]] can use [[Avenger's Shield]] |
||
| + | * Shamans can use [[Frost Shock]], [[Earthbind Totem]] or even [[Thunderstorm]]. |
||
| + | |||
| + | The defending team will have two turrets to every gate, and it's important that if they are manned that ranged players work to destroy them without placing themselves in danger of getting shot by turrets. It's possible that once the gate is down melee players can walk around and attack from there. |
||
| + | |||
| + | Capturing the first two graveyards will enable the workshops which allow more demolishers and are a good spot to pick up new seaforium charges. If a [[Shadowstep]] or [[Killing Spree]] [[Rogue]] is on the offensive side, they can use their respective abilities to teleport themselves up behind the turrets and either assault them from there to distract the turret's pilot or run past the gate to capture the next graveyard undetected. Capturing the last graveyard will push the defensive side back to spawn in their own courtyard. |
||
| + | |||
| + | If you are having trouble getting tanks through because of players on foot destroying them, synchronize your demolishers to move in at the same time so that focus will be divided, or at least be too focused to take out every tank before they hit the final door. |
||
| + | |||
| + | Clicking the orb at the end will instantly win the round. |
||
| + | |||
| + | === Defensive === |
||
| + | Strand of the Ancients Defense is unique among battlegrounds in that your team is free to move on the map during the initial countdown to the start of the round. A common mistake by less experienced players is that they stand around at the initial spawn point. The defense ''absolutely must'' use the time to get in to position to engage the enemy as soon as they land on the beach. |
||
| + | |||
| + | Right at the start of the game, you want to have people on the turrets for both the blue and the green gates. The rest of the group goes onto the beach getting ready to greet the incoming offense. Defense should be relatively split between the two landing docks, as the offense will also be split evenly on the incoming boats. |
||
| + | |||
| + | The demolishers have to be destroyed as soon as possible to prevent the gates from going down. Therefore, the one demolisher on the beach is often popular to destroy first. Demolishers also take priority to kill over players, unless they were hindering your ability to attack the demolisher. If you can crowd control any players trying to intercept your assault on the demolishers, then do so and continue on the demolisher until it is destroyed. Upon destruction, the driver will dismount and be very vulnerable if caught in a large group that just destroyed the demolisher. |
||
| + | |||
| + | Once the first gate is down (blue or green) the Eastern and Western graveyards are now open for the enemy to take. As soon as these graveyards are taken, the enemy gets better forward position when resurrecting, and additional demolishers from the adjacent workshop. Though it is still more important to destroy demolishers and keep the enemy from breaking the next gate (red or purple), holding these graveyards will do a lot to hinder the advance. |
||
| + | |||
| + | Pay attention to your map as well. Just because you're holding off people just fine at the purple gate might not mean the same for red. All active demolishers are visible on the map to all players. A single demolisher that has reached a gate with no one nearby to destroy it will be able to burn through a gate in about 15 seconds. Be prepared to concede that gate and fall back to the next one. |
||
| + | |||
| + | If there are demolishers incoming to the yellow gate, you will have to fall back and destroy it before trying to push forward again on defense. Typically, once both red and purple gates are down, the entire defense should fall back to the yellow gate and be prepared to destroy vehicles coming from either side. Watch the map to see where the closest demolisher is, and move towards it as a group. Do not wait for it to get within firing range of the yellow gate, or it will eventually go down. Good teams will send demolishers in groups of two from each vehicle emporium, which makes it more important to intercept them early and burn them down before they reach firing range of the yellow gate. Always watch the map and be ready to mobilize and meet demolishers coming from either side. |
||
| + | |||
| + | If the yellow gate goes down, you will have to use it as a chokepoint to prevent players and demolishers from getting past. If your entire group has not moved back and tanks are not going down quick enough before being able to touch the door, you will not have the best chance of lasting the timer. |
||
| + | |||
| + | While in the final courtyard, a few players on the offensive side tend to stray off and go west towards a pile of seaforium charges. If they are not intercepted, they will circumvent your group to the door and plant the seaforium charge. A couple people with good crowd control can guard the steps and prevent a seaforuim assault on the final gate. Though, it is best for most of the team to be at the yellow gate chokepoint, to prevent players from ever getting in the courtyard, and to burn down demolishers as quickly as possible. |
||
| + | |||
| + | If the door to the keep goes down, do your best to drag out the timer for as long as possible by keeping players out of range of the orb either through snares, disorients, stuns, or knockbacks. Any player on the opposing team has to be just lucky enough to charge through and click on the orb in order for the offensive team to win the round. |
||
| + | |||
| + | The most important thing to remember on defense is to hold back anything that can do damage to the gates. This means always attack demolishers as soon as possible, before they are in range of a gate. Also be on the watch for players who rush past towards a gate, as they probably have a seaforium charge to plant. Always work to push the offensive assault back, but be prepared to fall back if something slips through. All it takes is one uncontested demolisher to roll through every gate and lose the match. |
||
| + | |||
| + | == Achievements == |
||
| + | |||
| + | {{:Player vs. Player achievements/Strand_of_the_Ancients}} |
||
| + | |||
| + | ==Expected time for completion and record== |
||
| + | It is fairly common to win Strand of the Ancients under four minutes. If your team hasn't reached the Yellow Gate after three minutes it is quite probable that it will lose. |
||
| + | |||
| + | Reaching the Relic under four minutes completes the {{Achievement|Storm the Beach}} achievement. |
||
| + | |||
| + | The fastest Strand of the Ancient victory belongs to a [[pickup group]] which completed the battleground in two minutes and twenty seconds. |
||
| + | |||
| + | ==Considerations== |
||
| + | * Tank operators and turret operators do not get as much Honor as they don't get as many honor kills. However, Tank operators enhance your team's offense which in turn enables it to win faster. Turret operators enhance your team's defense which in turn supports your team in achieving victory. You must understand that the goal of all battlegrounds is to achieve victory in the quickest way possible in order to gain marks efficiently so that you can join a new battleground. |
||
| + | * The initial team on offense has to wait 10–15 seconds before they are allowed to start using the tanks. |
||
| + | * Some games may start with one team having double the numbers of the other team. This can cause a problem for the initial defensive team if they do not join quickly enough to man turret stations and start offensive attacks. However, the same can be said for initial Offensive team. If members of the initial Offensive team doesn't join quickly the initial Defensive can mount a defense rapidly which will hinder the initial offensive team's effort to be victorious. |
||
| + | * Classes with pets may have difficulty operating tanks or turrets. |
||
| + | * Tanks at the workshops do not despawn when the second offensive team attacks, allowing the second team to grab extra tanks before attempting to cap either the East or West graveyards |
||
| + | * The game awards more honor to the initial attackers on the average as if the defenders don't get capture the relic in time they lose any opportunity to destroy walls for extra honor in the time remaining. For example if team A takes 1 1/2 minutes to destroy each wall and team B takes 2 minutes to do the same. Then if team B attacks first they capture the relic in 8 minutes, while team A takes the relic in 6, giving bonus honor advantage only for winning. On the other hand if team A attacks first, they capture the relic in 6 minutes, while team B only destroys 3 of the 4 walls, giving bonus honor advantage for keeping a wall un-destroyed and for winning. |
||
| + | |||
| + | == Patch changes == |
||
| + | *{{Patched|date=2010-12-21|bluenote=Demolishers are properly spawning in at the beginning of Round 2 in Strand of the Ancients as Preparation fades.|link=http://us.battle.net/wow/en/blog/1232869}} |
||
| + | *{{Patched|date=2010-12-07|link=http://us.battle.net/wow/en/blog/1232869|bluenote=NPCs and vehicles now have the correct Cataclysm values for health and damage in the 80-84 and 85 Strand of the Ancients, Isle of Conquest, and Alterac Valley level brackets.}} |
||
| + | * {{Patch 4.0.3a|note=Minimum required level reduced to 65, brackets split into 5-level range instead of 10.}} |
||
| + | * {{Patch 3.3.3|note=Battlegrounds will no longer award Marks of Honor. |
||
| + | :* Players with existing Marks of Honor can still turn them in to their respective faction's quest givers, including individual marks for those who may have more marks for one Battleground than another. |
||
| + | :* Items which previously required Marks of Honor will have their costs adjusted to remove these requirements.}} |
||
| + | * {{Patch 3.2.0|note=The faction starting on attack/defense will now be randomized at the start of each match.}} |
||
| + | * {{Patch 3.0.8|note= |
||
| + | ** Antipersonnel Turrets will now gain vehicle immunities, use falloff damage, and damage increased to 4000 + 200 per level to compensate for falloff. |
||
| + | ** [[Battleground Demolisher|The Strand of the Ancients Demolisher]] has had its health increased. |
||
| + | ** The Strand of the Ancients tower cannon has had its health increased. |
||
| + | ** Seaforium charges have been moved closer to the graveyards on the 2nd tier.}} |
||
| + | |||
| + | ==References== |
||
| + | {{reflist}} |
||
| + | == External links == |
||
| + | <!-- Read http://www.wowpedia.org/Wowpedia:External_links before posting your links here. |
||
| + | Links that do not conform to the rules will be DELETED. |
||
| + | Repeat violations may result in a BAN. |
||
| + | Have a nice day. :) --> |
||
| + | {{Elinks-zone|4384}} |
||
| + | {{elink|icon=mmochampion|site=MMO-Champion|link=http://www.mmo-champion.com/index.php?topic=9499.0|desc=World Wide Invitational - Day 2 Panels}} |
||
| + | {{elink|icon=mmochampion|site=MMO-Champion|link=http://www.mmo-champion.com/index.php?page=816|desc=Strand of the Ancients}} |
||
| + | {{battlegrounds}} |
||
| − | [[es:Cima del Trueno]] |
||
| + | {{DEFAULTSORT:Strand Of The Ancients}} |
||
| − | [[fr:Pitons-du-Tonnerre]] |
||
| + | [[Category:Battlegrounds]] |
||
| − | [[nl:Thunder Bluff]] |
||
| + | [[Category:Strand of the Ancients| ]] |
||
| − | [[pl:Thunder Bluff]] |
||
| + | [[Category:Northrend]] |
||
| + | [[Category:Wrath of the Lich King]] |
||
Revision as of 11:38, 15 July 2011
| Level: 65-85 | |
|---|---|
 | |
| Location | Dragonblight |

Map
Strand of the Ancients (SotA for short, originally called Sands of Ulduran, but sometimes spelled Sands of Alduran), is a battleground located off the southern coast of the Dragonblight. It may be synonymous with the Northern Islands, though this is speculation. It was introduced in Wrath of the Lich King. This battleground consists of 3 walls which have to be destroyed to continue, capture points and a graveyard after each wall. The overall goal is to be the faster team to break through the last wall and capture the relic inside.
Overview
Goal
Strand of the Ancients is played in two rounds, each lasting up to 10 minutes. Each team has a maximum of 15 players; a team will be assigned to be either the attacking team or the defending team. Attackers prepare for battle split into two boats that approach the northern end of the strand, while defenders spawn at the southern graveyard and should move toward defensive positions.
The attacking team lands on the island at the start of the battleground and will use siege weapons to break through the island's walls and capture graveyards along the way. After the first team captures the relic, or 10 minutes have elapsed, the factions will switch, so the attacking team will become the defending team and vice versa[1]. It is described as a "D-day invasion scenario".[2]
In patch 3.2.0 a "coin toss" was implemented for Strand of the Ancients, which randomizes which faction starts on offense and which starts on defense.[3] Prior to this coin toss, the Alliance team always started on offense.
Entrance
Players must be at least level 65 to be eligible to join the Strand of the Ancients Battleground. Brackets are 65-69, 70-74, 75-79, 80-84 and 85. As of patch 3.1.0, players can enter all battlegrounds via the "Battlegrounds" tab in the "Player vs. Player" window. Before then, players had to interact with a battlemaster to join Strand of the Ancients. Battlemasters are located in all capitals back in Azeroth, Shattrath City in Outland's Terokkar Forest and Dalaran in Northrend's Crystalsong Forest. There is no known physical entrance at the moment. It is possible that an entrance will be at Moa'ki Harbor and/or The Forgotten Shore, even though this is very unlikely.
As of patch 3.1.0, a player may queue up for the Strand of the Ancients anywhere in the world by going to the battlegrounds tab of the Player vs. Player window. They will return to the location they chose to enter the battleground, not the queue, when the game ends.
Basic Rules
- The attacking team starts off-shore on two boats, splitting the attacking team, and moves south toward the relic.
- The defending team starts at South Graveyard and moves to defensive positions on the beach or on the turrets next to the walls.
- There are a total of 6 walls. There are 2 sets of 2 on each side, and then 2 in the middle line to block the way to the end.
- There are Siege weapons which will help you destroy the walls, buildings and enemy players.
- Graveyards are captured by clicking on them and completing a channeled effect, much like Arathi Basin.
- As you capture graveyards on both sides, more siege engines will spawn at the depots behind the first gates. This will allow faster attacks on the remaining 2 gates.
- Graveyards cannot be re-captured by the defending team once they have been capped.
- Defenders can make use of the turrets on the walls to destroy siege vehicles and kill enemy players.
- The faction who reaches the relic in the quicker amount of time wins. The second round attackers have as much time to capture the relic as the opposing team took to attain it, making it (at max) a 20 minute game.
- If neither team captures the relic, the game is considered a tie.
Honor Reward System
Strand of the Ancients items are available by spending honor accumulated.
Before Patch 3.3, Strand of the Ancients Mark of Honors were awarded to the players of the battleground. Three marks were awarded to the winning team, and one mark awarded to the losing team. If neither side breaches the final gate, all participants only receive a single mark.
Bonus Honor
Bonus honor is awarded as follows (level 80): Attacking Team
- 62+19 honor for each gate destroyed. Note: for gates that are in pairs (blue/green or red/purple) honor is only awarded for the destruction of one of these gates.
- 62+19 honor for capturing the relic.
Defending Team
- 62+19 honor for each gate not destroyed. Note: for gates that are in pairs (blue/green or red/purple) honor is only awarded if both gates are intact.
- 62+19 honor if the relic is not captured.
End of Game
- 124+124 honor at the completion of the game for losing.
- 248+124 honor at the completion of the game for winning.
Reputation
The Valiance Expedition is the Alliance faction for the battleground, and the Warsong Offensive is the Horde faction. However, no reputation is earned by competing in this battleground.
Siege Weapons
- Main article: Siege weapon
The Demolisher
- The Demolisher has a short-range attack (a ram with knockback) and a long-range attack (boulder throw).
- It is meant to destroy walls up close with its ram attack. Since it is slow to turn and the boulder throw takes time to hit, it is less effective against enemy players.
- It can hold up to 3 passengers, including the driver. Passengers are exposed and can be targeted individually. However, the side passengers can cast while the vehicle is moving if they're in it.
- Although it is very powerful, it is slow and not easily maneuverable. It is about as fast as running speed, and has a fixed turning speed.
- The Demolisher has 80,000 HP at level 80.
Other Weapons
Turret
- Shoots an explosive in the targeted area for 6,000 or so damage on demolishers and about 4,000 on players in the 80 bracket. (2 second CD)
- The Turret has 60,000 HP at level 80.
Seaforium Charges
- Players on the attacking team can pick these up at the docks, at the vehicle emporiums, at the southern graveyard, and in a pile near the relic chamber, to the northwest of it.
- When laid, they explode after ten seconds, doing about 25% of the walls' HP.
- Defending players can defuse these, and it is imperative they do.
- When a player dies while holding one, a barrel will spawn, allowing it to be carried on.
- You are allowed to mount while holding a charge.
Tactics
Some common tactics include rushing walls with charges, leaving so many charges at the wall makes it hard to defuse them before they all go off, Vehicle assault with melee defending the demolishers, or a combination of the two.
Defenders should make use of the turrets and pick off rushers as they run in. Paladins on a mount with crusader aura make this very difficult, but noticing the rush can save the wall. Also, try to take out demolishers unless a rusher gets your attention; most of the time, you will be in a lot more trouble against demolishers than a single mage targeting your turret.
Graveyards
As stated above, graveyards are captured via clicking on them and completing a channeled effect similar to the various capturable points in Arathi Basin and Alterac Valley.
On offense, you want to capture the Eastern and Western Graveyards as soon as possible in order to gain the additional demolishers. Some people argue that the Southern Graveyard shouldn't be captured until the relic door has been destroyed because doing so makes your team respawn away from tanks and bombs which slows down your team's ability to get new tanks back into the fight. However, capturing the Southern Graveyard makes your enemies spawn further away from the Yellow Gate which allows your tanks and bomb carriers to approach the gate unharmed.
On Defense, defend your east and west GY's with a furor. The turrets on the Red and Purple walls can shoot players that are trying to capture them making it very easy for 1 person to defend a GY. Let the Offense cap the south GY if the walls are still up, it will slow them down.
Turrets
Use Turrets to destroy tanks and defend East and West GYs. A tag team of turret operators at a gate can kill a tank before it reaches the wall. The closer the target is to where the rocket lands the more damage it will take. Up to 6000 dmg against a tank and 3000 against a player. Note that the turret projectile has a significant travel time. When taking out a moving target, you must anticipate where it will be in the 1–2 seconds it takes for the rocket to explode. When firing on moving demolishers, target the ground about one tank-length in front of it. Demolishers move and turn slowly compared to players, so it is much easier to use the turrets on them. Additionally, enemy players tend to crowd around the demolishers, and will take damage as well.
The turrets cannot hit targets beneath them, so a tank that is left or right justified on the wall can only be hit by 1 of the turrets.
Tanks
Some people argue that Tanks are the best means of winning this fight. Always capture the Eastern and Western Graveyards to increase tank supply and reduce travel time. Tanks should operate in groups, never go in one at a time. You will get 1) Owned 2) Yelled At 3) Laughed at by opposing team. Tanks spawn two at a time at each workshop, so jump in one and wait for another player to jump in the other before rolling out.
A note on tanks: ALWAYS DRIVE THEM TO THE WALL. NEVER USE A TANK TO ATTACK PLAYERS. It's pointless to attack players with a tank, just keep the tank moving to the wall and always use the Ram (2 button) and alternate in the Cannon (1 button). Ram does more damage.
While tanks are very effective at breaking through the walls, they are slow and vulnerable. Other players need to provide support for the tanks, by killing or CCing enemy players who are attacking them. Snares and roots are effective at keeping melee away. Ranged classes should take passenger seats on the demolishers and take care of anyone that is attacking the demolisher.
Bombs
Seasoned players have discovered that Bombs are the most effective way to destroy walls for several reasons:
- Multiple Bombs can be placed at a single time on a single target
- Bombs must be disarmed
- Bombs can't be destroyed by Turrets
- Bombs can be carried while mounted
- Bombs can be carried while stealthed or invisible
- Bombs can be easily defended
Seaforium bombs can be found near almost any graveyard. They can be picked up while mounted, and carried while mounted, stealthed or invisible. After resurrecting, always grab a bomb, even if you aren't planning on using it immediately. It will come in handy if you make it to a wall.
Defenders should be on the lookout for enemies that try to sneak by towards a wall - they are probably carrying seaforium.
Strategies
Offensive
The primary goal of the offense is to get through all the gates to the ancient relic in the keep at the end of the battlegrounds. The gates can only be brought down through seaforium charges and demolishers. When you are coming off the beach, take a seaforium charge if you intend on using it on the gate. This comes useful when you're going against a defensive group that doesn't like to be out further than the gate and therefore wouldn't be able to disarm the charge in time. The defense will probably be waiting by the demolisher on the beach ready to attack it and destroy it before you have a chance to use it. Here and all throughout the game you have to make sure that opposing players on foot can't damage your demolishers, otherwise they'll never make it to the gates they have to knock down. Any players that can do slowing effects and damage from the passenger spots should join the demolishers:
- Mages can
 [Frost Nova],
  [Cone of Cold], and
  [Slow]. If spec'd for PvP, [Reactive Barrier] may also help if taking ranged damage.
 - Druids can use [Cyclone], [Entangling Roots] and [Typhoon].
- Rogues can use [Fan of Knives] with [Crippling Poison] applied or specced into [Deadly Brew].
- Warriors can [Intimidating Shout] or [Piercing Howl].
- Warlocks can [Curse of Exhaustion], [Howl of Terror], single target [Fear], and Shadowflame when augmented by [Glyph of Shadowflame].
- Death Knights can use [Desecration], [Hungering Cold], and [Chains of Ice].
- Priests can use [Psychic Scream], [Mind Flay] and [Psychic Horror].
- Hunters can use [Concussive Shot].
- Paladins can use [Hammer of Justice], and if spec'd with Glyph of Dazing Shield can use [Avenger's Shield]
- Shamans can use [Frost Shock], [Earthbind Totem] or even [Thunderstorm].
The defending team will have two turrets to every gate, and it's important that if they are manned that ranged players work to destroy them without placing themselves in danger of getting shot by turrets. It's possible that once the gate is down melee players can walk around and attack from there.
Capturing the first two graveyards will enable the workshops which allow more demolishers and are a good spot to pick up new seaforium charges. If a ![]() [Shadowstep] or
[Shadowstep] or ![]() [Killing Spree] Rogue is on the offensive side, they can use their respective abilities to teleport themselves up behind the turrets and either assault them from there to distract the turret's pilot or run past the gate to capture the next graveyard undetected. Capturing the last graveyard will push the defensive side back to spawn in their own courtyard.
[Killing Spree] Rogue is on the offensive side, they can use their respective abilities to teleport themselves up behind the turrets and either assault them from there to distract the turret's pilot or run past the gate to capture the next graveyard undetected. Capturing the last graveyard will push the defensive side back to spawn in their own courtyard.
If you are having trouble getting tanks through because of players on foot destroying them, synchronize your demolishers to move in at the same time so that focus will be divided, or at least be too focused to take out every tank before they hit the final door.
Clicking the orb at the end will instantly win the round.
Defensive
Strand of the Ancients Defense is unique among battlegrounds in that your team is free to move on the map during the initial countdown to the start of the round. A common mistake by less experienced players is that they stand around at the initial spawn point. The defense absolutely must use the time to get in to position to engage the enemy as soon as they land on the beach.
Right at the start of the game, you want to have people on the turrets for both the blue and the green gates. The rest of the group goes onto the beach getting ready to greet the incoming offense. Defense should be relatively split between the two landing docks, as the offense will also be split evenly on the incoming boats.
The demolishers have to be destroyed as soon as possible to prevent the gates from going down. Therefore, the one demolisher on the beach is often popular to destroy first. Demolishers also take priority to kill over players, unless they were hindering your ability to attack the demolisher. If you can crowd control any players trying to intercept your assault on the demolishers, then do so and continue on the demolisher until it is destroyed. Upon destruction, the driver will dismount and be very vulnerable if caught in a large group that just destroyed the demolisher.
Once the first gate is down (blue or green) the Eastern and Western graveyards are now open for the enemy to take. As soon as these graveyards are taken, the enemy gets better forward position when resurrecting, and additional demolishers from the adjacent workshop. Though it is still more important to destroy demolishers and keep the enemy from breaking the next gate (red or purple), holding these graveyards will do a lot to hinder the advance.
Pay attention to your map as well. Just because you're holding off people just fine at the purple gate might not mean the same for red. All active demolishers are visible on the map to all players. A single demolisher that has reached a gate with no one nearby to destroy it will be able to burn through a gate in about 15 seconds. Be prepared to concede that gate and fall back to the next one.
If there are demolishers incoming to the yellow gate, you will have to fall back and destroy it before trying to push forward again on defense. Typically, once both red and purple gates are down, the entire defense should fall back to the yellow gate and be prepared to destroy vehicles coming from either side. Watch the map to see where the closest demolisher is, and move towards it as a group. Do not wait for it to get within firing range of the yellow gate, or it will eventually go down. Good teams will send demolishers in groups of two from each vehicle emporium, which makes it more important to intercept them early and burn them down before they reach firing range of the yellow gate. Always watch the map and be ready to mobilize and meet demolishers coming from either side.
If the yellow gate goes down, you will have to use it as a chokepoint to prevent players and demolishers from getting past. If your entire group has not moved back and tanks are not going down quick enough before being able to touch the door, you will not have the best chance of lasting the timer.
While in the final courtyard, a few players on the offensive side tend to stray off and go west towards a pile of seaforium charges. If they are not intercepted, they will circumvent your group to the door and plant the seaforium charge. A couple people with good crowd control can guard the steps and prevent a seaforuim assault on the final gate. Though, it is best for most of the team to be at the yellow gate chokepoint, to prevent players from ever getting in the courtyard, and to burn down demolishers as quickly as possible.
If the door to the keep goes down, do your best to drag out the timer for as long as possible by keeping players out of range of the orb either through snares, disorients, stuns, or knockbacks. Any player on the opposing team has to be just lucky enough to charge through and click on the orb in order for the offensive team to win the round.
The most important thing to remember on defense is to hold back anything that can do damage to the gates. This means always attack demolishers as soon as possible, before they are in range of a gate. Also be on the watch for players who rush past towards a gate, as they probably have a seaforium charge to plant. Always work to push the offensive assault back, but be prepared to fall back if something slips through. All it takes is one uncontested demolisher to roll through every gate and lose the match.
Achievements
| Title | Description | Reward |
|---|---|---|
| Win Strand of the Ancients. | 10 | |
| Complete 100 victories in Strand of the Ancients. | 10 | |
| Capture the Titan Relic in under four minutes. | 20 | |
| Disarm 5 seaforium charges in a single battle. | 10 | |
| Defend the beach without losing walls. | 10 | |
| Plant 100 Seaforium charges which successfully damage a wall. | 10 | |
| Plant 5 Seaforium charges which successfully damage a wall in a single battle. | 10 | |
| Win a Strand of the Ancients battle without losing any siege vehicles. | 10 | |
| Destroy 100 vehicles using a turret. | 10 | |
| Destroy 5 vehicles using a turret in a single battle. | 10 | |
| Kill 100 players carrying seaforium. | 10 | |
| Kill 5 players carrying seaforium in a single battle. | 10 | |
| Kill 10 players in the Courtyard of the Ancients in a single battle. | 10 | |
| Kill 100 players in the Courtyard of the Ancients. | 10 | |
| Complete the Strand of the Ancients achievements listed below: | 25 |
Expected time for completion and record
It is fairly common to win Strand of the Ancients under four minutes. If your team hasn't reached the Yellow Gate after three minutes it is quite probable that it will lose.
Reaching the Relic under four minutes completes the ![]() Storm the Beach achievement.
Storm the Beach achievement.
The fastest Strand of the Ancient victory belongs to a pickup group which completed the battleground in two minutes and twenty seconds.
Considerations
- Tank operators and turret operators do not get as much Honor as they don't get as many honor kills. However, Tank operators enhance your team's offense which in turn enables it to win faster. Turret operators enhance your team's defense which in turn supports your team in achieving victory. You must understand that the goal of all battlegrounds is to achieve victory in the quickest way possible in order to gain marks efficiently so that you can join a new battleground.
- The initial team on offense has to wait 10–15 seconds before they are allowed to start using the tanks.
- Some games may start with one team having double the numbers of the other team. This can cause a problem for the initial defensive team if they do not join quickly enough to man turret stations and start offensive attacks. However, the same can be said for initial Offensive team. If members of the initial Offensive team doesn't join quickly the initial Defensive can mount a defense rapidly which will hinder the initial offensive team's effort to be victorious.
- Classes with pets may have difficulty operating tanks or turrets.
- Tanks at the workshops do not despawn when the second offensive team attacks, allowing the second team to grab extra tanks before attempting to cap either the East or West graveyards
- The game awards more honor to the initial attackers on the average as if the defenders don't get capture the relic in time they lose any opportunity to destroy walls for extra honor in the time remaining. For example if team A takes 1 1/2 minutes to destroy each wall and team B takes 2 minutes to do the same. Then if team B attacks first they capture the relic in 8 minutes, while team A takes the relic in 6, giving bonus honor advantage only for winning. On the other hand if team A attacks first, they capture the relic in 6 minutes, while team B only destroys 3 of the 4 walls, giving bonus honor advantage for keeping a wall un-destroyed and for winning.
Patch changes
- Template:Patched
- Template:Patched
- Patch 4.0.3a (2010-11-23): Minimum required level reduced to 65, brackets split into 5-level range instead of 10.
- Patch 3.3.3 (2010-03-23): Battlegrounds will no longer award Marks of Honor.
- Players with existing Marks of Honor can still turn them in to their respective faction's quest givers, including individual marks for those who may have more marks for one Battleground than another.
- Items which previously required Marks of Honor will have their costs adjusted to remove these requirements.
- Patch 3.2.0 (2009-08-04): The faction starting on attack/defense will now be randomized at the start of each match.
- Patch 3.0.8 (2009-01-20):
- Antipersonnel Turrets will now gain vehicle immunities, use falloff damage, and damage increased to 4000 + 200 per level to compensate for falloff.
- The Strand of the Ancients Demolisher has had its health increased.
- The Strand of the Ancients tower cannon has had its health increased.
- Seaforium charges have been moved closer to the graveyards on the 2nd tier.
References
- ^ Elizabeth Harper 2008-06-29. WWI '08 Notes from the PvP panel. WoW.com. Retrieved on 2009-06-20.
- ^ Oli Welsh 2008-05-09. World of Warcraft: Wrath of the Lich King. MMO Eurogamer. Retrieved on 2009-06-20.
- ^
 Zarhym 2009-06-16. Re: strand of the alliance. Archived from the original on 2009-06-16. Retrieved on 2009-06-20.
External links
| ||||||||||||||||||||||||||||||||