m (You don't have to have ToGC on farm to be prepared for ICC.) |
WoWWiki-Loky@legacy41585215 (talk | contribs) |
||
| Line 234: | Line 234: | ||
{{elink|type=bosskillers|link=http://www.bosskillers.com/cgi-bin/bbguild/index.cgi?action=view_guide&guide_id=727|desc=Full strategy guide with diagrams}} |
{{elink|type=bosskillers|link=http://www.bosskillers.com/cgi-bin/bbguild/index.cgi?action=view_guide&guide_id=727|desc=Full strategy guide with diagrams}} |
||
{{elink|type=todowow|link=http://todowow.com/ciudadela-jefes/lord-marrowgar-lord-tuetano/|site=Todowow|desc=Guia en Español}} |
{{elink|type=todowow|link=http://todowow.com/ciudadela-jefes/lord-marrowgar-lord-tuetano/|site=Todowow|desc=Guia en Español}} |
||
| − | {{Elink|type=wowjuju|site=WoWJuju|link=http://www.wowjuju.com/guides/lord-marrowgar-guide-1222/|desc=Stats, abilities and strategy for |
+ | {{Elink|type=wowjuju|site=WoWJuju|link=http://www.wowjuju.com/guides/lord-marrowgar-guide-1222/|desc=Stats, abilities and strategy for Lord Marrowgar.}} |
[[Category:Icecrown Citadel mobs]] |
[[Category:Icecrown Citadel mobs]] |
||
[[Category:Bosses]] |
[[Category:Bosses]] |
||
Revision as of 02:18, 24 December 2009
 | |||||||||
| Race | Bone wraith (Undead) | ||||||||
| Level | ?? Boss | ||||||||
| Reaction | Alliance Horde | ||||||||
| Location | The Spire, Icecrown Citadel | ||||||||
| |||||||||
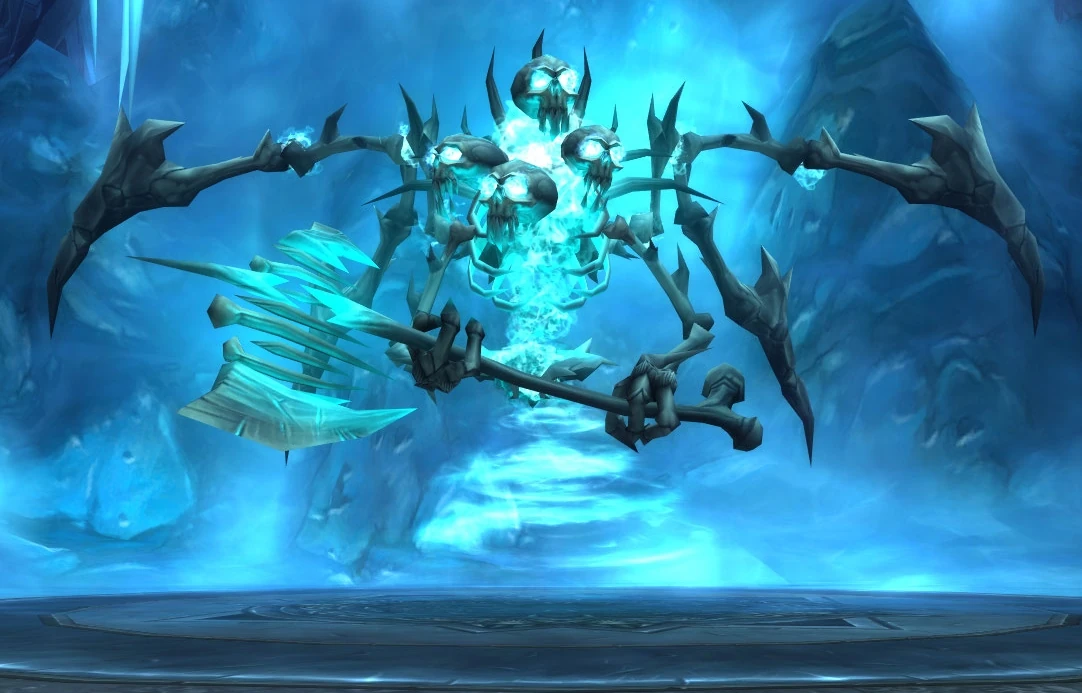
Lord Marrowgar is the first boss of the Icecrown Citadel raid. Pieced together by the Lich King from the bones of a thousand vanquished adventurers, he is the guardian of the Frozen Throne within The Spire, and wields the power of the throne itself.[1]
Abilities
10-player
 Bone Storm — Attacks nearby enemies in a whirlwind of bone that lasts until canceled. 3 sec cast. Every two seconds, triggers AoE damage that drops off as you get farther away from the boss. Roughly 6k standing on top of him, 4k just inside his hitbox, 2k just outside, and 800 or so at around 30 yards. The boss charges 4 targets before wiping aggro and ending the Bone Storm. 30 sec cooldown.
- Bone Storm (Heroic mode) — Attacks nearby enemies in a whirlwind of bone, which causes them to bleed for 15 seconds. Instant. 10000+?/3
- Bone Spike Graveyard — Hurls a massive bone spike which impales any enemies in the way. Deals 10% health per sec for 5 seconds or until killed. 3 sec cast. 39k hp. 10 sec cooldown.
- Bone Spike Graveyard (Heroic mode) — Hurls a massive bone spike which impales any enemies in the way. Deals 10% health per sec for 5 seconds or until killed. 3 sec cast. 5 sec duration
- Coldflame — Summons a line of frost that hits enemies in the way. Instant. 8 yd line of effect. Deals 6000 Frost/sec for 8 seconds. 3 sec cooldown. Random target.
- Coldflame (Heroic mode) — Instant. 8 yd radius. Deals 9000 Frost/sec for 8 sec.
- Saber Lash Melee range — Splits 200% of normal melee damage to an enemy and its nearest ally, replacing melee attack. used every second, but not during bone spike graveyard cast; prevents the targets from being targeted by Bone Spike Graveyard.
25-player
- Bone Storm — Attacks nearby enemies in a whirlwind of bone that lasts until canceled. 3 sec cast. Every two seconds, triggers...
- Bone Storm (Heroic mode) — Attacks nearby enemies in a whirlwind of bone, which causes them to bleed for 15 seconds. Instant. 8000+?/3 on Normal. 11000+?/3 on Heroic
- Bone Spike Graveyard (Heroic mode) — Hurls a massive bone spike which impales any enemies in the way. Deals 10% health per sec for 5 seconds or until killed. 3 sec cast. 5 sec duration Puts the Impaled debuff on the affected player.
- Coldflame (Heroic mode) — Summons a line of frost that hits enemies in the way. Instant. Should the Coldflame get within 8 yards of anyone, it casts...
- Coldflame (Heroic mode) — Inflicts 8000 Frost damage every 1.0 sec for 3 sec. Instant. 8 yd radius. Deals 11000 Frost/sec for 8 sec on Heroic
- Saber Lash Melee range — Splits 200% of normal melee damage to an enemy and its two nearest ally, replacing melee attack. used every second, but not during bone spike graveyard cast; prevents the targets from being targeted by Bone Spike Graveyard.
Loot
Normal mode
Heroic mode
| 10 man | Type | Description | Slot | 25 man | Type | Description | Slot |
|---|
General Strategy for Normal Difficulty
Lord Marrowgar is a fairly simple encounter that should not give any guild prepared for Icecrown Citadel much difficulty.
Tanking
Tanks need to stand on top of each other to soak Saber Lash. If you are short tanks and the raid has plate DPS available, one can be put in front of the boss with the tanks to help soak the Saber Lash damage. If said DPSer has a tanking set, equipping a piece or two to increase their HP is an option should they be taking too much damage. Note that the tanks will take substantial damage during the fight - using an off tank of this sort is not advised, as it will make healing even more difficult, although it is better than insufficient tanks.
It is entirely possible to single tank Marrowgar, in 10man, should the tank be sufficiently geared. In 3.3(a) Marrowgar's damage was further reduced, making this an even more viable strategy. Be advised that although this frees up another DPS in your 10man raid, the tank will take heavy damage.
The key to the fight is managing the transitions between the Bone Storms and going back to the Bone Graveyard phase. You have 10 seconds from the end of Bone Storm until Lord Marrowgar starts casting Saber Lash again (until then he simply melees his target) - the tanks need to pick him up and position themselves together in that time. (The 10 second grace period also applies to the beginning of the encounter, counting from when he is first aggroed, giving the tanks time to set themselves up.)
It is important to note, after every Bone Storm, the boss resets aggro. The DPS must give the tank a chance to re-establish threat, before continuing to DPS.
DPS
Lord Marrowgar has a gigantic hit box! If the melee are hugging the boss, they're standing way too close. This is true for those melee who wish to dodge the cold fire rather than avoid it completely by standing in his hit box, but if you're doing 10-man without a dedicated spike team the melee need to be standing with the healers until you outgear the encounter or are attempting his heroic mode.
Bone Spikes
Ranged DPS, or nearby melee, should immediately switch to Bone Spikes to free impaled players. If the raid has an abundance of melee, members should stay relatively close together to reduce travel time. Bone Spikes should die within two GCDs; any longer and you will have issues.
Cold Fire
Cold Fire spawned by Marrowgar should be avoided entirely by ranged DPS, and moved out of immediately by melee. It moves in a straight line out from its spawn point in melee range and if moved out of immediately by melee no damage will be taken. It is also possible for melee to stand inside his hit box and avoid it completely, as the cold fire spawn starts outside of his hit box. Touching this flame applies a short but potent Damage over Time effect in heroic mode.
Cold Fire during his non-Bone Storm periods will be directed at a given person, thus ranged should spread out radially, preventing more than one from having to move from any given spawn.
Bone Storm
Every 30 seconds Marrowgar will execute Bone Storm. This whirlwind attack cannot be avoided and damage is dealt every two seconds based on your proximity to the boss as he spins. The closer you are, the more damage you take. Additionally, in heroic this will also leave a bleed effect on anyone hit by it.
While in his Bone Storm Lord Marrowgar will randomly target and charge a raid member. When he reaches them he stops moving for around six seconds before targeting another random raid member. Every time Lord Marrowgar reaches his target and stops he will fire four lines of Cold Fire along the semi-cardinal points (NE, NW, SE, SW - they form an X). Unlike during phase 1, the cold flame lines start directly underneath him. After his fourth target the Bone Storm will end.
Healing
Need clarification and correction here.
The tanks take moderately-high damage (10-15k every second from Saber Lash (13-17k 25 man) [pre-3.3a nerf]). During the Bone Storms, everyone takes damage. People who don't move when they're targeted by the boss during Bone Storm will be taking full Bone Storm damage in addition to Cold Fire damage from up to four separate Cold Fire effects. They will probably die.
Note that Lord Marrowgar has a red positioning reticule below him. Stacking your entire raid (with the exception of the three tanks and any hunters) on the back edge of the reticule during phase 1 does three things:
1. Prevents all incoming Coldflame damage. (No one is hit by the fire)
2. Controls the location of Impales so they may be quickly DPSed.
3. Allows Healers and Caster DPS to remain stationary, maximizing throughput.
The raid must disperse during Phase 2. Bone Storm damage is negligible, but Priests need to be mindful that Inner Fire charges are depleted by this ability. Stay mobile in Phase 2, and re-collapse to the rear of the positioning reticule once the tanks regain control after phase 2.
Note that tanks do not take damage during the Bone Spike Graveyard cast, which can be very handy for moving into position or catching up on healing.
10-man Normal Specific Strategy
Lord Marrowgar is a two-phase repeating fight.
- Phase One is the Bone Graveyard phase where the tanks stand on one side of Marrowgar and the DPS and healers stand on the other.
- Phase Two is the Bone Storm phase and consists of the duration of Marrowgar's Bone Storm.
- The transition from Phase Two back to Phase One is what will kill most raids.
- Three healers are useful to handle tank healing when a healer gets hit with a spike.
Phase One
In the Bone Graveyard phase the raid wants to stay close to each other with the melee in the middle, the ranged on the sides, and the healers in-between the melee and the ranged. The healers need to be in range of the tanks, but farther from the boss than the melee. This setup specifically allows the melee to swap to any Bone Spikes that hit raid members near them allowing the spikes to be global'd. By doing this you minimize the damage taken by the spike target, maximize the raid's time on the boss, and minimize any interruption to the melees' rotations by target switching.
Alternatively you can have one or two dedicated spike-killers whose only job is to run around and kill spikes. These people will preferably be ranged DPS with short ramp-up times that can pull at least 4.5k (they need to deal 40k damage in under 10 seconds including ramp up time. Arcane Mages are good, for example, while Affliction Warlocks would be bad). By doing this you forgo one DPSer on the boss entirely, but the rest of the DPS will be interrupted only when they get spiked.
Regardless of how you handle the spikes, the raid needs to spread out as soon as the third spike is killed because the boss is about to transition to phase two.
Phase Two
In the Bone Storm phase of 10-normal, the raid wants to stay close enough together that the healers can reach them at all times and avoid the Cold Fire at all costs. The damage from the Bone Storm is negligible if you have competent raid healing and avoid standing directly under the boss when possible. The damage from Bone Storm is AoE, so abilities like a rogue's ![]() [Feint] will work to full effect.
[Feint] will work to full effect.
In short, don't stand in fire.
The transition from Phase Two back to Phase One is the difficult part, as he does a complete aggro wipe. To transition safely (for those of us who aren't farming heroic ToC) the raid, except for the tanks, need to stop DPS on the boss when he hits his fourth target's location. Once the fourth stationary spin is complete he'll wipe aggro and the tanks can pick him up.
Phase Two and Misdirects
The transition and Misdirect love each other. They really do. ![]() [Tricks of the Trade] on the other hand will get a rogue killed because before the boss aggros your Tricks target, he'll one-shot you with a 30k Saber Lash.
[Tricks of the Trade] on the other hand will get a rogue killed because before the boss aggros your Tricks target, he'll one-shot you with a 30k Saber Lash.
25 Man Normal Strategy
After experimenting with a few strategies we found one that worked great. It should work in 10 man also if you are having obscene trouble with spikes. Don't be afraid to take a 7th healer to ensure DPS survival if healing becomes too problematic, it's not a DPS race.
Phase One
Phase one is where this strategy differs. All DPS and healers should stack as close as possible to Lord Marrowgar far inside his hit box, but making sure you don't get in front and get cleaved. This does 2 things. One, it makes killing the spikes very simple as melee can cleave them all and take them out that much faster (Be aware of hunters that can't stack due to range and release them also). It also totally eliminates worrying about Cold Fire since it spawns on the outside of his hit box, so it just spawns past the raid giving you more time to DPS.
Phase Two
When his timer for Bone Storm is nearing everyone should run away from Marrowgar to lighten healer burden, though it only hits for around 5k right on top of him. Continue to DPS until he charges the 3rd person and all DPS must STOP or you WILL get aggro. Avoid the fires that spawn. Once he stops storming tanks must be ready to pick him up be standing on top of him on his last position. Moving him back to his original position can cause people to get cleaved so it is best to tank him where he ends up, trying to turn his back toward the raid to make it easier to stack on him again. Stacking is made much easier if someone is marked to stack on top of. Then just simply rinse and repeat.
Raid Strategy Macros
/raid (Marrowgar) Phase I
/raid Tanks always stack on each other.
/raid Melee dps the boss at all times.
/raid Ranged burn the bone spikes and release other players, then back onto boss.
/raid DODGE the BLUE FLAMES at all times.
/raid (Marrowgar) Phase II
/raid Avoid whirlwind, run very fast.
/raid Move out of blue flames that spread from Marrowgar in every direction.
/raid Let the tanks pick up aggro when he stops whirlwinding.
/raid Overheal the tanks when returning to phase I.
Quotes
- Intro
- This is the beginning...and the end, mortals. None may enter the Master's sanctum!
- Aggro
- The Scourge will wash over this world as a swarm of death and destruction!
- Bone Storm
- BONE STORM!
- Bone Spike
- Bound by bone!
- Stick Around!
- The only escape is death!
- Killing a player
- More bones for the offering!
- Languish in damnation!
- Death
- I see...only darkness...
- Enrage
- THE MASTER'S RAGE COURSES THROUGH ME!
Related Achievements
- [Boned (10 player)]
- [Boned (25 player)]
- [Storming the Citadel (10 player)]
- [Storming the Citadel (25 player)]
- [Heroic: Storming the Citadel (10 player)]
- [Heroic: Storming the Citadel (25 player)]
Patch changes
- Template:Patched
- Template:Patched
- Patch 3.3.0 (2009-12-08): Added.
Videos
10 player Normal encounter
25 player Normal encounter
References
- ^
 [80R] Lord Marrowgar Must Die!