 | |||
| Gender | Male | ||
| Race | Vrykul (Humanoid) | ||
| Level | 72 Elite | ||
| Location | Utgarde Keep | ||
| Status | Killable | ||
| |||

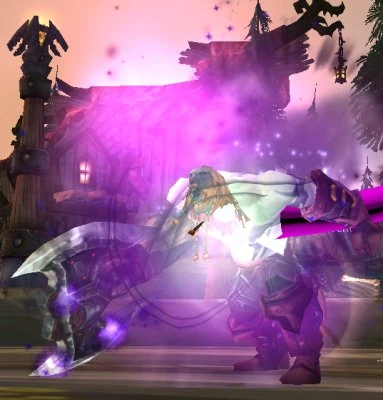
Ingvar as a Vargul
Ingvar the Plunderer is the last boss in Utgarde Keep. He directs the attacks on Valgarde from the balcony over the waterfall in Daggercap Bay. Under the command of Ingvar the Plunderer, the dragon riders revel in slaughtering their enemies from above without warning. He's known among both ally and enemy forces for his brute strength. His axe is more dull than one would think; when close up, he relies on his brute strength to cut down foes.
Dark Ranger Marrah wants his head for the quest ![]() [71D] Ingvar Must Die!.
[71D] Ingvar Must Die!.
Attacks and abilities
Health: 120,015 HP (phase 1); 120,015 HP (phase 2)
Phase 1
- Staggering Roar: 2188–2812 damage to all enemies within 60 yards, interrupting any spells being cast for 6 sec. 2s cast, 2s cooldown
- Smash: 13125–16875 physical damage to all enemies within a 10 yard cone in front of the caster. 3s cast, 2s cooldown. This can be easily avoided by stepping left or right, and when the casting is over, move back in front of Ingvar.
- Cleave: Inflicts 150% of normal melee damage to an enemy and its nearest ally.
- Enrage: Increases attack speed by 5% and size by 5% per cast. Stacks up to 50 times.
Phase 2: Resurrection by Annhylde the Caller
- Dreadful Roar: 3063–3937 shadow damage to all enemies within 60 yards, interrupting any spells being cast for 8 seconds. In addition, targets will take 5% more shadow damage. This effect can stack up to 40 times. 2s cast, 2s cooldown
- Woe Strike: Deals 200% of normal melee damage and inflicts the target a curse known as Woe Strike. Any direct healing the target receives while afflicted with Woe Strike deals 1313-1687 Shadow damage to the healer. This effect lasts for 20 seconds or until the curse is dispelled.
- Dark Smash: Deals 8750–11250 Shadow damage to all enemies within a 10 yard cone in front of the caster. In addition, deals 1750 to 2250 Shadow damage to all enemies, knocking them down for 2 seconds. 3s cast, 2s cooldown. See "Smash" to learn how to avoid its damage.
- Shadow Axe: Throws a Shadow Axe at a random target. The axe will arrive at the target and spin in place for 10 sec, dealing 1750 to 2250 damage per second to all nearby enemies.
Heroic
- Same abilities as normal but now Dark Smash affects an area around the caster
Tactics
Tanking Tactics
- Tank Ingvar so that he is facing away from the group if possible.
- Tank Ingvar near a pillar.
- When Ingvar casts (Dark) Smash you can avoid the effect by either dodging the effect in the middle of his animation (he jumps) or by LOSing Ingvar with a pillar.
- It is critical for the tank to move out of the 10 yards range in time (should be no problem since both abilities have a 3 second cast).
- Run directly away from any melee class behind him so that you don't accidentally turn him towards them (his (Dark) Smash is a cone and will most likely kill them instantly).
- When Ingvar the Damned (Phase 2) throws his axe move Ingvar away from it so it doesn't kill the melee.
Melee DPS Tactics
- It is essential that any melee class apart from the tank stays behind him.
- When he casts Smash (Phase 1) move back to make sure you're not hit by it accidentally.
- When Ingvar throws his axe (Phase 2) make sure you don't stand in the whirling axe. It will kill you.
- When he casts Dark Smash (Phase 2) use a pillar to LOS Ingvar to reduce or negate the shadow damage.
- Be ready to run.
- Plant DoT effects - poison, Rip, tear, Mangle, bleed effects, Seal of Corruption, etc - anything that keeps hitting while running is helpful.
- Don't expect high damage output.
Ranged DPS and Healing Tactics
- Make sure you stand at least far enough away you don't accidentally eat a (Dark) Smash.
- (non-healers) When Ingvar casts Dark Smash (Phase 2) LOS him with a pillar to reduce or avoid the shadow damage.
- (healers) When Ingvar casts Dark Smash (Phase 2) your ability to LOS him with a pillar is directly proportional to your ability to keep the tank alive if you get knocked down out of LOS. LOS your tank at your own risk.
- If Ingvar throws his axe at you, don't stand in the Magical Axe of Whirly-Doom effect. It will kill you.
- When Ingvar casts his roar, stop casting. If you don't you'll be eating an 8 second school lock-out (enemy casting bars work wonders).
Pet Classes
- When Ingvar casts Smash or Dark Smash call your pet back to you. If the pet gets smashed it will eat the huge hit and probably die, as well as deal significant damage to the rest of the group.
- Never under any circumstances should uncontrollable Guardian-type pets be used. They tend to get (Dark) Smashed and kill the group (I'm looking at you
 [Army of the Dead]!)
General Advice
- Save and use any CD's for the beginning of phase 2 when Ingvar's damage output is higher and he deals shadow damage.
- Melee DPS should have ~9000 health.
- After killing Ingvar the 1st time, he will be resurrected. This cannot be prevented and it marks the beginning of Phase 2. Between the two phases, you cannot eat or drink - Be ready to bandage,
 [Innervate], click the lightwell, get the tank a new healthstone, etc at this time.
 - Melee pets normally would try to attack from behind. However, if the pet is killed frequently by the Smash/Dark Smash, it should be called back when the boss is casting Smash/Dark Smash, or kept by their owner's side.
- Shadowfiend, elementals, and all similar moves, should be used straight away during phase 2.
- Low DPS groups or any group that loses one or two members during the fight will likely see healers and caster go OOM due to the boss's substantial damage. Shadow priests'
 [Vampiric Touch]/
 [Vampiric Embrace] can be unbelievably useful as it helps keep the ranged dpsers life at a manageable level.
Group Composition Tips
- Shadow resistance is extremely helpful for this encounter. Including a class that can provide it should be a top priority.
- More than 1 melee DPS can make for a difficult fight, as melee DPS may be killed by Smash during phase 1, make phase 2 all the more difficult
- Any class that can provide off-healing can greatly ease the burden on the primary healer's mana pool.
- Priests are very helpful for this encounter - lightwell can really make this encounter smoother. Casters, healers, and ranged dps can stay near the lightwell for the duration of the fight, allowing the healer to concentrate on keeping the tank alive.
Loot
|
|
Quotes
At the start of the encounter: "I'll paint my face with your blood!"
When killed for the first time: "My life for the... Death God!"
When resurrected: "I return! A second chance to carve out your skull!"
Killing a player: "Mjul orm agn gjor!" "I am a warrior born!"
When killed for the second time: "No! I can do... better! I can..."