TheGetBackers@legacy41576685 (talk | contribs) (Bosskillers Boss Page and Icon added) |
|||
| Line 1: | Line 1: | ||
| + | {{Infobox zone |
||
| − | {{Zul'Gurub}} |
||
| + | |ss=Sholazarconc.jpg |
||
| − | [[image:venorix.jpg|thumb|High Priest Venoxis as a troll and as the avatar of Ula-tek]] |
||
| + | |name=Sholazar Basin |
||
| + | |loc=Northwestern [[Northrend]] |
||
| + | }} |
||
| + | '''''UNDER CONSTRUCTION''''' related to [[User:GoldenYak/Spider_Kingdom_Expansion_Concept|Spider Kingdom Expansion Concept]] |
||
| − | ==General== |
||
| − | The [[troll]] '''Venoxis''' was the High Priest of the [[Primal God]] [[Ula-tek]], the goddess serpent. |
||
| − | In order to quell [[Hakkar the Soulflayer]], the trolls of the land banded together and sent a contingent of High Priests into the ancient city of [[Zul'Gurub]]. Each priest was a powerful champion of the Primal Gods, but despite their best efforts they fell under the sway of Hakkar. Now the champions and their Primal God aspects feed the awesome power of the Soulflayer. Any adventurers brave enough to venture into the foreboding ruins must overcome the High Priests if they are to have any hope of confronting the mighty blood god. |
||
| + | '''Sholazar Basin''' is a tropical jungle basin in the midst of [[Northrend]]. It is found between [[User:GoldenYak/New_Borean_Tundra|Borean Tundra]] and [[Icecrown Glacier]]. This land was one of the few in [[Northrend]] where the [[Scourge]] did not hold sway - the ancient relics of the titans kept the undead from entering. |
||
| − | Venoxis comes with 4 snake adds. He stays in [[priest]] form initially, where he casts [[Holy Nova]], [[Holy Fire]], and [[Renew]]. He can also cast Holy Wrath, a spell which jumps from person to person with damage increasing exponentially as it hits people (9000dmg per hit isn't uncommon). He later shifts to snake form, where his melee damage goes up dramatically and he releases a poison cloud AoE (500dmg/tick). |
||
| + | In the wake of the [[Cataclysm]], the cliff walls around the basin were breached by quakes, causing the sea's waters to flood the entire region. The natural balance of the basin has been thrown into chaos, causing elementals to run wild. The titan facilities and artifacts of the region have been damaged, causing greater havoc. [[Freya]], Keeper of Life and one of the [[Titanic Watchers]] of [[Ulduar]] has traveled to the basin in an effort to halt the chaos. |
||
| − | ==Strategy== |
||
| − | The High Priest isn't too hard, despite his recent buff in 1.9. I don't want to flood this page with pictures, so I will link to my own source. |
||
| + | == History == |
||
| − | *The first thing about this boss is getting to him and clearing out the entire room but him and his snakes. You will need this room. After you have killed all the other enemies in the room, get your MT and offtanks in the room, along with any CCers. This works best with at least 2 tanks, and 2-3 [[Mage]]s or [[Druid]]s. Get the rest of the raid directly outside the room, like this: [http://i25.photobucket.com/albums/c75/fitheach/snakebossoutside.jpg outside the room] |
||
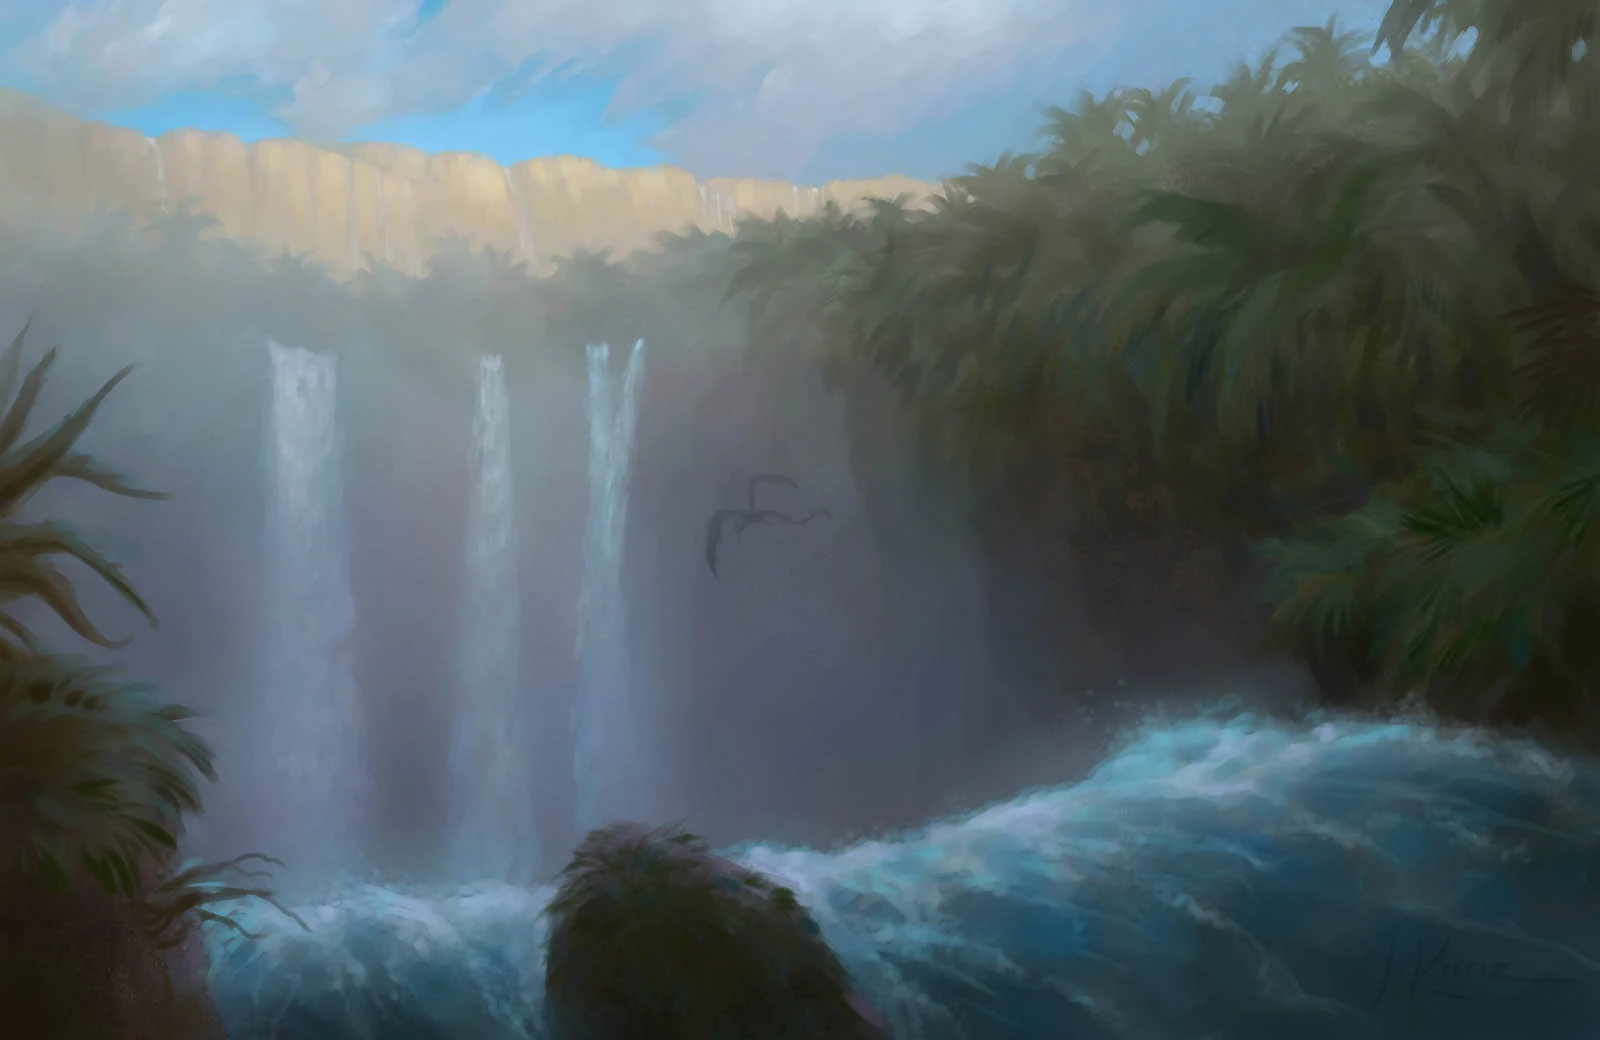
| + | [[Image:SBasin11.jpg|200px|right|thumb|Some outer regions of the basin have escaped the flooding.]] |
||
| − | *The next step is to have your offtank pull, so all the adds will come down to him. The main tank must immediately pull the High Priest off the OT or he will likely die. The OT must pull the adds to the rest of his raid, killing them one at a time. [[Polymorph|Sheep]] 3, sleep 3, [[Blind]], [[Freezing Trap]], whatever you have; the point is to have only one fighting at a time. Take them down quickly and move onto the next one, allowing the OT to break CC. |
||
| − | *Next, you all run in to where the MT is tanking the boss. (He should be tanked near the bonfire for best results, I've seen.) When the snake adds are dead, get within shooting range of the boss and unload anything you want on him while conserving some mana (meaning wands, bows, dots, low mana cost spells). Do this so that the High Priest won't use his Holy Wrath spell (a cranked-up chain lightning form of [[Holy Nova]]) to hit people, even those far away. This can easily wipe a raid. |
||
| − | *Now, you MUST get rid of his mana and keep it gone the entire remaining fight to prevent Venoxis using his defence spells. With one hunter putting on a [[Viper Sting]], use [[Warlock]]s to [[Drain Mana]], [[Priest]]s to [[Mana Burn]] and any other way you can think of. Do not melee until he is without mana. Circle around him like this to get rid of his mana: [http://i25.photobucket.com/albums/c75/fitheach/snakebossmanadrain.jpg Mana draining] |
||
| − | *When all of his mana is gone, DPS with all melee you have, until he hits 50% health. Keep him away from casters, against a wall like this: [http://i25.photobucket.com/albums/c75/fitheach/snakebossmanagonemelee.jpg DPSing him when no mana] Keep him there, and back away at 50-55% because he will turn into his snake form and create a poison cloud. You won't enjoy it. |
||
| − | *Next thing is to stay away from him. Everyone but the MT must stay at least 25 yards from him. No melee. At this time, you will have to be de-poisoning the MT and healing him like crazy. If he falls without a [[Soulstone]], you will probably wipe. See this: [http://i25.photobucket.com/albums/c75/fitheach/snakeformranged.jpg Ranged DPS snake form] You will be doing all the ranged DPS you can. Use your arrows, use your speed cooldowns, use your mana. Kill him quickly or your tank can drop. |
||
| − | *At roughly 20% your other Warriors may want to use [[Bloodrage]], run in and [[Execute]] in between Poison Clouds; this will do extra damage and drop him faster. |
||
| + | A high elf scholar that once visited Kaskala believed that the titans used the Sholazar Basin as a testing ground. Some of their experiments, or at least the remains of those experiments, may still exist. Thus, the basin is a potential treasure trove of knowledge and power. Who knows what species the Titans left here, and what notes and tools? |
||
| − | ===Alternate Strategy=== |
||
| − | *Set up crowd control for 3 of the 4 adds and have the main tank body pull Venoxis by standing on the right side of the steps and being careful not to go in too far. The [[Mage]]s immediately pick up their 3 Sheeps and a Hunter pulls in the marked add to the group (where an offtank is waiting). (We usually have the group stand near the campfire, with the tank along the right wall as you walk into the area.) |
||
| − | *Take each add down individually. Once all 4 adds have been dealt with (they go down very fast) then everyone sets up to do range DPS only, because Venoxis will do a nasty [[AoE]] attack to all in melee range. (We don't bother with mana draining, just keep all heals on the tank and all DPS outside of the range of his AoE.) |
||
| − | *At 50% he will turn into a snake and immediately drop a poison cloud. This conversion is crucial; all heals should remain on the main tank. The MT's job at this point is to run out of the Poison Cloud when it drops. |
||
| − | *After the first poison cloud expires, we send in our melee DPS to unload. |
||
| − | *Keep an eye on Venoxis's hands; when he raises them above his head, that means he has just cast Poison Cloud and you need to move out of that area ASAP. If everyone pays attention and moves out of the cloud (especially the tank), this boss is easy. |
||
| + | ==Cataclysm== |
||
| − | ===Strategy Notes=== |
||
| − | While following either of these stratagies, keep these notes in mind: |
||
| − | *You don't really need to kill all the adds. You can Crowd control the 4 adds. If possible, the whole fight long. For that you will need any combination of mages/druids (sheep/sleep). If not, just OT each add and kill it. |
||
| − | *Holy Wrath CAN be avoided!! If you keep no more than three people meleeing him (or anywhere near him for that matter), he will not spazz out and cast Holy Wrath. |
||
| − | *Holy Wrath CAN be minimized!! It only jumps about 10 feet at a time, so if everyone is EITHER at melee range or at maximum range, only melee will be hit. If you have powerful melee DPS, this can be worth it. Just don't send pets in. |
||
| − | *Poison cloud CAN be cured!! However, there are some warnings. If you stand in the cloud while being cured, the cloud will repoison you. Furthermore, if you are depending on the Poison Cleansing Totem, you are bound to run out of the reach by the time it could have saved you. The best advice would be for one healer to be on curing duty and he/she should cure only when the tank has gotten out of the cloud. This should save at least 2.5K health (500dmg per second, 10 second buff), and can make a big difference (in theory). |
||
| − | *Venoxis will occassionally cast Renew on himself. The renew is dispellable, and it will help take him down faster if a priest watches for the renew to remove it. |
||
| + | When [[Deathwing]] tore apart the world and brought down the fury of the elements, not even far off Northrend escaped. Sholazar Basin's outer walls were breached by earthquakes, causing the seas to flood the entire region. Only the highest cliffs and the towering pillars escaped the destruction. Shortly after the flood, [[Freya]], one of the Keeper's of [[Ulduar]], arrived with druids of the [[Cenarion Circle]] to aid in restoring balance to the region and preserving life. |
||
| − | ===8-2-06 (post 1.11) Another Alternate Strategy=== |
||
| − | This boss is very easy. We took him down with 16 people with the following strategy. Set up with everyone but the MT and OT at entrance. Have OT body pull unless he can gain line of sight (doubtful with the stairs) and have the MT immediately taunt and pull Venoxis over to behind the camp fire. Have at least two priests keeping the MT alive at this point. CC 3 of the 4 adds and DPS them down one at a time as described in the other strategies. As soon as the adds are down the strategy changes a bit. Have all backup healing (anything but the priests) heal the MT and let the priests mana back up (they will be low on mana by the time the adds are dead). For phase one, because of the AOE, have nothing but ranged DPS on Venoxis. Once Venoxis hits 50% he changes to snake form and begins his cloud. All melee DPS goes in, the MT must keep him moving every time he sees the cloud start (raises hands). When he hits phase two the priests come back to healing. Keep him moving and stay out of the cloud, and he will be down in no time. This might be slightly more complicated, but it works very well for newer groups. We did it with 16 people mostly in blues including myself (the MT) with only about 5225 unbuffed HP. |
||
| − | Good Luck! |
||
| + | The last of the Scourge in this area have been eradicated, but the Twilight's Hammer have recently arrived to exploit the relics of the titans that still remain in the region. They are led by the diabolical [[User:GoldenYak/Twilight's_Hammer_of_Northrend#Dark_Master_Zorc|Dark Master Zorc]]. |
||
| − | ===21-9-06 (post 1.11) Another Alternate Strategy=== |
||
| − | This boss is very easy. Our guild have several times taken him down with only 15 ppl and some of the ppl first time was only lv56+ and was wearing mostly green items. This tactic only works if your Alliance (since we use a palladin). |
||
| − | Basicly read up on the posts above and do the following. |
||
| − | *) raidleader marks 3 snakes with 3 symbols, mages / druid pick one symbol each so you get 3x sleeped/sheeped mobs. |
||
| − | *) a paladin bubbles and run up and start event. |
||
| − | *) mages/druids sheep/sleep there targets while MT take boss away from raid and start tanking him |
||
| − | *) a hunter puts down a vypersting on the boss |
||
| − | *) raid starts to dps down the addons one by one. |
||
| − | *) once only 1 snake is left the warlock and hunter switch to boss and start draining more mana. |
||
| − | *) only 5ppl in melee range from boss else he might AoE and wipe some raid members. so if your more then 5 melee classes tell them who is going to stand in raid using ranged weapon (pref. a def tank is somehow the boss gets loose for backup) |
||
| − | *) once the mana have reached 0 on the boss all ranged dps can begin / but let the warlock continue manadraining every now and then also let the hunter keep the vyperssting on at all times. |
||
| − | *) dps boss down fast now / 1-2 healers should try and preserve mana for second stage as the boss will hit harder. |
||
| − | *) once in second stage just continue dps, if your not MT use bandages/pots to stay alive as the healers is bussy with the MT. |
||
| + | {{cata-section}} |
||
| − | ===December 11th 2006 (post 2.0 patch) Strategy notes=== |
||
| − | This boss is extremely easy and any mana draining strategies are superfluous. We took down Venoxis with a group of 8 and no warriors(!!!) with ease, resetting him only once due to some group miscommunications. A well equipped druid can even tank this boss, provided he has 2-3 healers. Simply offtank venoxis on your tank with one healer, while the rest dps the adds. Switch to venoxis, staying well back of him until he shifts. Then increase dps and healing on the MT, while making sure to dispel his HoT (renew). With raidtracker you can have it announce when he heals to make it super easy. I could see venoxis being down by 1 warrior, 1 priest, 1 shaman/paladin, 1 warlock and perhaps a hunter or mage. A 5 man group with tier 2-3 would make short work of him. |
||
| + | Areas affected: |
||
| − | ===Further Observations=== |
||
| − | As of Patch 1.10 Venoxis doesn't need mana to cast his AoE spell. Our group fully drained his mana and kept it down to zero as the melee DPS went in. Shorty after that, he cast his AoE which jumped from the warriors and rogues to the caster and one-shoted half of our raid. Since then, we only deal ranged DPS during the Phase 1 of the fight. |
||
| + | *The [[Cataclysm]] has broken open the sea walls, causing the basin to be flooded. |
||
| − | ====Alternate point of view==== |
||
| + | *[[Naga]], [[murlocs]], and other underwater monsters have invaded the flooded regions of the basin. |
||
| − | It seems doubtful any of the bosses in ZG can cast spells with zero mana - although this is up for debate. It is certainly true though that they can cast with 100-200 mana, and it is very hard to keep them completely at zero. |
||
| + | *The [[Wolvar]] have relocated to cliff-side dwellings, and navigate the flooded basin using rafts. |
||
| + | *[[Gorloc|Gorlocs]] have built floating lodges to dwell on. Their war against the Wolvar continues. |
||
| + | *[[The Avalanche]] from [[Icecrown]] has been cleared away, revealing caverns and tunnels swarming with [[nerubians]]. |
||
| + | *[[Hemet Nesingwary]] managed to repair his ship before the Cataclysm, and has set up new challenges hunting sea monsters. |
||
| + | *[[Freya]] of [[Ulduar]] watches over the basin from atop the [[Suntouched Pillar]], alongside the druids of the [[Cenarion Circle]]. [[Archmage Pentarus]] will send adventurers here via flying machine. |
||
| + | *Freya's [[Avatar_of_Freya|Avatar]] has been ordered by her mistress away from Sholazar to attend to other tasks. |
||
| + | *The five pillars have been connected by bridges. The [[Twilight's Hammer]] have seized control of the [[Mosslight Pillar]] and the [[Skyreach Pillar]]. |
||
| + | *The shattered [[Lifeblood Pillar]] is magically rebuilding itself. |
||
| + | ==Geography== |
||
| − | Regardless, it is perfectly possible to do Venoxis with no mana draining - and almost certainly easier, in fact. Keep only 2-3 characters in melee range in phase 1, and the rest at 20 yards+ and he will not use Holy Wrath at all. |
||
| + | === Maps === |
||
| + | [[Image:sholazarbasin_goldenyak.jpg|left|thumb|350px|Sholazar Basin, post-Cataclysm.]] |
||
| + | {| class="darktable" width=50% |
||
| − | ==Loot== |
||
| + | |- |
||
| + | |[[Bonefields|The Bonefields]]{{·}} [[Bones of Nozronn|The Bones of Nozronn]]{{·}} [[Bristlepine Den]]{{·}} [[Death's Hand Encampment]]{{·}} [[Dorian's Outpost]]{{·}} [[Frenzyheart Hill]]{{·}} [[Frenzyheart River]]{{·}} [[Glimmering Pillar|The Glimmering Pillar]]{{·}} [[Kartak's Hold]]{{·}} [[Lakeside Landing]]{{·}} [[Lifeblood Pillar|The Lifeblood Pillar]]{{·}} [[Lost Lands|The Lost Lands]]{{·}} [[Lost Passage|The Lost Passage]]{{·}} [[Makers' Overlook]]{{·}} [[Makers' Perch]]{{·}} [[Mistwhisper Refuge]]{{·}} [[Mosslight Pillar|The Mosslight Pillar]]{{·}} [[Nesingwary Base Camp]]{{·}} [[Path of the Lifewarden|The Path of the Lifewarden]]{{·}} [[Rainspeaker Canopy]]{{·}} [[Rainspeaker Rapids]]{{·}} [[Sapphire Hive]]{{·}} [[Savage Thicket|The Savage Thicket]]{{·}} [[Seabreach Flow|The Seabreach Flow]]{{·}} [[Skyreach Pillar|The Skyreach Pillar]]{{·}} [[Sparktouched Haven]]{{·}} [[Spearborn Encampment]]{{·}} [[Stormwright's Shelf|The Stormwright's Shelf]]{{·}} [[The Sundered Shard]]{{·}} [[Suntouched Pillar|The Suntouched Pillar]]{{·}} [[Swindlegrin's Dig]]{{·}} [[Waygate]]{{·}} [[Wildgrowth Mangal]]{{·}} [[Wintergrasp River]]{{·}} [[Savage Thicket]]{{·}} [[The Skyreach Pillar]]{{·}} [[The Stormwright's Shelf]]{{·}} [[The Suntouched Pillar]]{{·}} |
||
| + | |} |
||
| + | {{clr}} |
||
| + | == Quests and Storylines == |
||
| − | * One [[Primal Hakkari]] armor quest drop per kill. |
||
| − | *{{loot|Epic|Band of Servitude}} |
||
| − | *{{loot|Epic|Fang of Venoxis}} |
||
| − | *{{loot|Epic|Runed Bloodstained Hauberk}} |
||
| − | *{{loot|Epic|Seal of the Gurubashi Berserker}} |
||
| − | *{{loot|Rare|Belt of Untapped Power}} |
||
| − | *{{loot|Rare|Blooddrenched Mask}} |
||
| − | *{{loot|Rare|Blooddrenched Footpads}} |
||
| − | *{{loot|Rare|Cloak of the Hakkari Worshipers}} |
||
| − | *{{loot|Rare|Gloves of the Tormented}} |
||
| − | *{{loot|Rare|Might of the Tribe}} |
||
| − | *{{loot|Rare|Sacrificial Gauntlets}} |
||
| − | *{{loot|Rare|Zanzil's Band}} |
||
| − | *{{loot|Rare|Zulian Headdress}} |
||
| − | *{{loot|Rare|Zulian Scepter of Rites}} |
||
| − | *{{loot|Rare|Zulian Slicer}} |
||
| − | *{{loot|Rare|Zulian Stone Axe}} |
||
| − | *{{loot|Rare|Zulian Tigerhide Cloak}} |
||
| + | The battle between the [[Oracles|Oracle]] [[gorloc|gorlocs]] and the [[Frenzyheart]] [[wolvar]] has continued to rage despite the ravages the [[Cataclysm]] has inflicted upon the basin. The Frenzyheart believe that the 'bigmouths' have called down the floods that destroyed their old hunting grounds, while the Oracles blame the 'puppymen' for angering the [[titans]]. The Oracles now live on floating lodges they've built, while Wolvar have dens on high cliffs surrounding the basin, and travel across the flood-waters on wooden rafts lashed together to make primitive flotillas. Frenzyheart quests are given out at '''Cliffgrasp Village''' and many of them allow players to use rafts to move around quickly. Oracle quests come from '''Rainspeaker Lodge''' and enable both [[Sea Legs]] and [[Underwater Breathing]] to allow players to navigate the flooded floor of the basin in a manner similar to [[Vashjir]] questing. |
||
| + | [[Hemet Nesingwary]] and his friends managed to repair their damage ship before the Cataclysm breached the sea walls, and now sail around hunting the new underwater wildlife that the flood has brought to the basin. Hemet's underwater hunts will eventually draw him and his crew into conflict with the '''Sinscale''' naga who have invaded the flooded basin, especially after Hemet sets his sights on the enormous [[shark|sharks]], [[hydra|hydras]], and [[kraken]] that they've brought with them. |
||
| − | == External Links == |
||
| − | {{elinks-NPC|14507|tb=743780}} |
||
| − | *[[Image:Bosskillers.png|Bosskillers.com]] [http://www.bosskillers.com/cgi-bin/bbguild/index.cgi?action=bosspage&bossid=53 Bosskillers] |
||
| + | [[Image:sholazar_yakss.jpg|200px|right|thumb|Zorc seeks to unmake all that the titans created.]] |
||
| − | [[Category:Trolls|Venoxis, High Priest]] |
||
| + | |||
| − | [[Category:Bosses|Venoxis, High Priest]] |
||
| + | [[Freya]], the Keeper of Life from [[Ulduar]], has traveled to the basin in the wake of the Cataclysm, seeking to restore the ravaged region to its former state. She is joined atop the [[Suntouched Pillar]] by druids of the [[Cenarion Circle]], and will enlist the aid of travelers in their efforts to balance the rampaging elements of the basin. Before long, the Cenarion Circle comes into contact with the [[Twilight's Hammer]], who have invaded the basin seeking to usurp the power of the titans. Hammer agents have infiltrated the titan ruins along the cliffs of the basin, and have seized control of several of the great pillars. Cultists are particularly abundant at the once ruined [[Lifeblood Pillar]], which has mysteriously begun to repair itself. |
||
| − | [[Category:Instance:Zul'Gurub|Venoxis, High Priest]] |
||
| + | |||
| + | The battle against the Twilight's Hammer will eventually draw both the Frenzyheart and the Oracles into the carnage. Freya and the Cenarion Circle, with the aid of the player, will at last bring about peace between the two factions by showing them the greater foe - [[User:GoldenYak/Twilight's_Hammer_of_Northrend#Dark_Master_Zorc|Dark Master Zorc]], the Twilight's Hammer lieutenant in charge of the forces in Sholazar. The conflict will eventually lead players to the '''Heartbreak Vortex''', a whirlpool above the former [[River's Heart]] valley. Beneath the vortex, the land has broken open, and the waters of the basin slowly drain into Azeroth's underworld. Far beneath the basin in a dark, flooded cavern, players will encounter [[Faceless Ones]], [[User:GoldenYak/Spider_Kingdom_Bestiary#Undying_Tendrils|Undying Tendrils]], and finally Zorc himself. Defeating the maniacal orc with Freya's help will force him to retreat back to [[Icecrown]]. |
||
| + | |||
| + | == Gallery == |
||
| + | <gallery> |
||
| + | File:Wintergrasp_River.jpg|The sea walls were shattered in the [[Cataclysm]], flooding the basin. |
||
| + | File:Characters_zorc.jpg|[[User:GoldenYak/Twilight's_Hammer_of_Northrend#Dark Master Zorc|Dark Master Zorc]] seeks the power of the titans for the [[Twilight's Hammer]]. |
||
| + | File:Lifeblood_Pillar.jpg|The fragments of the [[Lifeblood Pillar]] are magically reassembling themselves Could this be a legacy of the [[titans]]? |
||
| + | File:Freya.jpg|[[Freya]], the Keeper of Life, has traveled to the Basin to ease the devastation wrought by the Cataclysm. |
||
| + | File:Hatch_from_lost.jpg|Many once familiar regions have been reshaped by flooding. |
||
| + | File:Makers'_Perch.jpg|More titan secrets have been uncovered. What is the basin's connection to far off [[Un'goro Crater]]? |
||
| + | File:Hemet_Nesingwary.jpg|[[Hemet Nesingwary|Hemet]] isn't about to let the end of the world interrupt his deep diving hunts. |
||
| + | File:StormwrightsShelf.jpg|Unleashed by the Cataclysm, the elements of the basin are running wild. |
||
| + | </gallery> |
||
| + | |||
| + | |||
| + | [[Category:Fan fiction| ]] |
||
Revision as of 09:09, 8 February 2011
 | |
| Location | Northwestern Northrend |
UNDER CONSTRUCTION related to Spider Kingdom Expansion Concept
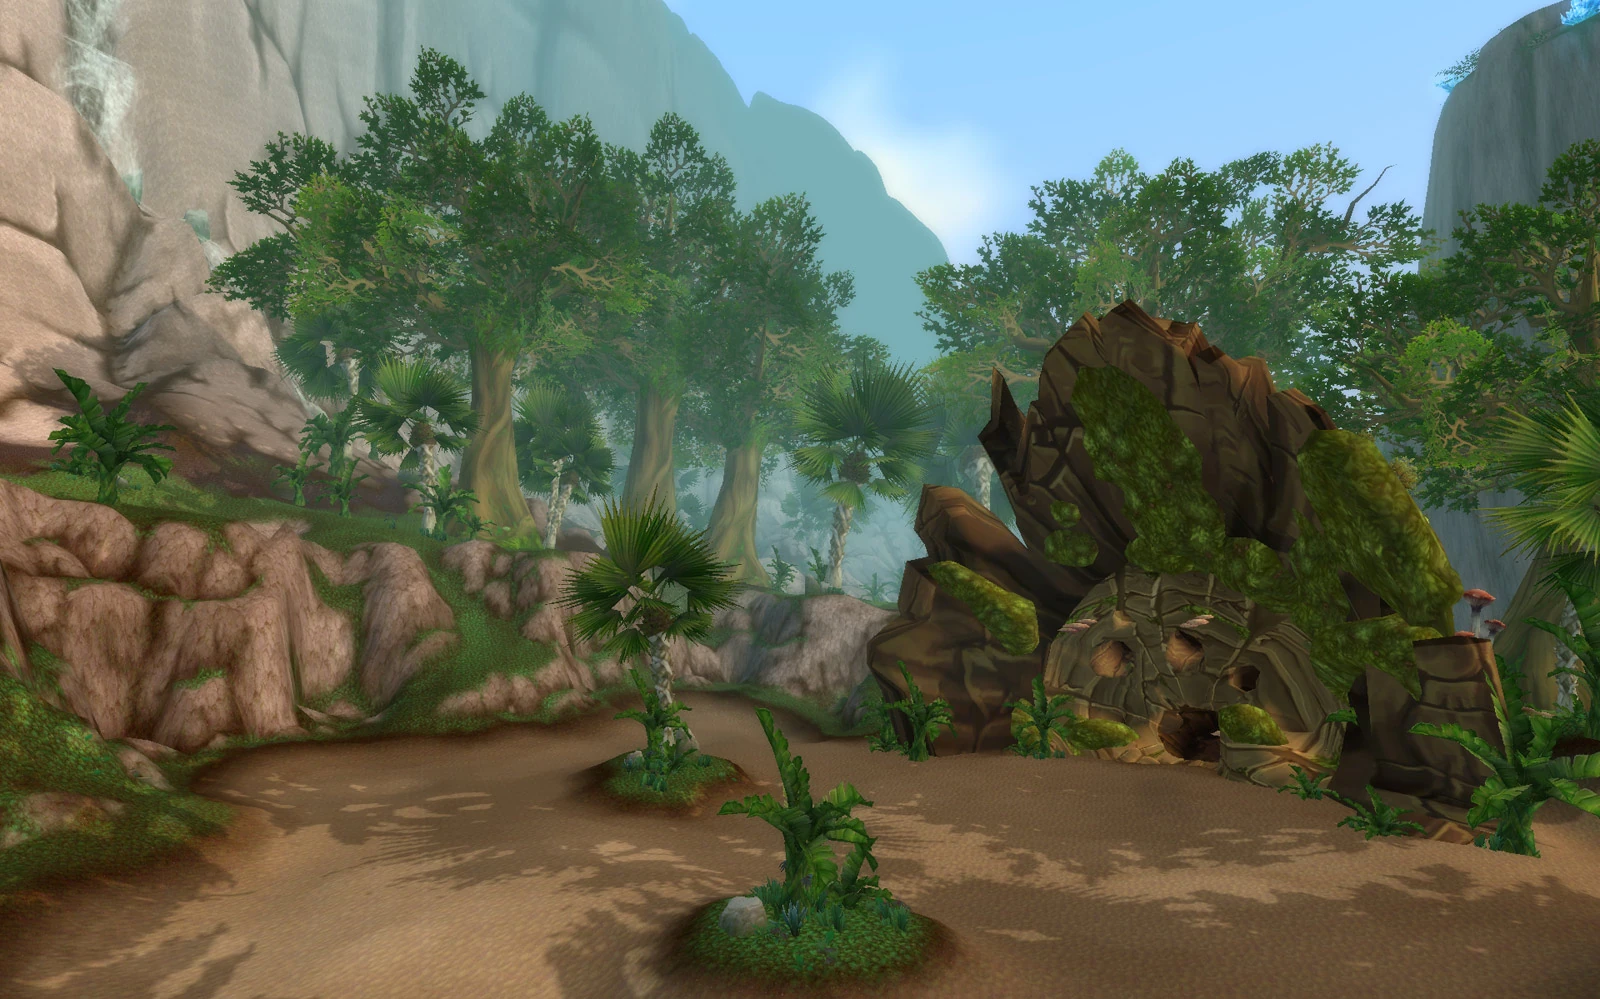
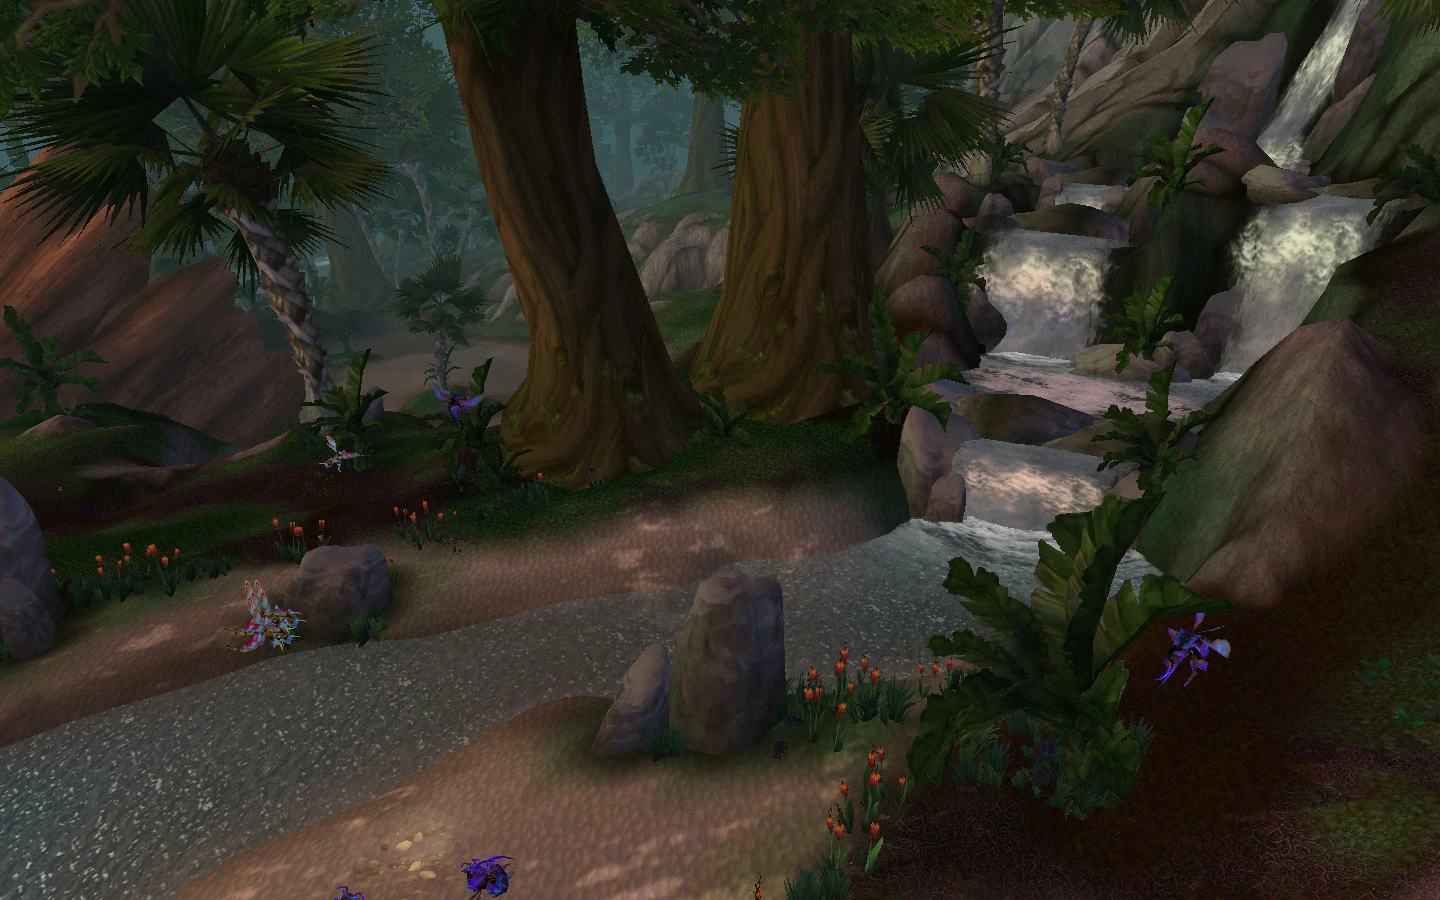
Sholazar Basin is a tropical jungle basin in the midst of Northrend. It is found between Borean Tundra and Icecrown Glacier. This land was one of the few in Northrend where the Scourge did not hold sway - the ancient relics of the titans kept the undead from entering.
In the wake of the Cataclysm, the cliff walls around the basin were breached by quakes, causing the sea's waters to flood the entire region. The natural balance of the basin has been thrown into chaos, causing elementals to run wild. The titan facilities and artifacts of the region have been damaged, causing greater havoc. Freya, Keeper of Life and one of the Titanic Watchers of Ulduar has traveled to the basin in an effort to halt the chaos.
History

Some outer regions of the basin have escaped the flooding.
A high elf scholar that once visited Kaskala believed that the titans used the Sholazar Basin as a testing ground. Some of their experiments, or at least the remains of those experiments, may still exist. Thus, the basin is a potential treasure trove of knowledge and power. Who knows what species the Titans left here, and what notes and tools?
Cataclysm
When Deathwing tore apart the world and brought down the fury of the elements, not even far off Northrend escaped. Sholazar Basin's outer walls were breached by earthquakes, causing the seas to flood the entire region. Only the highest cliffs and the towering pillars escaped the destruction. Shortly after the flood, Freya, one of the Keeper's of Ulduar, arrived with druids of the Cenarion Circle to aid in restoring balance to the region and preserving life.
The last of the Scourge in this area have been eradicated, but the Twilight's Hammer have recently arrived to exploit the relics of the titans that still remain in the region. They are led by the diabolical Dark Master Zorc.
Areas affected:
- The Cataclysm has broken open the sea walls, causing the basin to be flooded.
- Naga, murlocs, and other underwater monsters have invaded the flooded regions of the basin.
- The Wolvar have relocated to cliff-side dwellings, and navigate the flooded basin using rafts.
- Gorlocs have built floating lodges to dwell on. Their war against the Wolvar continues.
- The Avalanche from Icecrown has been cleared away, revealing caverns and tunnels swarming with nerubians.
- Hemet Nesingwary managed to repair his ship before the Cataclysm, and has set up new challenges hunting sea monsters.
- Freya of Ulduar watches over the basin from atop the Suntouched Pillar, alongside the druids of the Cenarion Circle. Archmage Pentarus will send adventurers here via flying machine.
- Freya's Avatar has been ordered by her mistress away from Sholazar to attend to other tasks.
- The five pillars have been connected by bridges. The Twilight's Hammer have seized control of the Mosslight Pillar and the Skyreach Pillar.
- The shattered Lifeblood Pillar is magically rebuilding itself.
Geography
Maps
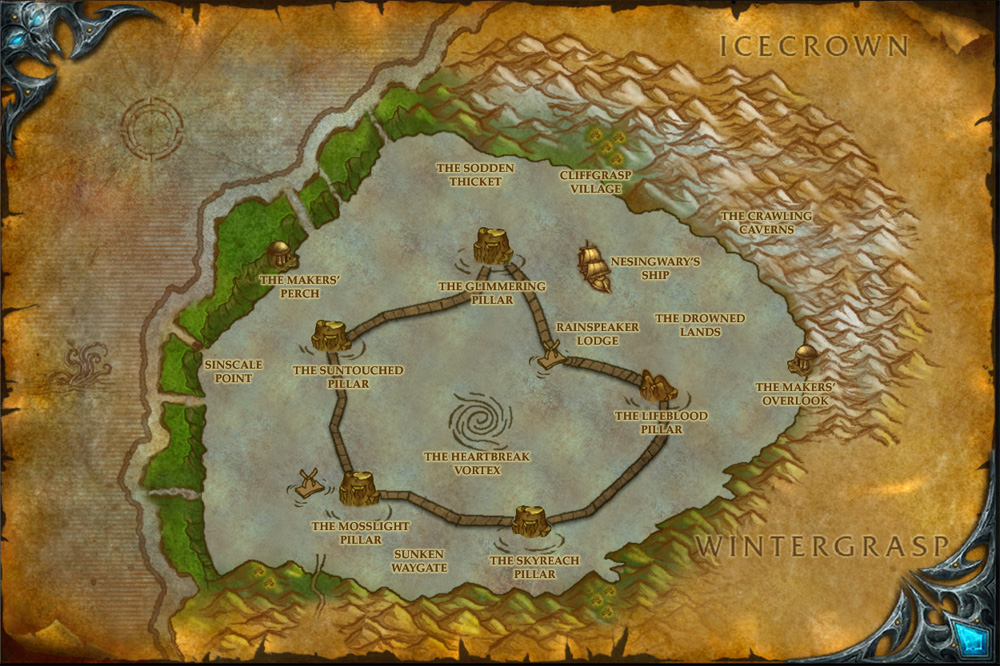

Sholazar Basin, post-Cataclysm.
Quests and Storylines
The battle between the Oracle gorlocs and the Frenzyheart wolvar has continued to rage despite the ravages the Cataclysm has inflicted upon the basin. The Frenzyheart believe that the 'bigmouths' have called down the floods that destroyed their old hunting grounds, while the Oracles blame the 'puppymen' for angering the titans. The Oracles now live on floating lodges they've built, while Wolvar have dens on high cliffs surrounding the basin, and travel across the flood-waters on wooden rafts lashed together to make primitive flotillas. Frenzyheart quests are given out at Cliffgrasp Village and many of them allow players to use rafts to move around quickly. Oracle quests come from Rainspeaker Lodge and enable both ![]() [Sea Legs] and
[Sea Legs] and ![]() [Underwater Breathing] to allow players to navigate the flooded floor of the basin in a manner similar to Vashjir questing.
[Underwater Breathing] to allow players to navigate the flooded floor of the basin in a manner similar to Vashjir questing.
Hemet Nesingwary and his friends managed to repair their damage ship before the Cataclysm breached the sea walls, and now sail around hunting the new underwater wildlife that the flood has brought to the basin. Hemet's underwater hunts will eventually draw him and his crew into conflict with the Sinscale naga who have invaded the flooded basin, especially after Hemet sets his sights on the enormous sharks, hydras, and kraken that they've brought with them.


Zorc seeks to unmake all that the titans created.
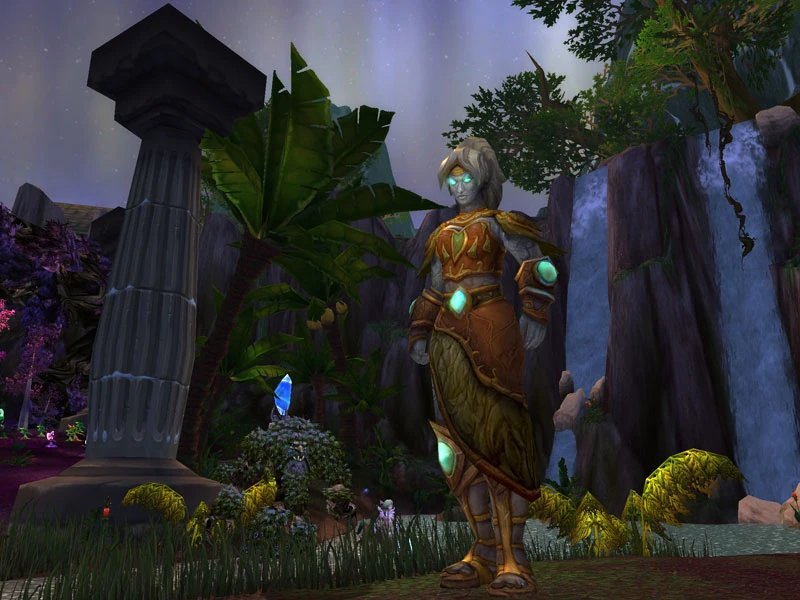
Freya, the Keeper of Life from Ulduar, has traveled to the basin in the wake of the Cataclysm, seeking to restore the ravaged region to its former state. She is joined atop the Suntouched Pillar by druids of the Cenarion Circle, and will enlist the aid of travelers in their efforts to balance the rampaging elements of the basin. Before long, the Cenarion Circle comes into contact with the Twilight's Hammer, who have invaded the basin seeking to usurp the power of the titans. Hammer agents have infiltrated the titan ruins along the cliffs of the basin, and have seized control of several of the great pillars. Cultists are particularly abundant at the once ruined Lifeblood Pillar, which has mysteriously begun to repair itself.
The battle against the Twilight's Hammer will eventually draw both the Frenzyheart and the Oracles into the carnage. Freya and the Cenarion Circle, with the aid of the player, will at last bring about peace between the two factions by showing them the greater foe - Dark Master Zorc, the Twilight's Hammer lieutenant in charge of the forces in Sholazar. The conflict will eventually lead players to the Heartbreak Vortex, a whirlpool above the former ![]() [River's Heart] valley. Beneath the vortex, the land has broken open, and the waters of the basin slowly drain into Azeroth's underworld. Far beneath the basin in a dark, flooded cavern, players will encounter Faceless Ones, Undying Tendrils, and finally Zorc himself. Defeating the maniacal orc with Freya's help will force him to retreat back to Icecrown.
[River's Heart] valley. Beneath the vortex, the land has broken open, and the waters of the basin slowly drain into Azeroth's underworld. Far beneath the basin in a dark, flooded cavern, players will encounter Faceless Ones, Undying Tendrils, and finally Zorc himself. Defeating the maniacal orc with Freya's help will force him to retreat back to Icecrown.
Gallery

The sea walls were shattered in the Cataclysm, flooding the basin.

Dark Master Zorc seeks the power of the titans for the Twilight's Hammer.

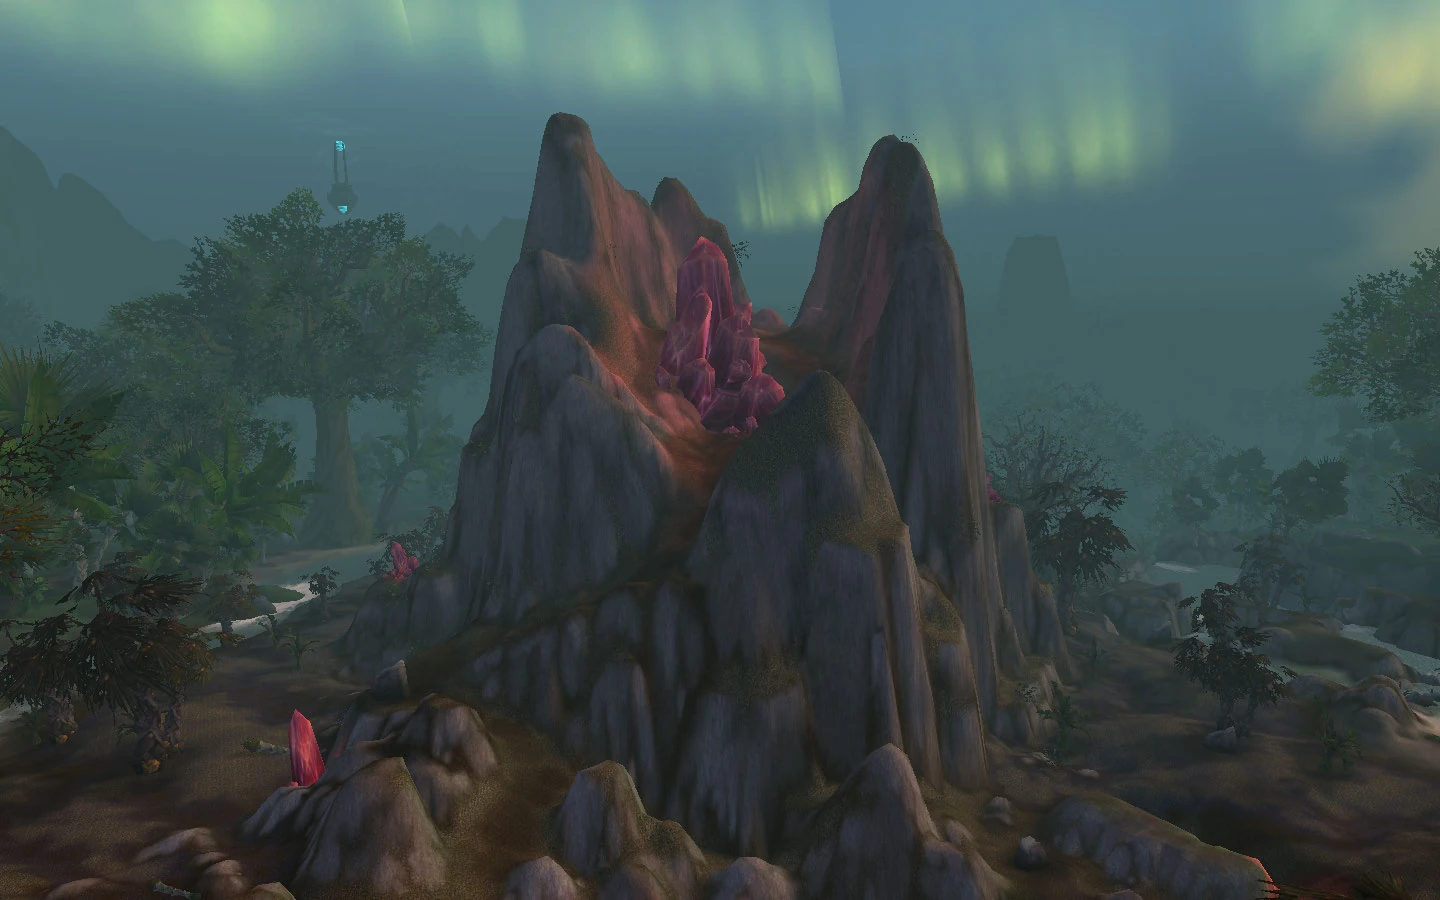
The fragments of the Lifeblood Pillar are magically reassembling themselves Could this be a legacy of the titans?

Freya, the Keeper of Life, has traveled to the Basin to ease the devastation wrought by the Cataclysm.
Many once familiar regions have been reshaped by flooding.
More titan secrets have been uncovered. What is the basin's connection to far off Un'goro Crater?
Hemet isn't about to let the end of the world interrupt his deep diving hunts.
- StormwrightsShelf.jpg
Unleashed by the Cataclysm, the elements of the basin are running wild.

