m (robot Adding: fr:Profondeurs de Brassenoire) |
Killars31069@legacy41551333 (talk | contribs) |
||
| Line 1: | Line 1: | ||
| + | {{Stub/Strategy}} |
||
| − | {{infobox instance |
||
| + | {{npcbox |
||
| − | |name=Blackfathom Deeps |
||
| + | |name = Shannox |
||
| − | |aka=BFD |
||
| + | |image = Shannox.png |
||
| − | |ss=Blackfathom Graphic.jpg |
||
| + | |race = Flamewaker |
||
| − | |caption=Blackfathom Deeps loading graphic |
||
| + | |creature = |
||
| − | |loc=[[The Zoram Strand]], [[Ashenvale]] |
||
| + | |type = Boss |
||
| − | |race={{Dwarf Race}}<br />{{Gnome Race}}<br />{{Human Race}}<br />{{Makrura Race}}<br />{{Murloc Race}}<br />{{Naga Race}}<br />{{Orc Race}}<br />{{Satyr Race}} |
||
| + | |level = ?? |
||
| − | |boss=Aku'mai |
||
| + | |location = [[Firelands]] |
||
| − | |type= |
||
| + | |faction=Combat |
||
| − | |level=20-27 |
||
| + | |health = 24,050,000 (10-man Normal)<br/>114,236,360 (10-man Heroic) |
||
| − | |minlevel=10 |
||
| + | |instance=Firelands |
||
| − | |players=5 (10) |
||
| − | |key= |
||
| − | |bosses= {{Blackfathom Deeps}} |
||
}} |
}} |
||
| + | :"''The ferocious flamewakers of [[Firelands]] are terrifying enough, but Shannox has brought companions to his side in defense of the Firelands. This mighty hunter will require that you find a way to deal with his blazing pets before he burns you to a crisp.<ref>[http://us.battle.net/wow/en/blog/2682944#blog Patch 4.2 Preview: The Firelands]</ref>'' |
||
| + | The flamewakers are among the most feared elemental guardians in the Firelands. Shannox is no exception. Serving as the chief hunter and kennel master of Ragnaros' [[hell hound]]s, Shannox patrols the elemental realm with his two most ferocious beasts: [[#Riplimb|Riplimb]] and [[#Rageface|Rageface]].<ref>[[Encounter Journal]]</ref> |
||
| − | '''Blackfathom Deeps''' is a partially underwater dungeon in northwestern [[Ashenvale]]. It is accessed by a stair-lined shaft that requires one to swim through an underwater entrance. The deeps are comprised of a series of watery caverns leading deep to a temple devoted to the [[Old Gods]]. The [[Twilight's Hammer]] cult runs this shrine, and it has joined forces with local [[naga]] and [[satyr]]s to defend the unholy creature, [[Aku'mai]]. It seems an Old God may be underneath the land.<ref>{{quest|Blackfathom Villainy (Alliance)}}</ref><ref>{{quest|Blackfathom Villainy (Alliance)}}</ref> |
||
| − | == |
+ | ==Abilities== |
| + | *{{abilities|Immolation Trap|Shannox launches a fiery trap at a random player's location. The trap arms after 2 seconds, then detonates when either a player or one of Shannox's pets steps over the trap. Immolation Trap inflicts 75000 Fire damage, 20000 Fire damage every 3 sec., and increases the target's damage taken by 40% for 9 sec.|image=SPELL_FIRE_FLAMESHOCK}} |
||
| − | This series of ruins and caverns was built into the side of a cliff directly south of [[Black Fathom Bay]]. Many dangerous creatures lurk within - including, if tales at the [[Fish Eye Tavern]] are to believed, ghosts of heroes that fell to some nastiness while within the Deeps. Others suggest that this place, once a night elf temple to [[Elune]], is now the headquarters of the vile warlocks, known as the [[Shadow Council]].{{Cite|WRPG|194}} The naga here seem to be searching for something. The Twilight’s Hammer, a foul cult dedicated to the Old Gods, works with the naga in the underground ruins for an unknown purpose.{{Cite|LoM|8}} |
||
| + | *{{abilities|Crystal Prison Trap|Shannox launches a prison trap at a random player's location. The trap arms after 2 seconds, then detonates when either a player or one of Shannox's pets steps over the trap. The Crystal Prison trap encases the target in a block of magma crystal, preventing all movement and any other action. Destroying the crystal prison frees a trapped player.|image=SPELL_FROST_CHAINSOFICE}} |
||
| − | {{wow-dungeons}} |
||
| − | :''Situated along the [[Zoram Strand]] of [[Ashenvale]], Blackfathom Deeps was once a glorious temple dedicated to the night elves' moon-goddess, [[Elune]]. However, the great Sundering shattered the temple - sinking it beneath the waves of the [[Veiled Sea]]. There it remained untouched - until, drawn by its ancient power - the [[naga]] and [[satyr]] emerged to plumb its secrets. Legends hold that the ancient beast, [[Aku'mai]], has taken up residence within the temple's ruins. [[Aku'mai]], a favored pet of the primordial [[Old Gods]], has preyed upon the area ever since. Drawn to Aku'mai's presence, the cult known as the [[Twilight's Hammer]] has also come to bask in the Old Gods' evil presence.'' |
||
| + | *{{abilities|Arcing Slash|Shannox inflicts 125% of normal melee damage in a 120 degree cone up to 10 yards in front of him, and inflicts Jagged Tear on his current target.|image=ABILITY_THROW}} |
||
| − | ==Geography== |
||
| + | **{{abilities|Jagged Tear|Shannox's Arcing Slash leaves a Jagged Tear that inflicts 3000 Physical damage every 3 sec. for 30 sec. This effect stacks.|id=99937|image=ability_gouge}} |
||
| − | ===Maps=== |
||
| − | * A denoted [http://www.worldofwar.net/cartography/instances/blackfathom.php map] at [http://www.worldofwar.net WorldofWar.net]. |
||
| − | * A [http://www.videogamemaps.net/wow/maps/Blackfathom%20Deeps%20-%20Mephea.jpg large map] (1027 kb) from [http://www.videogamemaps.net videogamemaps.net]. |
||
| + | *{{abilities|Hurl Spear|Shannox hurls his spear at a location near Riplimb. When the spear lands it inflicts 120000 Physical damage to all enemies within 3 yards and 50000 Fire damage to all enemies within 50 yards. The spear strike also triggers a cascade of molten eruptions around the impact location, inflicting 76000 Fire damage to enemies caught in an eruption. Riplimb will then break off from combat, fetch the spear, and return it to Shannox.|image=SPELL_NATURE_EARTHBIND}} |
||
| − | ===Sub-regions=== |
||
| − | {| class="darktable" |
||
| − | |- |
||
| − | ||[[Aku'mai's Lair]]|| • ||[[The Drowned Sacellum]]|| • ||[[The Forgotten Pool]]|| • ||[[Moonshrine Ruins]]|| • ||[[Moonshrine Sanctum]]|| • ||[[Pool of Ask'ar|The Pool of Ask'ar]]|| |
||
| − | |} |
||
| + | *{{abilities|Frenzy|When the players defeat Riplimb or Rageface, Shannox enters a frenzy. This increases his Physical damage by 30% and attack speed by 30%. This effects stacks twice.|image=SPELL_SHADOW_UNHOLYFRENZY}} |
||
| − | ==Quest guide== |
||
| − | {| class="darktable" |
||
| − | ! Quest name |
||
| − | ! Quest giver |
||
| − | ! Zone location |
||
| − | |- |
||
| − | !colspan="3"|{{Alliance Icon Small}} Alliance quests |
||
| − | |- |
||
| − | | {{questlong|Alliance|23|Knowledge in the Deeps}} |
||
| − | | {{RaceIcon|Dwarf|Male|Small}}{{NPC|Alliance|Gerrig Bonegrip}} |
||
| − | | [[Forlorn Cavern]], [[Ironforge]] |
||
| − | |- |
||
| − | | {{questlong|Alliance|24|Researching the Corruption}} |
||
| − | | {{RaceIcon|NightElf|Male|Small}}{{NPC|Alliance|Gershala Nightwhisper}} |
||
| − | | [[Auberdine]], [[Darkshore]] |
||
| − | |- |
||
| − | | {{questlong|Alliance|24|In Search of Thaelrid}} |
||
| − | | {{RaceIcon|NightElf|Male|Small}}{{NPC|Neutral|Dawnwatcher Shaedlass}} |
||
| − | | [[Craftsmen's Terrace]], [[Darnassus]] |
||
| − | |- |
||
| − | | {{questlong|Alliance|25|Twilight Falls}} |
||
| − | | {{RaceIcon|NightElf|Male|Small}}{{NPC|Neutral|Argent Guard Manados}} |
||
| − | | [[Craftsmen's Terrace]], [[Darnassus]] |
||
| − | |- |
||
| − | | {{questlong|Alliance|27|Blackfathom Villainy (Alliance)|Blackfathom Villainy}} |
||
| − | | {{RaceIcon|NightElf|Male|Small}}{{NPC|Neutral|Argent Guard Thaelrid}} |
||
| − | | In a cavern in Blackfathom Deeps |
||
| − | |- |
||
| − | !colspan="3"|{{Horde Icon Small}} Horde quests |
||
| − | |- |
||
| − | |- |
||
| − | | {{questlong|Horde|22|The Essence of Aku'Mai}} |
||
| − | | {{RaceIcon|Troll|Male|Small}}{{NPC|Horde|Je'neu Sancrea}} |
||
| − | | [[Zoram'gar Outpost]], [[Ashenvale]] |
||
| − | |- |
||
| − | | {{questlong|Horde|22|Allegiance to the Old Gods}} |
||
| − | | [[Image:INV Misc Note 06.png|20px]]{{loot|Common|Damp Note}}, drop<br />from [[Blackfathom Tide Priestess]] |
||
| − | | Outside the instance |
||
| − | |- |
||
| − | | {{questlong|Horde|26|Allegiance to the Old Gods (2)}} |
||
| − | | {{RaceIcon|Troll|Male|Small}}{{NPC|Horde|Je'neu Sancrea}} |
||
| − | | [[Zoram'gar Outpost]], [[Ashenvale]] |
||
| − | |- |
||
| − | | {{questlong|Horde|27|Amongst the Ruins}} |
||
| − | | {{RaceIcon|Troll|Male|Small}}{{NPC|Horde|Je'neu Sancrea}} |
||
| − | | [[Zoram'gar Outpost]], [[Ashenvale]] |
||
| − | |- |
||
| − | | {{questlong|Horde|27|Blackfathom Villainy (Horde)|Blackfathom Villainy}} |
||
| − | | {{RaceIcon|NightElf|Male|Small}}{{NPC|Neutral|Argent Guard Thaelrid}} |
||
| − | | In a cavern in Blackfathom Deeps |
||
| − | |- |
||
| − | | {{questlong|Horde|30|Baron Aquanis}} |
||
| − | | [[Image:INV Misc Note 06.png|20px]]{{loot|Uncommon|Strange Water Globe}}, drop<br />from [[Baron Aquanis]] |
||
| − | | In Blackfathom Deeps |
||
| − | |- |
||
| − | !colspan="3"|{{Neutral Icon Small}} Class specific quests |
||
| − | |- |
||
| − | |- |
||
| − | | |{{questclass|Neutral|Warlock|20|The Orb of Soran'ruk}} |
||
| − | | {{RaceIcon|Human|Male|Small}}{{NPC|Neutral|Doan Karhan}} |
||
| − | | East of [[Camp Taurajo]], [[the Barrens]] |
||
| − | |- |
||
| − | | | {{questclass|Alliance|Paladin|22|Seeking the Kor Gem}} |
||
| − | | {{RaceIcon|NightElf|Male|Small}}{{NPC|Alliance|Thundris Windweaver}} |
||
| − | | [[Auberdine]], [[Darkshore]] |
||
| − | |- |
||
| − | | | {{questclass|Horde|Paladin|23|The Path of the Adept}} |
||
| − | | {{RaceIcon|BloodElf|Male|Small}}{{NPC|Horde|Knight-Lord Bloodvalor}} |
||
| − | | [[Farstriders' Square]], [[Silvermoon]] |
||
| − | |} |
||
| + | *{{abilities|Magma Rupture|Once Riplimb has been slain, Shannox drives his spear into the ground instead of hurling it. This attack inflicts 50000 Fire damage and increases the Fire damage taken for all players by 40% for 1 min. The spear strike also triggers a cascade of molten eruptions around the impact location, inflicting 80000 Fire damage to enemies caught in an eruption.|image=SPELL_FIRE_VOLCANO}} |
||
| − | ==Walkthrough== |
||
| − | This underwater cove can be tricky to navigate for the first time, but it's a great place to hone your skills and find your role when in a group. |
||
| + | ===Riplimb=== |
||
| − | Level appropriate groups should watch out for two things. The first is that there are many magic casting Naga which, when amassed in numbers, can do a good deal of damage. Always keep a warrior with shield bash on any casting mobs, or any other class that can stun/interrupt like Shamans and Paladins. Also, this is a great dungeon to try out crowd control. Many of the enemies pulled to you will come with friends. In addition, there are invisible Satyr that you cannot see until they have come close enough to aggro you. |
||
| + | Riplimb will attack the target with the most threat. |
||
| + | In Heroic Difficulty Riplimb cannot be permanently slain while his master lives. When his health reaches zero, he will collapse for 30 seconds, and then reanimate at full health to resume fighting. |
||
| − | Caution should be used when combating the murlocs. Once at low health, they run quite fast, often running back towards the other murlocs and the murloc boss Gelihast. Keep a form of snare on these guys. The latter part of the instance includes the Twilight Cultists. These foes come in groups of two or three, but often can include more if you aren't aware of wanderers. The ideal way to avoid an unwanted add is to pull with range, targeting the casters first (which you can get to follow you by cutting the Line of Sight, i.e. turning around a corner), and sheeping, sapping, or off tanking the adds. Also, having the highest level person in your group do the pulling helps, due to their smaller aggro radius. |
||
| + | *{{abilities|Limb Rip|Riplimb savagely bites his current target, inflicting 130% of normal melee damage and inflicting Jagged Tear.|id=99832|image=ability_backstab}} |
||
| − | The 'summoning chamber' with Twilight Lord Kelris includes many other cultists in the room. It is recommended to use the walled off entrance to your advantage, pulling the mobs one by one from the large room until Kelris is alone. After the room is cleared, he is ready to be engaged safely. Once he is defeated, all four candles pieces on the middle altar will need to be lit in order to advance past the large door to the final boss. Right-click these one at a time because a small group of mobs is summoned from the adjacent doors every time you do. Defeat these one at a time to avoid death. |
||
| + | **{{abilities|Jagged Tear|Riplimb's Limb Rip eaves a Jagged Tear that inflicts 3000 Physical damage every 3 sec. for 30 sec. This effect stacks.|id=99937|image=ability_gouge}} |
||
| + | *{{abilities|Frenzied Devotion|Riplimb enters an unstoppable rage if he witnesses Shannox's health reach 30%. This effect increases Riplimb's damage dealt by 400%, attack speed by 200% and movement speed by 100%.|id=100064|image=spell_shadow_unholyfrenzy}} |
||
| − | The final boss is relatively easy if you have a dedicated tank and healer. See walk-through for [[Aku'mai]]. A stylishly hatted dwarf will await you at the end, giving you an option to port to [[Darnassus]]. |
||
| + | *On heroic mode, Frenzied Devotion is replace with Feeding Frenzy: |
||
| + | **{{abilities|Feeding Frenzy|Riplimb's successful melee attacks increase his physical damage dealt by 5% for 20 sec. This effect stacks.|id=100656|type=heroic|image=ability_ghoulfrenzy}} |
||
| − | == |
+ | ===Rageface=== |
| + | Rageface cannot be controlled, and darts about from enemy to enemy, changing targets periodically. |
||
| − | *[[Herbalism|Herbs]] |
||
| − | **[[Bruiseweed]] |
||
| − | **[[Stranglekelp]] |
||
| − | *[[Mining|Ore Veins]] |
||
| − | **[[Tin Vein]] |
||
| + | *{{abilities|Face Rage|Rageface leaps at a random player, stunning and knocking them to the ground. Rageface begins to viciously maul the player, inflicting 8000 Physical damage every 0.5 sec. and the damage dealt increases over time. While Rageface mauls the player, all successful attacks against him will be critical strikes (changed as of 4.2). Rageface will continue the mauling until his target is dead, or he receives a single attack that deals at least 30000 damage.|id=100129|image=ability_creature_poison_01}} |
||
| − | ==Dungeon denizens== |
||
| + | *{{abilities|Frenzied Devotion|Rageface enters an unstoppable rage if he witnesses Shannox's health reach 30%. This effect increases Riplimb's damage dealt by 400%, attack speed by 200% and movement speed by 100%.|id=100064|image=spell_shadow_unholyfrenzy}} |
||
| − | [[Image:BFDbosses.jpg|thumb|Blackfathom Deeps bosses]] |
||
| + | *On heroic mode, Frenzied Devotion is replace with Feeding Frenzy: |
||
| + | **{{abilities|Feeding Frenzy|Rageface's successful melee attacks increase his physical damage dealt by 5% for 20 sec. This effect stacks.|id=100656|type=heroic|image=ability_ghoulfrenzy}} |
||
| + | ==Strategy== |
||
| − | *{{RaceIconExt|Crab|Small}} [[Crab]]s |
||
| + | [[File:Shannox.jpg|thumb]] |
||
| − | *{{RaceIcon|DarkIron|Male|Small}} [[Dark Iron dwarves]] (one, [[Morridune]]) |
||
| + | [[Image:Stub.png|20px]] |
||
| − | *{{RaceIcon|Dwarf|Male|Small}}{{RaceIcon|Dwarf|Female|Small}}[[Dwarves]] |
||
| + | There are three things to worry about during this fight. Traps, Tank debuff stacks, and raid damage. We will briefly go over each mechanic and how to mitigate it. |
||
| − | *{{RaceIcon|Undead|Male|Small}}{{RaceIcon|Undead|Female|Small}}[[Forsaken]] |
||
| − | *{{RaceIcon|Gnome|Male|Small}}{{RaceIcon|Gnome|Female|Small}}[[Gnome]]s |
||
| − | *{{RaceIcon|Human|Male|Small}}{{RaceIcon|Human|Female|Small}}[[Human]]s |
||
| − | *{{RaceIconExt|Hydra|Small}} [[Hydra]]s (one, [[Aku'mai]]) |
||
| − | *{{RaceIconExt|Makrura|Small}} [[Makrura]] |
||
| − | *{{RaceIconExt|Murloc|Small}} [[Murloc]]s |
||
| − | *{{RaceIcon|Naga|Male|Small}}{{RaceIcon|Naga|Female|Small}}[[Naga]] |
||
| − | *{{RaceIcon|NightElf|Male|Small}} [[Night elves]] (one, [[Argent Guard Thaelrid]]) |
||
| − | *{{RaceIcon|Orc|Male|Small}}{{RaceIcon|Orc|Female|Small}}[[Orc]]s |
||
| − | *{{RaceIconExt|Satyr|Small}} [[Satyr]] |
||
| − | *{{RaceIcon|Tauren|Male|Small}}{{RaceIcon|Tauren|Female|Small}}[[Tauren]] |
||
| − | *{{RaceIconExt|Threshadon|Small}} [[Threshadon]]s |
||
| − | *{{RaceIconExt|Turtle|Small}} [[Turtle]]s |
||
| − | *{{RaceIcon|Troll|Male|Small}}{{RaceIcon|Troll|Female|Small}}[[Troll]]s |
||
| − | *{{RaceIconExt|Water|Small}} [[Water Elemental]]s |
||
| + | |||
| − | ===Encounters=== |
||
| + | ===Traps=== |
||
| − | {| class="darktable" |
||
| + | Shannox throws traps around. Don't walk over traps. If a doggie is chasing you, walk the dog over the trap. Crystalline traps have a dark red crystal in the center. Immolation traps have the familiar flame dancing in the center of the trap. The Riplimb tank must develop the ability to distinguish the two. |
||
| − | |- |
||
| + | |||
| − | ! Bosses || Monsters |
||
| + | When a dog runs over any trap it gains a {{abilities|Wary|id=101670}} buff which prevents it from being affected by other traps for a while. Riplimb often gains Wary once he completes a spear fetch (because there are tons of immolation traps lying around). Also, a few seconds after Shannox performs Hurl Spear, Riplimb will gain {{abilities|Dogged Determination|id=101111}} that prevents him from being immobilized or slowed below 65% of his normal speed. This small window is when Riplimb can be kited (preferably into a Crystal Trap) to increase Shannox' spear downtime. |
||
| − | |- valign=top |
||
| + | |||
| − | | |
||
| + | ===Tank Debuffs=== |
||
| − | * '''Drowned Sacellum |
||
| + | Shannox and Riplimb can be tanked but not taunted. You'll want one tank on each of them and no tank on rageface. Both Shannox and Riplimb place a stacking debuff on the tanks that must time off to be cleared. Riplimb will place the debuff when he attacks, Shannox will only place his debuff while he holds his spear. Keep Shannox and Riplimb a good 20-30 yards apart, but not too far that Shannox gets separation anxiety. |
||
| − | | |
||
| + | |||
| − | * {{NPC||Blindlight Murloc}} |
||
| + | Shannox will throw his spear to Riplimb. The spear will explode in fire. Riplimb will then pick up the spear and bring it back to Shannox. It is during this "fetch it boy" stage that both tanks can clear their debuffs. Riplimb can be slowed. Shannox can be kited for more time. Riplimb can be kited into a crystal trap but it must be done quickly. If the tank doesn't kite Riplimb into a trap before Riplimb begins his fetch cycle, he becomes immune to traps. It is not required to cleanse the buff every time he throws the spear, but it makes the fight much easier on the healers. |
||
| − | * {{NPC||Murkshallow Snapclaw}} |
||
| + | |||
| − | * {{NPC||Skittering Crustacean}} |
||
| + | Getting the Jagged Tear debuff to fall off requires a combination of |
||
| − | |- valign=top class="alt" |
||
| + | * luck regarding how much time is left on the debuff when Shannox hurls his spear |
||
| − | | |
||
| + | *distance between Riplimb and Shannox |
||
| − | * '''Pool of As'kar |
||
| + | *distance between Riplimb and the spear (which can be increased by kiting Riplimb after the spear lands) |
||
| − | **{{RaceIconExt|Turtle|Small}} {{NPC||Ghamoo-ra}} |
||
| + | * and time Riplimb is stuck in a crystal trap. |
||
| − | | |
||
| + | If one of these time-eaters is missing or too small, the other factors must be increased (tank Riplimb farther away, kite him away from the spear impact zone). |
||
| − | * {{NPC||Aku'mai Fisher}} |
||
| + | |||
| − | * {{NPC||Blackfathom Myrmidon}} |
||
| + | ===Raid Damage=== |
||
| − | * {{NPC||Blackfathom Sea Witch}} |
||
| + | During this fight your raid will take damage from Rageface. Both placing immolation traps on him (thus allowing easier stopping of face rage) and placing him in crystalline traps will reduce the sporadic raid damage. Shannox cleaves and traps can wipe you if you get hit by them. |
||
| − | * {{NPC||Snapping Crustacean}} |
||
| + | |||
| − | |- valign=top |
||
| + | ===Kill Order=== |
||
| − | | |
||
| + | I have heard people have success with multiple kill orders. Rageface caused the most problems for us and so the kill order we took is as follows: |
||
| − | * '''Pool of As'kar - Side Cavern |
||
| + | Kill Rageface right off the bat. |
||
| − | **{{RaceIconExt|Naga_Female|Small}} {{NPC||Lady Sarevess}} |
||
| + | Kill Riplimb with Shannox down near 30% but kill Riplimb before he hits 30% |
||
| − | | |
||
| + | Kill Shannox |
||
| − | * {{NPC||Blackfathom Myrmidon}} |
||
| + | |||
| − | * {{NPC||Blackfathom Sea Witch}} |
||
| + | |||
| − | |- valign=top class="alt" |
||
| + | ''Alternative Strategy'' |
||
| − | | |
||
| + | There have been reports of tanks that can ride each others agro so well that they effectively tank swap both Shannox/Riplimb. While this strat has proven successfull for some, it greatly increases the amount of damage taken to the tanks (Dog doesn't have a long "fetch it boy" phase) and complicates an easy fight. |
||
| − | * '''Tunnels |
||
| + | |||
| − | **{{RaceIconExt|Human_Male|Small}} {{NPC||Lorgus Jett}} |
||
| + | ===Alternate Kill Order=== |
||
| − | | |
||
| + | If your raid has issues with tank death once Rageface dies, often due to Immolation traps hitting the tank, it is possible to alter the order slightly. Burn Rageface to about 30%, then move your melee to Shannox and your ranged to Riplimb apart from a couple heavy-hitters, who stay on Rageface to break Face Rage. Arcane mages are a very good option here, with Marksman hunters being a decent backup. Once Riplimb and Rageface are both under 10% and Shannox is close to 30%, both dogs are killed off in quick succession and Shannox is then burned through the remainder of his health. |
||
| − | * {{NPC||Blackfathom Myrmidon}} |
||
| + | |||
| − | * {{NPC||Blackfathom Sea Witch}} |
||
| + | This allows all healers to move from other targets to the Shannox tank at the same time, simplifying the healing. However, this does increase the risk of deaths to Face Rage if the assigned dps are out of range or otherwise unable to act. Note that the exact percent health Rageface should be left at, as well as which dps go where, depends greatly on both your raid composition and the performance of all dps. |
||
| − | * {{NPC||Fallenroot Hellcaller}} |
||
| − | * {{NPC||Fallenroot Shadowstalker}} |
||
| − | * {{NPC||Twilight Acolyte}} |
||
| − | * {{NPC||Twilight Reaver}} |
||
| − | |- valign=top |
||
| − | | |
||
| − | * '''Shrine of Gelihast |
||
| − | **{{RaceIconExt|Murloc|Small}} {{NPC||Gelihast}} |
||
| − | | |
||
| − | * {{NPC||Blindlight Muckdweller}} |
||
| − | * {{NPC||Blindlight Oracle}} |
||
| − | |- valign=top class="alt" |
||
| − | | |
||
| − | * '''Moonshrine Ruins |
||
| − | **{{RaceIconExt|Water|Small}} {{NPC||Baron Aquanis}} |
||
| − | | |
||
| − | * {{NPC||Aqua Guardian}} |
||
| − | * {{NPC||Barbed Crustacean}} |
||
| − | * {{NPC||Deep Pool Threshfin}} |
||
| − | * {{NPC||Twilight Acolyte}} |
||
| − | * {{NPC||Twilight Aquamancer}} |
||
| − | * {{NPC||Twilight Loreseeker}} |
||
| − | * {{NPC||Twilight Reaver}} |
||
| − | |- valign=top |
||
| − | | |
||
| − | * '''Forgotten Pool |
||
| − | **{{RaceIconExt|Threshadon|Small}} {{NPC||Old Serra'kis}} |
||
| − | | |
||
| − | * {{NPC||Deep Pool Threshfin}} |
||
| − | |- valign=top class="alt" |
||
| − | | |
||
| − | * '''Moonshrine Sanctum |
||
| − | **{{RaceIconExt|Orc_Male|Small}} {{NPC||Twilight Lord Kelris}} |
||
| − | | |
||
| − | * {{NPC||Aku'mai Servant}} |
||
| − | * {{NPC||Aku'mai Snapjaw}} |
||
| − | * {{NPC||Barbed Crustacean}} |
||
| − | * {{NPC||Murkshallow Softshell}} |
||
| − | * {{NPC||Twilight Elementalist}} |
||
| − | * {{NPC||Twilight Shadowmage}} |
||
| − | * {{NPC||Voidwalker Minion}} |
||
| − | |- valign=top |
||
| − | | |
||
| − | * '''Aku'mai's Lair |
||
| − | **{{RaceIconExt|Hydra|Small}} {{NPC||Aku'mai}} |
||
| − | | |
||
| − | * {{NPC||Aku'mai Snapjaw}} |
||
| − | |- valign=top class="alt" |
||
| − | |} |
||
==Loot== |
==Loot== |
||
| + | {{lootbox|Normal Mode |
||
| − | See [[Blackfathom Deeps loot]]. |
||
| + | |Skullstealer Greataxe |
||
| + | |Coalwalker Sandals |
||
| + | |Feeding Frenzy |
||
| + | |Crystal Prison Band |
||
| + | |Gloves of Dissolving Smoke |
||
| + | |Flickering Shoulderpads |
||
| + | |Treads of Implicit Obedience |
||
| + | |Scalp of the Bandit Prince |
||
| + | |Necklace of Fetishes |
||
| + | |Goblet of Anger |
||
| + | |Legplates of Absolute Control |
||
| + | |Legplates of Frenzied Devotion |
||
| + | |Uncrushable Belt of Fury |
||
| + | |Bracers of the Dread Hunter |
||
| + | }} |
||
| + | {{lootbox|Heroic Mode |
||
| − | ==Notes == |
||
| + | |Skullstealer Greataxe (heroic) |
||
| − | * Also known as: BFD (not to be confused with BRD, which is [[Blackrock Depths]].) |
||
| + | |Coalwalker Sandals (heroic) |
||
| − | ** Sometimes misidentified as Blackfathom ''Depths''. |
||
| + | |Feeding Frenzy (heroic) |
||
| − | * Found in: Ashenvale Forest, Northwest corner (The [[Zoram Strand]]) |
||
| + | |Crystal Prison Band (heroic) |
||
| − | * Enemy Level Range: |
||
| + | |Gloves of Dissolving Smoke (heroic) |
||
| − | ** Outside Instance: 20-21 |
||
| + | |Flickering Shoulderpads (heroic) |
||
| − | ** Inside Instance: 22-24 (Elite) |
||
| + | |Treads of Implicit Obedience (heroic) |
||
| − | * Gain entrance at level: 10 |
||
| + | |Scalp of the Bandit Prince (heroic) |
||
| − | * 10 Player Limit (However quests can only be completed with 5 - which is how it is most often tackled) |
||
| + | |Necklace of Fetishes (heroic) |
||
| + | |Goblet of Anger (heroic) |
||
| + | |Legplates of Absolute Control (heroic) |
||
| + | |Legplates of Frenzied Devotion (heroic) |
||
| + | |Uncrushable Belt of Fury (heroic) |
||
| + | |Bracers of the Dread Hunter (heroic) |
||
| + | |Leggings of the Fiery Conqueror |
||
| + | |Leggings of the Fiery Protector |
||
| + | |Leggings of the Fiery Vanquisher |
||
| + | |Crystallized Firestone |
||
| + | }} |
||
| + | |||
| + | ==Quotes== |
||
| + | ;Intro |
||
| + | *{{text|yell|Yes... I smell them too, Riplimb. Outsiders encroach on the Firelord's private grounds. Find their trail, find them for me, that I may dispense punishment!}} |
||
| + | |||
| + | ;Aggro |
||
| + | *{{text|yell|Aha! The interlopers... Kill them! EAT THEM!}} |
||
| + | |||
| + | ;Abilities |
||
| + | *{{text|yell|Now you BURN!!}} |
||
| + | *{{text|yell|Twist in flames, interlopers!}} |
||
| + | *{{text|yell|KILL!}} |
||
| + | *{{text|yell|You are marked for death! Go! FLEE, little one!}} |
||
| + | *{{text|yell|You're being hunted!}} |
||
| + | *{{text|yell|Go for the throat!}} |
||
| + | *{{text|yell|Time to run... Shannox comes!}} |
||
| + | *{{text|yell|The realm of fire will consume you!}} |
||
| + | *{{text|yell|Tear them down!}} |
||
| + | *{{text|yell|Sic 'em!}} |
||
| + | *{{text|yell|Fetch your supper!}} |
||
| + | |||
| + | ;Killing a player |
||
| + | *{{text|yell|Yes... oh yes!}} |
||
| + | *{{text|yell|The Firelord will be most pleased!}} |
||
| + | *{{text|yell|Now you stay dead!}} |
||
| + | *{{text|yell|Dog food!}} |
||
| + | |||
| + | ;Disengage |
||
| + | *{{text|yell|Step off!}} |
||
| + | *{{text|yell|Back! Stay back!}} |
||
| + | *{{text|yell|Get away from me, outsiders!}} |
||
| + | *{{text|yell|Back, filth!}} |
||
| + | |||
| + | ;Riplimb dies |
||
| + | *{{text|yell|Riplimb! No! NO! Oh, you terrible little beasts! HOW COULD YOU?!}} |
||
| + | |||
| + | ;Rageface dies |
||
| + | *{{text|yell|You murderers! Why... why would you kill such a noble animal?!}} |
||
| + | |||
| + | ;Death |
||
| + | *{{text|yell|The pain... Lord of fire, it hurts...}} |
||
| + | |||
| + | ==Videos== |
||
| + | |||
| + | ===10-man Heroic=== |
||
| + | {{Youtubelink|X1yuff6BCqA|desc=[http://www.vagrantcorps.com/ Vagrant Corps] - 1080p}} |
||
| + | |||
| + | ===10-man Normal=== |
||
| + | {{Youtubelink|6RFWm6EXN6M|desc=[http://www.vagrantcorps.com/ Vagrant Corps] - 1080p}} |
||
| + | {{Youtubelink|6hlJwec_ihU|desc= Cause and Effect - on screen guide, low in game sound, voice chat, 1080p HD}} |
||
| + | |||
| + | ===25-man Heroic=== |
||
| + | {{Youtubelink|uT1xrga58s|desc=[http://www.Learntoraid.com/ Learntoraid] Heroic 25 Strategy Guide}} |
||
| + | |||
| + | ===25-man Normal=== |
||
| + | {{Youtubelink|8IwVNAnXqs0|desc=[http://www.Learntoraid.com/ Learntoraid] Norma 25 Guide}} |
||
| + | {{Youtubelink|DGJGNtN6A8c&lc|desc= <Aeon> Turalyon U.S (1080p HD)}} |
||
| + | {{Youtubelink|pQFmLZH9D88|desc=LoD, 25 man strategic guide (HD)}} |
||
| + | {{Youtubelink|HYRg_BMzup8|desc=TankSpot}} |
||
| + | {{Youtubelink|Eyky59Ght4o|desc=Bless the Martyr 25 man (HD)}} |
||
==References== |
==References== |
||
| − | {{ |
+ | {{Reflist}} |
| + | |||
| + | ==Patches and hotfixes== |
||
| + | *{{Hotfix|date=2011-07-14|bluenote= |
||
| + | **Successful attacks on Rageface will now always be critical strikes while he is channeling Face Rage. |
||
| + | **Players on the legendary quest [[Quest:Delegation]] should now be able to get the Dull Emberstone Focus charge off of Shannox’s spear more easily, so long as it’s placed within 50 yards of the spear.|link=http://us.battle.net/wow/en/blog/3019413}} |
||
| + | *{{Hotfix|date=2011-07-06|bluenote= |
||
| + | **Shannox will now rotate when appropriate instead of moving to get in range of his target while being tanked. |
||
| + | **Shannox will always use Hurl Spear after a raid wipes, even if Riplimb collapsed just prior to the group wiping.|link=http://us.battle.net/wow/en/blog/3019413}} |
||
| + | *{{hotfix|date=2011-06-29|bluenote= |
||
| + | ** Rageface’s Face Rage is now slightly less rageful, as the increase of the rate of damage per tick has been reduced. |
||
| + | ** Creatures linked to Shannox will now respawn every 4 hours until he is killed, up from 2 hours.|link=http://us.battle.net/wow/en/blog/3019413}} |
||
| + | *{{Patch 4.2.0|note=Added.}} |
||
==External links== |
==External links== |
||
| − | <!-- Read http://www. |
+ | <!-- Read http://www.wowpedia.org/Wowpedia:External_links before posting your links here. |
Links that do not conform to the rules will be DELETED. |
Links that do not conform to the rules will be DELETED. |
||
Repeat violations may result in a BAN. |
Repeat violations may result in a BAN. |
||
Have a nice day. :) --> |
Have a nice day. :) --> |
||
| − | {{ |
+ | {{elinks-NPC|53691}} |
| + | {{elink|icon=L2R|site=LearnToRaid.com|link=http://www.learntoraid.com/2011/07/11/shannox-video-strategy-guide-25-heroic/|desc=Shannox Video Strategy Guide}} |
||
| + | {{elink|icon=icyveinscom|site=Icy Veins|link=http://www.icy-veins.com/shannox-detailed-strategy|desc=Comprehensive Shannox strategy guide (includes perspective guides for tanks, healers, and DPS)}} |
||
| + | {{elink|icon=25man|site=25man.com|link=http://25man.com/firelands/shannox|desc=Shannox Tactics & Strategy Guide}} |
||
| − | {{Blackfathom Deeps Subzones}} |
||
| − | {{Dungeons}} |
||
| − | [[Category:Instances]] |
||
| − | [[Category:Caves]] |
||
| − | [[Category:Blackfathom Deeps| ]] |
||
| − | [[Category:Old Gods]] |
||
| + | [[Category:Flamewakers]] |
||
| − | [[fr:Profondeurs de Brassenoire]] |
||
| + | [[Category:Bosses]] |
||
| + | [[Category:Firelands mobs]] |
||
Revision as of 20:42, 20 July 2011
 | |
| Race | Flamewaker |
| Level | ?? Boss |
| Location | Firelands |
- "The ferocious flamewakers of Firelands are terrifying enough, but Shannox has brought companions to his side in defense of the Firelands. This mighty hunter will require that you find a way to deal with his blazing pets before he burns you to a crisp.[1]
The flamewakers are among the most feared elemental guardians in the Firelands. Shannox is no exception. Serving as the chief hunter and kennel master of Ragnaros' hell hounds, Shannox patrols the elemental realm with his two most ferocious beasts: Riplimb and Rageface.[2]
Abilities
 Immolation Trap — Shannox launches a fiery trap at a random player's location. The trap arms after 2 seconds, then detonates when either a player or one of Shannox's pets steps over the trap. Immolation Trap inflicts 75000 Fire damage, 20000 Fire damage every 3 sec., and increases the target's damage taken by 40% for 9 sec.
- Crystal Prison Trap — Shannox launches a prison trap at a random player's location. The trap arms after 2 seconds, then detonates when either a player or one of Shannox's pets steps over the trap. The Crystal Prison trap encases the target in a block of magma crystal, preventing all movement and any other action. Destroying the crystal prison frees a trapped player.
- Arcing Slash — Shannox inflicts 125% of normal melee damage in a 120 degree cone up to 10 yards in front of him, and inflicts Jagged Tear on his current target.
- Jagged Tear — Shannox's Arcing Slash leaves a Jagged Tear that inflicts 3000 Physical damage every 3 sec. for 30 sec. This effect stacks.
- Hurl Spear — Shannox hurls his spear at a location near Riplimb. When the spear lands it inflicts 120000 Physical damage to all enemies within 3 yards and 50000 Fire damage to all enemies within 50 yards. The spear strike also triggers a cascade of molten eruptions around the impact location, inflicting 76000 Fire damage to enemies caught in an eruption. Riplimb will then break off from combat, fetch the spear, and return it to Shannox.
- Frenzy — When the players defeat Riplimb or Rageface, Shannox enters a frenzy. This increases his Physical damage by 30% and attack speed by 30%. This effects stacks twice.
- Magma Rupture — Once Riplimb has been slain, Shannox drives his spear into the ground instead of hurling it. This attack inflicts 50000 Fire damage and increases the Fire damage taken for all players by 40% for 1 min. The spear strike also triggers a cascade of molten eruptions around the impact location, inflicting 80000 Fire damage to enemies caught in an eruption.
Riplimb
Riplimb will attack the target with the most threat.
In Heroic Difficulty Riplimb cannot be permanently slain while his master lives. When his health reaches zero, he will collapse for 30 seconds, and then reanimate at full health to resume fighting.
- Limb Rip — Riplimb savagely bites his current target, inflicting 130% of normal melee damage and inflicting Jagged Tear.
- Jagged Tear — Riplimb's Limb Rip eaves a Jagged Tear that inflicts 3000 Physical damage every 3 sec. for 30 sec. This effect stacks.
- Frenzied Devotion — Riplimb enters an unstoppable rage if he witnesses Shannox's health reach 30%. This effect increases Riplimb's damage dealt by 400%, attack speed by 200% and movement speed by 100%.
- On heroic mode, Frenzied Devotion is replace with Feeding Frenzy:
- Feeding Frenzy — Riplimb's successful melee attacks increase his physical damage dealt by 5% for 20 sec. This effect stacks.
Rageface
Rageface cannot be controlled, and darts about from enemy to enemy, changing targets periodically.
- Face Rage — Rageface leaps at a random player, stunning and knocking them to the ground. Rageface begins to viciously maul the player, inflicting 8000 Physical damage every 0.5 sec. and the damage dealt increases over time. While Rageface mauls the player, all successful attacks against him will be critical strikes (changed as of 4.2). Rageface will continue the mauling until his target is dead, or he receives a single attack that deals at least 30000 damage.
- Frenzied Devotion — Rageface enters an unstoppable rage if he witnesses Shannox's health reach 30%. This effect increases Riplimb's damage dealt by 400%, attack speed by 200% and movement speed by 100%.
- On heroic mode, Frenzied Devotion is replace with Feeding Frenzy:
- Feeding Frenzy — Rageface's successful melee attacks increase his physical damage dealt by 5% for 20 sec. This effect stacks.
Strategy

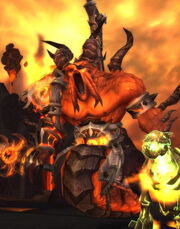
![]() There are three things to worry about during this fight. Traps, Tank debuff stacks, and raid damage. We will briefly go over each mechanic and how to mitigate it.
There are three things to worry about during this fight. Traps, Tank debuff stacks, and raid damage. We will briefly go over each mechanic and how to mitigate it.
Traps
Shannox throws traps around. Don't walk over traps. If a doggie is chasing you, walk the dog over the trap. Crystalline traps have a dark red crystal in the center. Immolation traps have the familiar flame dancing in the center of the trap. The Riplimb tank must develop the ability to distinguish the two.
When a dog runs over any trap it gains a Wary buff which prevents it from being affected by other traps for a while. Riplimb often gains Wary once he completes a spear fetch (because there are tons of immolation traps lying around). Also, a few seconds after Shannox performs Hurl Spear, Riplimb will gain Dogged Determination that prevents him from being immobilized or slowed below 65% of his normal speed. This small window is when Riplimb can be kited (preferably into a Crystal Trap) to increase Shannox' spear downtime.
Tank Debuffs
Shannox and Riplimb can be tanked but not taunted. You'll want one tank on each of them and no tank on rageface. Both Shannox and Riplimb place a stacking debuff on the tanks that must time off to be cleared. Riplimb will place the debuff when he attacks, Shannox will only place his debuff while he holds his spear. Keep Shannox and Riplimb a good 20-30 yards apart, but not too far that Shannox gets separation anxiety.
Shannox will throw his spear to Riplimb. The spear will explode in fire. Riplimb will then pick up the spear and bring it back to Shannox. It is during this "fetch it boy" stage that both tanks can clear their debuffs. Riplimb can be slowed. Shannox can be kited for more time. Riplimb can be kited into a crystal trap but it must be done quickly. If the tank doesn't kite Riplimb into a trap before Riplimb begins his fetch cycle, he becomes immune to traps. It is not required to cleanse the buff every time he throws the spear, but it makes the fight much easier on the healers.
Getting the Jagged Tear debuff to fall off requires a combination of
- luck regarding how much time is left on the debuff when Shannox hurls his spear
- distance between Riplimb and Shannox
- distance between Riplimb and the spear (which can be increased by kiting Riplimb after the spear lands)
- and time Riplimb is stuck in a crystal trap.
If one of these time-eaters is missing or too small, the other factors must be increased (tank Riplimb farther away, kite him away from the spear impact zone).
Raid Damage
During this fight your raid will take damage from Rageface. Both placing immolation traps on him (thus allowing easier stopping of face rage) and placing him in crystalline traps will reduce the sporadic raid damage. Shannox cleaves and traps can wipe you if you get hit by them.
Kill Order
I have heard people have success with multiple kill orders. Rageface caused the most problems for us and so the kill order we took is as follows: Kill Rageface right off the bat. Kill Riplimb with Shannox down near 30% but kill Riplimb before he hits 30% Kill Shannox
Alternative Strategy
There have been reports of tanks that can ride each others agro so well that they effectively tank swap both Shannox/Riplimb. While this strat has proven successfull for some, it greatly increases the amount of damage taken to the tanks (Dog doesn't have a long "fetch it boy" phase) and complicates an easy fight.
Alternate Kill Order
If your raid has issues with tank death once Rageface dies, often due to Immolation traps hitting the tank, it is possible to alter the order slightly. Burn Rageface to about 30%, then move your melee to Shannox and your ranged to Riplimb apart from a couple heavy-hitters, who stay on Rageface to break Face Rage. Arcane mages are a very good option here, with Marksman hunters being a decent backup. Once Riplimb and Rageface are both under 10% and Shannox is close to 30%, both dogs are killed off in quick succession and Shannox is then burned through the remainder of his health.
This allows all healers to move from other targets to the Shannox tank at the same time, simplifying the healing. However, this does increase the risk of deaths to Face Rage if the assigned dps are out of range or otherwise unable to act. Note that the exact percent health Rageface should be left at, as well as which dps go where, depends greatly on both your raid composition and the performance of all dps.
Loot
|
Quotes
- Intro
- Yes... I smell them too, Riplimb. Outsiders encroach on the Firelord's private grounds. Find their trail, find them for me, that I may dispense punishment!
- Aggro
- Aha! The interlopers... Kill them! EAT THEM!
- Abilities
- Now you BURN!!
- Twist in flames, interlopers!
- KILL!
- You are marked for death! Go! FLEE, little one!
- You're being hunted!
- Go for the throat!
- Time to run... Shannox comes!
- The realm of fire will consume you!
- Tear them down!
- Sic 'em!
- Fetch your supper!
- Killing a player
- Yes... oh yes!
- The Firelord will be most pleased!
- Now you stay dead!
- Dog food!
- Disengage
- Step off!
- Back! Stay back!
- Get away from me, outsiders!
- Back, filth!
- Riplimb dies
- Riplimb! No! NO! Oh, you terrible little beasts! HOW COULD YOU?!
- Rageface dies
- You murderers! Why... why would you kill such a noble animal?!
- Death
- The pain... Lord of fire, it hurts...
Videos
10-man Heroic
Template:Youtubelink
10-man Normal
Template:Youtubelink Template:Youtubelink
25-man Heroic
Template:Youtubelink
25-man Normal
Template:Youtubelink Template:Youtubelink Template:Youtubelink Template:Youtubelink Template:Youtubelink
References
Patches and hotfixes
- Hotfix (2011-07-14):
- Successful attacks on Rageface will now always be critical strikes while he is channeling Face Rage.
- Players on the legendary quest Quest:Delegation should now be able to get the Dull Emberstone Focus charge off of Shannox’s spear more easily, so long as it’s placed within 50 yards of the spear.
- Hotfix (2011-07-06):
- Shannox will now rotate when appropriate instead of moving to get in range of his target while being tanked.
- Shannox will always use Hurl Spear after a raid wipes, even if Riplimb collapsed just prior to the group wiping.
- Hotfix (2011-06-29):
- Rageface’s Face Rage is now slightly less rageful, as the increase of the rate of damage per tick has been reduced.
- Creatures linked to Shannox will now respawn every 4 hours until he is killed, up from 2 hours.
- Patch 4.2.0 (2011-06-28): Added.