 | |||||||
| Race | Unknown | ||||||
| Level | ?? Elite (Boss) | ||||||
| Location | Shrine of Lost Souls, Black Temple | ||||||
| |||||||
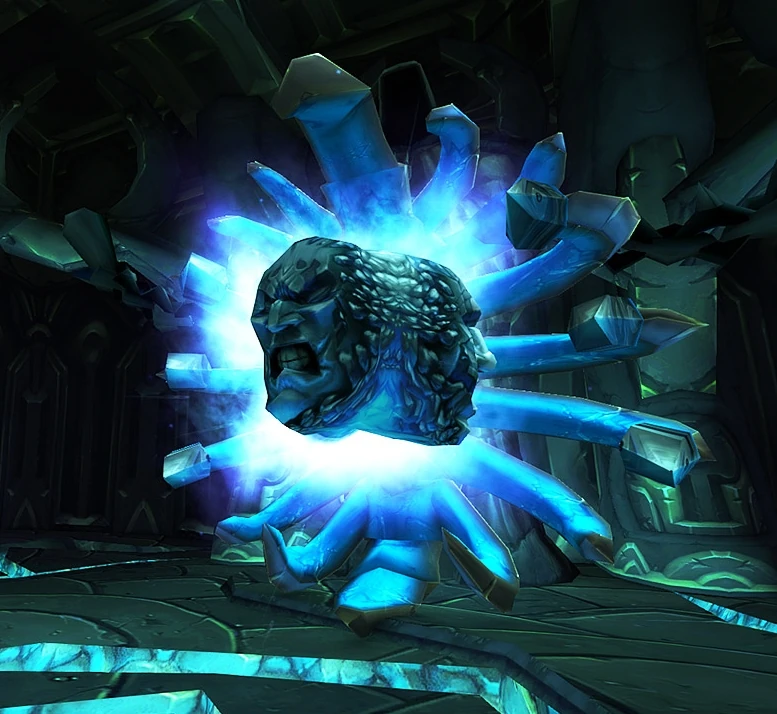
Reliquary of the Lost (often also referred to as the Reliquary of Souls) is a boss in the Black Temple. This boss is a three faced figure. The three faces are the Essences of Anger, Desire and Suffering. The three have to be defeated one after the other. They all are DPS races, each with a different twist.
Abilities
Each aspect has an aura which is not removable, and raid-wide in effect until the aspect is defeated.
Essence of Suffering
- Health: ~2.500.000 HP
- Aura of Suffering: Reduce healing, regeneration and armor by 100% and defence by 500
- Fixate: lock aggro on closest target every 5 sec
- Enrage: every 45 sec increase physical damage by 25% and attack speed by 50% for 15 sec
- Soul Drain: 30 sec dispellable debuff on three random targets, 2625 to 3375 damage plus 2625 to 3375 mana drain every 3 sec
Essence of Desire
All spells used by EoD can be interrupted, reflected or spell stolen.
- Health: ~3.000.000 HP
- Aura of Desire: 50% of damage dealt hits the player. Healing increased by 100%. Max player mana reduced by 5% every 8 seconds (after 160 seconds mana users have 0 mana)
- Deaden: 1 sec cast, increase damage taken by 100%, 10 second duration
- Spirit Shock: 1 sec cast, 9250-10750 arcane damage plus 5 sec confuse
- Rune Shield: 15 sec duration. Absorb 50000 damage, grant immunity to interrupt effects. Increases attack and case speed by 100%
Essence of Anger
- Health: ~3.000.000 HP
- Aura of Anger: Deals shadow damage which increases by 100 per tick (100 after 2sec, 200 after 4 sec then 300 etc..). Also increases damage dealt by players by 5% each tick
- Seethe: After aggro switch or taunt ability usage, EoA gets a 10 sec buff increasing attack speed by 100% and size by 20%, the raid takes a 10 sec debuff increasing threat gained by 200%
- Soul Scream: 5 targets in a 10-yard frontal cone take 2625-3375 shadow damage plus 4375-5625 mana/rage burn (every point of mana/rage burned causes 0.5/100 damage), 10 sec cooldown
- Spite: 3 random targets get a debuff which grants 6 sec immunity, then deals 7444-7556 nature damage followed by another 2 sec immunity
Ghosts
- Melee: ~600 on cloth
- Holy Explosion: 15 yard AoE, restoring about 30% health and mana
Preparation
Raid composition:
- 1 Warrior Main Tank
- 6-7 healers (6 healers is better than 7)
- 17-18 damge dealers, at least 3 Rogues among them
Running the Gauntlet
In the corridor leading to the boss, mobs are on a 15 sec respawn timer, so the raid has to run through it fast. There is no safe place between the trash mobs and the boss. The raid must stay close together at all times. No totems must be dropped (else they aggro respawns). The raid should stop and AoE after one third of the distance, a second time after two thirds, and the last time on top of the ramp leading down to the boss. When stopping, all AoE capable classes should do so, and point damage dealers should concentrate on the red ghosts first, these are the most dangerous type. It's best to continue moving after all red ghosts are dead, and just keep the larger blue and purple ones tanked - these two types don't deal substantial amounts of damage.
Upon reaching the top of the ramp, it's safest to wait for one repop of the last group, kill them, and then engage RoS fully rezzed, buffed and coordinated.
Phase 1: Essence of Suffering
This phase is characterized by two things - healing is impossible, and aggro can be easily controlled. Beyond that, Soul Drain must be dispelled immediately.
Tank switching
In order to get the tank rotation going, a lot of control is needed. Therefore, the EoS should move as little as possible. The red circle on the ground marks melee range. The current tank should stay on top of EoS, only if a change is due the new tank moves into the current tank, and the current tank takes one step back. Tanks can usually stay for several fixates and should switch only if taking too much damage, or if an enrage is due.
Enrage
During enrages, it's highly advisable to have a rogue with ![]() [Evasion] tank it (incidentally evasion and the enrage have exactly the same duration). With normal DPS, three enrages can be expected, thus three rogues should be pre-designated. They must step in and take a fixate as in the normal tank rotation, and hit evasion as soon as EoS enrages.
[Evasion] tank it (incidentally evasion and the enrage have exactly the same duration). With normal DPS, three enrages can be expected, thus three rogues should be pre-designated. They must step in and take a fixate as in the normal tank rotation, and hit evasion as soon as EoS enrages.
The rogue must not use ![]() [Vanish] after the enrage is over, but rather hand over aggro as described above. If the current tank dies or somehow removes himself from the combat (e.g. with a paladin bubble), EoS switches to normal aggro mechanics (which is very bad).
[Vanish] after the enrage is over, but rather hand over aggro as described above. If the current tank dies or somehow removes himself from the combat (e.g. with a paladin bubble), EoS switches to normal aggro mechanics (which is very bad).
If the rogues have good dodge/parry gear, they can tank EoS the entire time prior to the enrage, and switch only right after each enrage.
Healing
Normal healing cannot take place during this phase. The only abilities which help are ![]() [Blessing of Sacrifice],
[Blessing of Sacrifice], ![]() [Power Word: Shield] and
[Power Word: Shield] and ![]() [Pain Suppression]. Priests should spam PW:S freely, it's also a good idea to cast it on the rogue 15 sec before the enrage, so that the weakened soul debuff has worn off and a second shield can be cast during the enrage. The safest method to deal with Soul Drain is to have two priests hit
[Pain Suppression]. Priests should spam PW:S freely, it's also a good idea to cast it on the rogue 15 sec before the enrage, so that the weakened soul debuff has worn off and a second shield can be cast during the enrage. The safest method to deal with Soul Drain is to have two priests hit ![]() [Mass Dispel] every time it happens.
[Mass Dispel] every time it happens.
Alternate tanking rotation
The whole raid (except the three rogues) stand on the boss. When a player gets fixated, he moves outside the group (but not far, so that the boss doesn't move), thus another player gets fixated next. When an enrage is near, everyone moves out from under the boss except the current fixated person and a rogue moves in. The raid moves back in when less than five seconds of enrage remain, so that the next fixate after the enrage is taken by somebody else again.
Ghost interphase
After EoS is defeated, it goes back into the Reliquary. At that point, several ghosts spawn and head towards the raid. To maximize the health and mana gain, the raid should all stand on one spot. It's a good idea to use mana intensive abilities (such as making mana gems or summoning new demons) at the beginning of the ghost phase so that the players can start the next phase with full mana.
Phase2: Essence of Desire
This phase is all about spell steal/interrupt/reflect, beyond healing through the massive damage the raid deals to itself (from the aura). Since EoD deals only low amounts of melee damage, rage generation can be a problem. Therefore the tank should not use abilities like Demo Shout or Thunderclap, while ![]() [Curse of Recklessness] is very useful. Warlocks should keep
[Curse of Recklessness] is very useful. Warlocks should keep ![]() [Curse of Tongues] up, and a rogue should use Mind-numbing Poison. Paladins in caster groups should use
[Curse of Tongues] up, and a rogue should use Mind-numbing Poison. Paladins in caster groups should use ![]() [Concentration Aura]. For classes whose DPS consists of many hits for smaller amounts of damage (such as rogues and affliction warlocks),
[Concentration Aura]. For classes whose DPS consists of many hits for smaller amounts of damage (such as rogues and affliction warlocks), ![]() [Dampen Magic] can be useful.
[Dampen Magic] can be useful.
Spell handling
- The main tank must use
 [Spell Reflection] on Deaden (the first time after about 30 seconds)
 - Two rogues should set up a Spirit Shock interrupt routine so that it doesn't hit the MT. Using two rogues has the advantage that they each know that the next Shock is due when their Kick becomes available again
- It's best to [Spellsteal] the Rune Shield, but that incurs the danger of a not interruptable Spirit Shock (if the mage is slow), so having a Felhunter eat it is safer (because the Felhunter is always on the boss)
Healing
This phase is very healing intensive. Since all damge dealers take 50% of their damage done, raid healers are very busy. Particularly after a spell reflected Deaden is up, damage dealers must be careful not to kill themselves.
Tips
- If the raid gets near 0% mana and a kill is within reach, priests can use [Inner Focus] to cast one last spell (e.g. [Mass Dispel] the shield), yielding a few precious extra seconds to kill it for the melee damage dealers
- Resummoning felhunters during this phase resets their mana to 100% so even though the raid is drained they may still have mana (depending only on how long they have been in the fight)
Once Essence of Desire returns to the Reliquary, the ghosts appear once more and refill the raids mana and health.
Phase3: Essence of Anger
An initial Seethe can be avoided if the MT tab targets the boss before it starts moving and then uses a combination of Taunt and ![]() [Shield Slam]. The shield slam removes the Seethe. To avoid further Seethes, the tank must never lose aggro.
[Shield Slam]. The shield slam removes the Seethe. To avoid further Seethes, the tank must never lose aggro.
Tanking
EoA should be tanked facing away from the raid. Threat generation is crucial. The tanks must spam all his abilities to keep rage low (lest it's converted to damage by a Soul Scream). If a Scream is near and the tank has excess rage, he must stance dance to reduce the rage, even though this hurts aggro buildup.
DPS
Damage dealers must be very careful at start. After the second scream (at about 20 seconds), everybody should use all DPS cooldowns (and ![]() [Heroism]/
[Heroism]/![]() [Bloodlust]), Hunters should use
[Bloodlust]), Hunters should use ![]() [Misdirection], and everybody should go all-out (still trying not to draw aggro).
[Misdirection], and everybody should go all-out (still trying not to draw aggro).
Healing
About two healers should be on the tank, and four (preferably shamans and/or priests) on the raid. While the Aura damage is low, healers may even DPS a little if they have excess mana. Players afflicted by Spite must be topped up before they take the nature damage, and then immediately topped up again before the Aura kills them.
Quotes
| Essence of Suffering | Essence of Desire | Essence of Anger |
|---|---|---|
|
|
|
- Note: Sounds are as they are named in the MPQ file.
Loot
Trivia
- The essence of anger strongly resembles Sinistar, a boss from the old arcade game Sinistar. His quote "Beware - I live" is also said by Sinistar in the original game.
Notes
- Arcane spec mages excel on this fight, -40% threat from talents, 100% interrupt resist and mana reset to 100% after every phase they can make the most of the superior dps offered by the spec while going oom should not be a problem
- Tranquil Air totems can be useful in phase 3 as damage is restricted by threat, the extra threat reduction allows more damage than the Windfury or Wrath of Air totems would bring.
- Windfury Totem in the MT's group helps significantly with threat generation in phases 2 and 3.
External links
File:Icon-video-22x22.pngFor Killmovies of this encounter, see the Bosskill Movies page.