Parl200143821@legacy41563549 (talk | contribs) No edit summary |
m (→Tanking) |
||
| Line 1: | Line 1: | ||
| + | {{redirect|Bloodboil|the death knight ability|Blood Boil}} |
||
| − | {{Stub/Mob}} |
||
{{npcbox |
{{npcbox |
||
| − | |name= |
+ | |name=Gurtogg Bloodboil |
| + | |race=Fel orc |
||
| − | |image=Promenade Sentinel.jpg |
||
| ⚫ | |||
| − | |race=Arcane guardian |
||
| + | |image=Gurtogg_Bloodboil.jpg |
||
| ⚫ | |||
| − | |level= |
+ | |level=?? |
| − | |type= |
+ | |type=Boss |
| ⚫ | |||
| ⚫ | |||
| + | |status = Killable |
||
| − | |aggro={{aggro|-1|-1}} |
||
| ⚫ | |||
| ⚫ | |||
| + | |location=[[Halls of Anguish]], [[Black Temple]] |
||
| ⚫ | |||
| − | | |
+ | |instance=Black Temple |
| ⚫ | |||
}} |
}} |
||
| + | '''Gurtogg Bloodboil''' is a (presumedly) [[fel-sworn]] [[orc]] [[boss]] in [[Black Temple]]. The fight is a [[battle for survival]] combined with a tough healer [[gear check]]. Depending on the relative gear levels between healers and damage dealers, Bloodboil is usually killed fifth or sixth, and is a prerequisite for gaining access to [[Mother Shahraz]]. |
||
| − | '''Promenade Sentinel''' can be found in [[Black Temple]]. |
||
| + | ==Abilities== |
||
| − | Popularly nicknamed "One-Shot the Robot" due to its ability to kill a random (?) player in the raid. |
||
| + | * '''Melee''': 6k on plate (9k crushing, up to 20k on cloth) |
||
| + | * '''Fel Acid Breath''': 10 yard AoE Nature debuff dealt in a frontal cone on a random target in melee range, for 2750 nature damage every 5 seconds for 20 seconds, resistible, Cloak of Shadows removes. |
||
| + | * '''Arcing Smash''': 5k damage 4 yard range cleave attack on all targets in front of the boss, 10 sec cooldown. |
||
| + | * '''Berserk''': After 10 minutes Gurtoggs damage increases by 500% and attack speed by 150% |
||
| − | == |
+ | === Phase 1 only === |
| + | * '''Bloodboil''': debuff cast every 10 sec on the five raid members furthest away from Gurtogg, dealing 600 damage per sec for 24 sec. Not resistible or dispellable, resilience and [[Shadow Embrace]] reduce the damage taken. Can be removed with Divine Shield and Ice Block. |
||
| − | * '''L1 Arcane Charge''' (Arcane) - Causes 1259 to 1391 Arcane damage to an enemy target. |
||
| + | * '''Acidic Wound''': stacking debuff applied on melee hit every 2 sec. The stack expires 60 sec after the last debuff was applied. Reduces armor by 500 and ticks for 250 damage per debuff. Not removable. Avoidable by dodge/parry/miss |
||
| − | * '''L4 Arcane Charge''' (Arcane) - Causes 7013 to 7987 Arcane damage to nearby enemies. |
||
| + | * '''Eject''': Knock back the current target, reduces threat |
||
| − | * '''L5 Arcane Charge''' (Arcane) - Deals Arcane damage to a single target equal to 100% of the target's maximum health. |
||
| + | * '''Bewildering Strike''': Disorients the current target (similar to [[Scatter Shot]]), causing 5 sec aggro loss |
||
| + | * '''Arcing Smash''' also applies (= refreshes) the Acidic Wound debuff on all targets hit |
||
| − | == |
+ | === Phase 2 only === |
| + | * '''Fel Acid Breath''' is cast on the Fel Rage target only |
||
| ⚫ | |||
| + | * '''Arcing Smash''' damage is increased to 12k and also deals a [[Mortal Strike]] type debuff which reduces healing taken by 50% for 6 sec |
||
| + | * '''Fel Rage (player)''': 30 sec debuff cast on a random raid member (see below) used every 90 seconds |
||
| + | * '''Fel Rage (self)''': stacking self-buff which increases damage dealt and forces Gurtogg to attack only the player with the Fel Rage debuff |
||
| + | * '''Acid Geyser''': 5k nature damage 5 yard AoE on and around the Fel Rage target at the start of phase 2 |
||
| + | * '''Insignificance''': All raid members get this resistable buff. Insignificant players cannot cause threat |
||
| + | |||
| + | === Fel Rage === |
||
| + | The Fel Rage debuff has the following effects on players: |
||
| + | |||
| + | * +15k Armor |
||
| + | * +30k Health |
||
| + | * +100% Healing done (healing doubled) |
||
| + | * +300% Damage done (DPS quadrupled) |
||
| + | * +100% Size (character size doubled) |
||
| + | * Gurtogg attacks only the player with Fel Rage until the player is dead or becomes invulnerable (e.g. Ice Block or Bubble), in that case he returns to the highest aggro target |
||
| + | |||
| + | == Preparation == |
||
| + | The fight has two alternating phases in a 90 seconds cycle. During the 60 seconds of Phase 1 the bloodboil debuff is dealt out and the tanks take a stacking debuff. Right after the fifth set of bloodboil debuffs, Gurtogg and one random raid member receive Fel Rage, which starts Phase 2. After 30 seconds Fel Rage wears off and Phase 1 starts again. |
||
| + | |||
| + | The encounter can be reset by running up the ramp, through the next room and up the stairs on the back of that room. |
||
| + | |||
| + | === Raid composition === |
||
| + | * 3 Tanks (more difficult but possible with two tanks) |
||
| + | * 8-9 healers (well-geared and experienced raids can do with 7, new raids can bring even 10) |
||
| + | * normal mix of damage dealers |
||
| + | |||
| + | Because the enrage timer is rather long trading DPS for extra healing is feasible. |
||
| + | |||
| + | === Buffs and gear === |
||
| + | The fight is extremely healing intensive, even more so than [[High Warlord Naj'entus]] - healers should wear their best endurance gear. The whole raid should be buffed with [[Amplify Magic]] - even though the acid damage is magic, the advantage gained from increased healing outweighs that. Each raid member should have a [[Healthstone]], all raid members should have a few health or rejuvenation potions. No special resistance gear is required. |
||
| + | |||
| + | === Positioning === |
||
| + | Most raids fight him on the ramp leading down to his place. The melee group stands on the right wall (when facing the boss), tanks with their backs to the wall, everybody else sets up on the ramp near the line drawn on the floor at the left wall. Three groups of five people each need to be pre-designated as Bloodboil (BB) soakers. The first of these groups sets up beyond the line with their backs to the left wall. |
||
| + | |||
| + | == Phase 1 == |
||
| + | After a standard [[Misdirection]] pull, the first tank takes him. The other tanks should do their best to build as much threat as possible, all other raid members must be extra careful to stay below all three tanks on the aggro list. |
||
| + | |||
| + | === Bloodboil === |
||
| + | Every time Gurtogg deals BB, the five BB soakers who just got it must move forward over the line, and the next group of five must move back to the wall, in order to take the next BB. The three groups need to keep up this rotation until five sets of BBs have been dealt. For new raids it's a good idea to practise this rotation prior to the pull. No raid member should ever take a double BB, because that's very hard to heal through. |
||
| + | |||
| + | One method to organize the rotation is to designate three groups, and give one member of each group a raid mark. After each BB, the raid leader calls out the icon which is due next. Two of the groups have to take two sets of BB each, one group takes only one. Raid members with low total health, usually Mages or Priests, should be in that third group. |
||
| + | |||
| + | === Healing === |
||
| + | Three healers should concentrate on healing through the BB damage. 1-2 healers should be on the off-tanks, and the rest on the current MT. As usual in situations with lots of distributed damage, [[Chain Heal]] and [[Circle of Healing]] are the spells of choice. |
||
| + | |||
| + | === Tanking === |
||
| + | The Acidic Wound stack can grow to dangerous levels, at 20 debuffs for example, the tank takes 5k damage per [[tick]] and has 10k less armor. If it gets too much, the tank must drop aggro ([[Misdirection]] to one of the OTs is helpful here) and move to Gurtoggs back, avoiding Arcing Smash for 60 seconds until the debuff stack wears off. During that time, the tank must continue building as much hate as possible. Paladins can bubble out of the debuff stack (which temporarily removes him from the threat list). |
||
| + | |||
| + | All three tanks must be clearly aware of each others threat levels and current Acidic Wound stack. In the ideal case, the three tanks are closely together on the hate list and can easily take aggro from each other. In order to build rage the OTs can take an Arcing Smash now and then on purpose. A small stack of Acidic Wounds helps rage generation. |
||
| + | |||
| + | The third tank is needed for Disorient. If one tank is on Acidic Wound cooldown and the current MT gets Disoriented, the third tank must take over. |
||
| + | |||
| + | Stacking avoidance gear can be feasible, because all of Gurtogg's abilities can be avoided. The problem in that case is that the aggro-reducing abilities are avoided too, this can lead to the MT running far ahead on the hate list. The MT may have to stop his attacks entirely, or [[Hand of Protection]] can be used. |
||
| + | |||
| + | == Transition to Fel Rage == |
||
| + | The transition to Fel Rage (FR) after the fifth BB is the most healing intensive moment in the fight. 15 raid members have BB, and one person gets FR, needing a lot of attention from the healers, while the tanks still have the DoT stacks from Acidic Wounds. All main tank healers must immediately switch to the FR target, while the raid healers must do their best keeping the BB targets up. At the same time, the raid must spread out to avoid too much damage from the Acid Geyser. It's a good idea to start repositioning after the fourth BB, but be careful that the designated BB soakers remain the raid members furthest away from Gurtogg. The melee damage dealers should also move away from him, to avoid taking damage from Arcing Smash when he turns around to face the FR target. |
||
| + | |||
| + | ==Phase 2== |
||
| + | At the start of Phase 2, Gurtogg casts Acid Geyser together with FR on a random raid member and quickly runs to that person. The FR target should not move, and the raid should regroup so that nobody is hit by Gurtoggs frontal cone attacks. |
||
| + | |||
| + | The toughest job during these 30 seconds is to keep the FR target up. Cloth classes take normal attacks for ~13k (up to 20k crushing), and nothing prevents two (or more) crushing blows in a row. If the FR target can heal, he should do a lot of self-healing (since FR increases healing done by 100%). All non-healing capable classes should use at least a [[Super Healing Potion]] and a [[Healthstone]], and try to reduce their damage taken as much as possible. |
||
| + | |||
| + | If the FR target dies, Gurtogg returns to the normal aggro list (usually to a tank). Since during Phase 2 Gurtoggs damage output is substantially higher than during Phase 1, the tank should use all means available to increase his survivability (e.g. [[Shield Wall]]). It is in the raid's best interest not to let the FR target die, as with the extra HP and armor, even mages are better suited to take Gurtogg's attacks than the tanks are. |
||
| + | |||
| + | Damage dealers should make sure they have the Insignificance buff, and then go all-out during this phase, using all trinkets and cooldowns (like [[Bloodlust]]). |
||
| + | |||
| + | ==Class instructions for Fel Rage== |
||
| + | Generally, FR targets must immediately use all damage-reducing or health enhancing abilities they have. Damage dealers and tanks should switch to their most defensive setup. Classes able to use a shield should equip one. Pure healing builds should exclusively spam heal themselves (this allows the other healers to regain some mana). DPS hybrids able to heal should start out spam healing themselves. If the raid healers have covered up and the situation feels comfortable, hybrids may start do DPS, but must be ready to immediately resume self healing if their health drops below 50%. |
||
| + | |||
| + | * '''Death knight''': First, [[Icebound Fortitude]] and [[Bone Armor]] (if available). After that, go [[Frost Presence]] immediately. [[Vampiric Blood]] helps healing you. Be prepared to use [[Rune Tap]] (if available) |
||
| + | * '''Druid''': First, [[Barkskin]]. After that, go [[Bear Form]] immediately. [[Frenzied Regeneration]] heals for double the usual amount, use it wisely. Keep [[Demoralizing Roar]] up |
||
| + | * '''Hunter''': Hit [[Aspect of the Monkey]]/[[Aspect of the Dragonhawk]] as soon as possible, since it's impossible to move away from him, deal melee damage. Use [[Deterrence]] if available |
||
| + | * '''Mage''': Use [[Ice Armor]] and [[Ice Barrier]] as often as possible. Switch on [[Mana Shield]] while the Mortal Strike debuff is in effect. Nuke with instant or uninterruptible attacks (like [[Fire Blast]] or [[Ice Lance]]). Never use [[Ice Block]] |
||
| + | * '''Priest''': Use [[Dispersion]] if available. Use [[Power Word: Shield]] on every CD. Keep [[Renew]] up and spam [[Flash Heal]] on self. Be prepared to use [[Desperate Prayer]] (if available) |
||
| + | * '''Rogue''': Use all DPS enhancing cooldowns. Hit [[Cloak of Shadows]] when he uses Fel Acid. Save [[Evasion]] for the Mortal Strike debuff. Do not Vanish |
||
| + | * '''Shaman''': Enhancement Shamans should use [[Shamanistic Rage]]. Resto shamans must not forget to [[Earth Shield]] themselves. If the shaman has a two handed weapon equipped, it is recommend to equip a shield for extra armor until the FR is gone. |
||
| + | * '''Warlock''': First, [[Metamorphosis]] if available. Spam [[Drain Life]], ignoring interrupts. Keep up [[Siphon Life]] if available, use [[Death Coil]] when low on HP |
||
| + | * '''Warrior''': Switch to [[Defensive Stance]] and equip 1H + shield. Do not use [[Death Wish]] |
||
| + | |||
| + | ==Tips== |
||
| + | * [[Pain Suppression]] helps the FR target a lot. It may be worth having a priest respec to get it if the raid is continuously unable to beat this boss |
||
| + | * If it looks like a Fel Raged person is going to die, [[Intervene]] may be a life saver. |
||
| + | * Shamans not in the tank group should drop [[Tranquil Air Totem]] during Phase 1, and a DPS enhancing totem (like [[Wrath of Air Totem]]) during Phase 2 |
||
| + | * Mages can take the fourth and fifth BBs on purpose and then remove them with [[Ice Block]], Paladins can do the same with [[Divine Shield]] |
||
| + | |||
| + | == Alternate strategy == |
||
| + | === Positioning=== |
||
| + | Some raids fight Gurtogg at the waterfalls right in front of his initial position. The tanks line up at the right waterfall, the raid stands near the trough of the left waterfall, with the BB soakers in the trough. |
||
| + | |||
| + | Another alternative is to tank him on the wall behind his initial position. This gives the raid a lot of space to spread out to minimize the damage from Acit Geyser, but has the disadvantage that wipe recovery is much more difficult. |
||
| + | |||
| + | === Two tanks === |
||
| + | It's possible to manage this fight with only two tanks. This requires them both to have very good avoidance gear. |
||
| + | |||
| + | == Quotes == |
||
| + | Aggro: |
||
| + | *{{text|yell|Horde will crush you!}} |
||
| + | Special: |
||
| + | *{{text|yell|Drink your blood! Eat your flesh!}} |
||
| + | *{{text|yell|I hunger!}} |
||
| + | Killing a player: |
||
| + | *{{text|yell|Time to feast!}} |
||
| + | *{{text|yell|More! I want more!}} |
||
| + | Enraged: |
||
| + | *{{text|yell|I'll rip the meat from your bones!}} |
||
| + | |||
| + | ==Loot== |
||
| + | {{Lootbox|Gurtogg Bloodboil drops |
||
| + | |Belt of Primal Majesty |
||
| + | |Blood-cursed Shoulderpads |
||
| + | |Garments of Temperance |
||
| + | |Girdle of Mighty Resolve |
||
| + | |Girdle of Stability |
||
| + | |Leggings of Divine Retribution |
||
| + | |Messenger of Fate |
||
| + | |Shadowmoon Insignia |
||
| + | |Shroud of Forgiveness |
||
| + | |Staff of Immaculate Recovery |
||
| + | |Unstoppable Aggressor's Ring |
||
| + | |Vest of Mounting Assault |
||
| + | |Wand of Prismatic Focus |
||
| + | }} |
||
| + | |||
| + | == Movies == |
||
| + | *[[Image:Icon-video-22x22.png]][http://www.warcraftmovies.com/movieview.php?id=63263 Rogue PoV Kill Movie] by 3ioB (US-SURAMAR) |
||
| + | *[[Image:Icon-video-22x22.png]][http://www.warcraftmovies.com/movieview.php?id=44552 First Kill] by Black Division (EU-Drak'thul) |
||
| + | *[[Image:Icon-video-22x22.png]][http://www.guildvideo.com/guild/cookie/cookie_vs_bloodboil Hunter PoV] by Cookie (EU-Darkspear) |
||
| + | *[[Image:Icon-video-22x22.png]]For more Killmovies of this encounter, see the [[Movies of boss kills]] article. |
||
| + | |||
| + | ==Patches and hotfixes== |
||
| + | {{Patch 2.1.0|note=Added}} |
||
| + | |||
| + | ==External links== |
||
| ⚫ | |||
Links that do not conform to the rules will be DELETED. |
Links that do not conform to the rules will be DELETED. |
||
Repeat violations may result in a BAN. |
Repeat violations may result in a BAN. |
||
Have a nice day. :) --> |
Have a nice day. :) --> |
||
| − | {{ |
+ | {{elinks-NPC|22948|armory=1}} |
| + | |||
| + | {{DEFAULTSORT:Bloodboil, Gurtogg}} |
||
| + | [[es:Gurtogg Bloodboil]] |
||
| ⚫ | |||
| + | [[Category:Bosses]] |
||
[[Category:Black Temple mobs]] |
[[Category:Black Temple mobs]] |
||
| ⚫ | |||
Revision as of 08:11, 12 January 2011
- "Bloodboil" redirects here. For the death knight ability, see
 [Blood Boil].
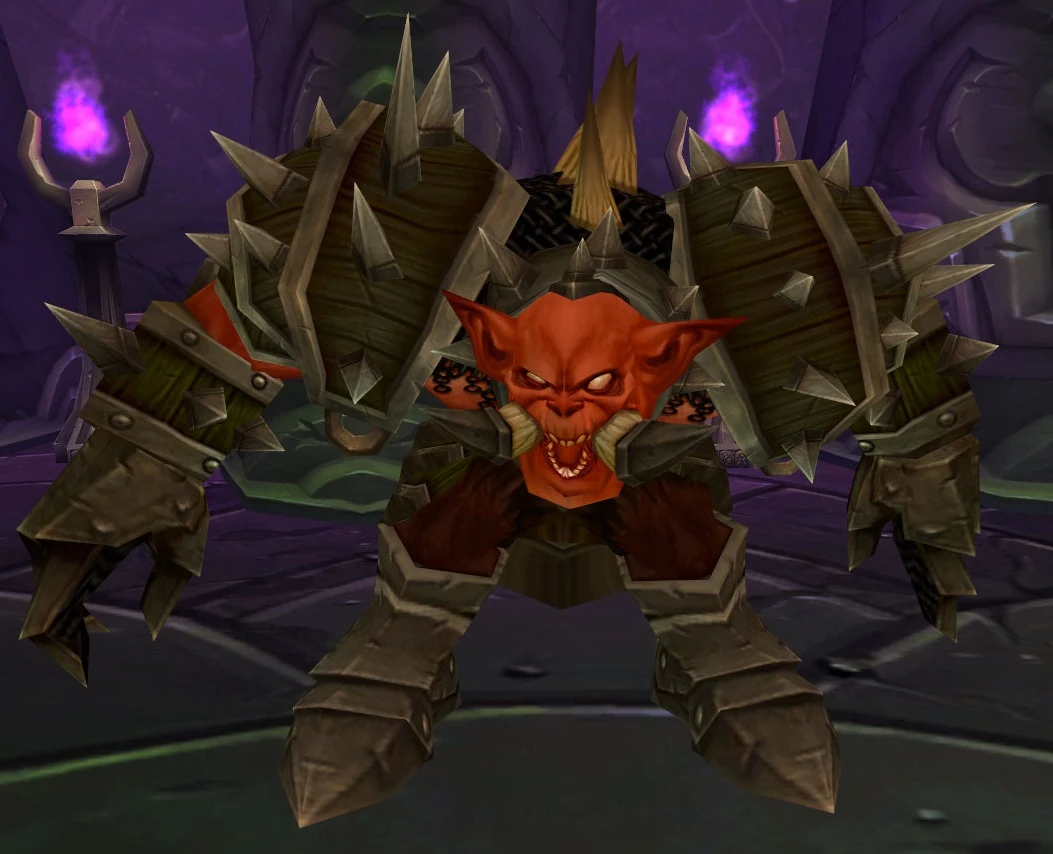 | |||||||
| Race | Fel orc (Humanoid) | ||||||
| Level | ?? Boss | ||||||
| Location | Halls of Anguish, Black Temple | ||||||
| Status | Killable | ||||||
| |||||||
Gurtogg Bloodboil is a (presumedly) fel-sworn orc boss in Black Temple. The fight is a battle for survival combined with a tough healer gear check. Depending on the relative gear levels between healers and damage dealers, Bloodboil is usually killed fifth or sixth, and is a prerequisite for gaining access to Mother Shahraz.
Abilities
- Melee: 6k on plate (9k crushing, up to 20k on cloth)
- Fel Acid Breath: 10 yard AoE Nature debuff dealt in a frontal cone on a random target in melee range, for 2750 nature damage every 5 seconds for 20 seconds, resistible, Cloak of Shadows removes.
- Arcing Smash: 5k damage 4 yard range cleave attack on all targets in front of the boss, 10 sec cooldown.
- Berserk: After 10 minutes Gurtoggs damage increases by 500% and attack speed by 150%
Phase 1 only
- Bloodboil: debuff cast every 10 sec on the five raid members furthest away from Gurtogg, dealing 600 damage per sec for 24 sec. Not resistible or dispellable, resilience and
 [Shadow Embrace] reduce the damage taken. Can be removed with Divine Shield and Ice Block.
 - Acidic Wound: stacking debuff applied on melee hit every 2 sec. The stack expires 60 sec after the last debuff was applied. Reduces armor by 500 and ticks for 250 damage per debuff. Not removable. Avoidable by dodge/parry/miss
- Eject: Knock back the current target, reduces threat
- Bewildering Strike: Disorients the current target (similar to
 [Scatter Shot]), causing 5 sec aggro loss
 - Arcing Smash also applies (= refreshes) the Acidic Wound debuff on all targets hit
Phase 2 only
- Fel Acid Breath is cast on the Fel Rage target only
- Arcing Smash damage is increased to 12k and also deals a
 [Mortal Strike] type debuff which reduces healing taken by 50% for 6 sec
 - Fel Rage (player): 30 sec debuff cast on a random raid member (see below) used every 90 seconds
- Fel Rage (self): stacking self-buff which increases damage dealt and forces Gurtogg to attack only the player with the Fel Rage debuff
- Acid Geyser: 5k nature damage 5 yard AoE on and around the Fel Rage target at the start of phase 2
- Insignificance: All raid members get this resistable buff. Insignificant players cannot cause threat
Fel Rage
The Fel Rage debuff has the following effects on players:
- +15k Armor
- +30k Health
- +100% Healing done (healing doubled)
- +300% Damage done (DPS quadrupled)
- +100% Size (character size doubled)
- Gurtogg attacks only the player with Fel Rage until the player is dead or becomes invulnerable (e.g. Ice Block or Bubble), in that case he returns to the highest aggro target
Preparation
The fight has two alternating phases in a 90 seconds cycle. During the 60 seconds of Phase 1 the bloodboil debuff is dealt out and the tanks take a stacking debuff. Right after the fifth set of bloodboil debuffs, Gurtogg and one random raid member receive Fel Rage, which starts Phase 2. After 30 seconds Fel Rage wears off and Phase 1 starts again.
The encounter can be reset by running up the ramp, through the next room and up the stairs on the back of that room.
Raid composition
- 3 Tanks (more difficult but possible with two tanks)
- 8-9 healers (well-geared and experienced raids can do with 7, new raids can bring even 10)
- normal mix of damage dealers
Because the enrage timer is rather long trading DPS for extra healing is feasible.
Buffs and gear
The fight is extremely healing intensive, even more so than High Warlord Naj'entus - healers should wear their best endurance gear. The whole raid should be buffed with ![]()
![]() [Amplify Magic] - even though the acid damage is magic, the advantage gained from increased healing outweighs that. Each raid member should have a
[Amplify Magic] - even though the acid damage is magic, the advantage gained from increased healing outweighs that. Each raid member should have a ![]() [Healthstone], all raid members should have a few health or rejuvenation potions. No special resistance gear is required.
[Healthstone], all raid members should have a few health or rejuvenation potions. No special resistance gear is required.
Positioning
Most raids fight him on the ramp leading down to his place. The melee group stands on the right wall (when facing the boss), tanks with their backs to the wall, everybody else sets up on the ramp near the line drawn on the floor at the left wall. Three groups of five people each need to be pre-designated as Bloodboil (BB) soakers. The first of these groups sets up beyond the line with their backs to the left wall.
Phase 1
After a standard ![]() [Misdirection] pull, the first tank takes him. The other tanks should do their best to build as much threat as possible, all other raid members must be extra careful to stay below all three tanks on the aggro list.
[Misdirection] pull, the first tank takes him. The other tanks should do their best to build as much threat as possible, all other raid members must be extra careful to stay below all three tanks on the aggro list.
Bloodboil
Every time Gurtogg deals BB, the five BB soakers who just got it must move forward over the line, and the next group of five must move back to the wall, in order to take the next BB. The three groups need to keep up this rotation until five sets of BBs have been dealt. For new raids it's a good idea to practise this rotation prior to the pull. No raid member should ever take a double BB, because that's very hard to heal through.
One method to organize the rotation is to designate three groups, and give one member of each group a raid mark. After each BB, the raid leader calls out the icon which is due next. Two of the groups have to take two sets of BB each, one group takes only one. Raid members with low total health, usually Mages or Priests, should be in that third group.
Healing
Three healers should concentrate on healing through the BB damage. 1-2 healers should be on the off-tanks, and the rest on the current MT. As usual in situations with lots of distributed damage, ![]() [Chain Heal] and
[Chain Heal] and ![]() [Circle of Healing] are the spells of choice.
[Circle of Healing] are the spells of choice.
Tanking
The Acidic Wound stack can grow to dangerous levels, at 20 debuffs for example, the tank takes 5k damage per tick and has 10k less armor. If it gets too much, the tank must drop aggro (![]() [Misdirection] to one of the OTs is helpful here) and move to Gurtoggs back, avoiding Arcing Smash for 60 seconds until the debuff stack wears off. During that time, the tank must continue building as much hate as possible. Paladins can bubble out of the debuff stack (which temporarily removes him from the threat list).
[Misdirection] to one of the OTs is helpful here) and move to Gurtoggs back, avoiding Arcing Smash for 60 seconds until the debuff stack wears off. During that time, the tank must continue building as much hate as possible. Paladins can bubble out of the debuff stack (which temporarily removes him from the threat list).
All three tanks must be clearly aware of each others threat levels and current Acidic Wound stack. In the ideal case, the three tanks are closely together on the hate list and can easily take aggro from each other. In order to build rage the OTs can take an Arcing Smash now and then on purpose. A small stack of Acidic Wounds helps rage generation.
The third tank is needed for Disorient. If one tank is on Acidic Wound cooldown and the current MT gets Disoriented, the third tank must take over.
Stacking avoidance gear can be feasible, because all of Gurtogg's abilities can be avoided. The problem in that case is that the aggro-reducing abilities are avoided too, this can lead to the MT running far ahead on the hate list. The MT may have to stop his attacks entirely, or ![]() [Hand of Protection] can be used.
[Hand of Protection] can be used.
Transition to Fel Rage
The transition to Fel Rage (FR) after the fifth BB is the most healing intensive moment in the fight. 15 raid members have BB, and one person gets FR, needing a lot of attention from the healers, while the tanks still have the DoT stacks from Acidic Wounds. All main tank healers must immediately switch to the FR target, while the raid healers must do their best keeping the BB targets up. At the same time, the raid must spread out to avoid too much damage from the Acid Geyser. It's a good idea to start repositioning after the fourth BB, but be careful that the designated BB soakers remain the raid members furthest away from Gurtogg. The melee damage dealers should also move away from him, to avoid taking damage from Arcing Smash when he turns around to face the FR target.
Phase 2
At the start of Phase 2, Gurtogg casts Acid Geyser together with FR on a random raid member and quickly runs to that person. The FR target should not move, and the raid should regroup so that nobody is hit by Gurtoggs frontal cone attacks.
The toughest job during these 30 seconds is to keep the FR target up. Cloth classes take normal attacks for ~13k (up to 20k crushing), and nothing prevents two (or more) crushing blows in a row. If the FR target can heal, he should do a lot of self-healing (since FR increases healing done by 100%). All non-healing capable classes should use at least a ![]() [Super Healing Potion] and a
[Super Healing Potion] and a ![]() [Healthstone], and try to reduce their damage taken as much as possible.
[Healthstone], and try to reduce their damage taken as much as possible.
If the FR target dies, Gurtogg returns to the normal aggro list (usually to a tank). Since during Phase 2 Gurtoggs damage output is substantially higher than during Phase 1, the tank should use all means available to increase his survivability (e.g. ![]() [Shield Wall]). It is in the raid's best interest not to let the FR target die, as with the extra HP and armor, even mages are better suited to take Gurtogg's attacks than the tanks are.
[Shield Wall]). It is in the raid's best interest not to let the FR target die, as with the extra HP and armor, even mages are better suited to take Gurtogg's attacks than the tanks are.
Damage dealers should make sure they have the Insignificance buff, and then go all-out during this phase, using all trinkets and cooldowns (like ![]() [Bloodlust]).
[Bloodlust]).
Class instructions for Fel Rage
Generally, FR targets must immediately use all damage-reducing or health enhancing abilities they have. Damage dealers and tanks should switch to their most defensive setup. Classes able to use a shield should equip one. Pure healing builds should exclusively spam heal themselves (this allows the other healers to regain some mana). DPS hybrids able to heal should start out spam healing themselves. If the raid healers have covered up and the situation feels comfortable, hybrids may start do DPS, but must be ready to immediately resume self healing if their health drops below 50%.
- Death knight: First, [Icebound Fortitude] and Bone Armor (if available). After that, go [Frost Presence] immediately. [Vampiric Blood] helps healing you. Be prepared to use [Rune Tap] (if available)
- Druid: First, [Barkskin]. After that, go [Bear Form] immediately. [Frenzied Regeneration] heals for double the usual amount, use it wisely. Keep [Demoralizing Roar] up
- Hunter: Hit [Aspect of the Monkey]/ [Aspect of the Dragonhawk] as soon as possible, since it's impossible to move away from him, deal melee damage. Use [Deterrence] if available
- Mage: Use [Ice Armor] and [Ice Barrier] as often as possible. Switch on [Mana Shield] while the Mortal Strike debuff is in effect. Nuke with instant or uninterruptible attacks (like [Fire Blast] or [Ice Lance]). Never use [Ice Block]
- Priest: Use [Dispersion] if available. Use [Power Word: Shield] on every CD. Keep [Renew] up and spam [Flash Heal] on self. Be prepared to use [Desperate Prayer] (if available)
- Rogue: Use all DPS enhancing cooldowns. Hit [Cloak of Shadows] when he uses Fel Acid. Save [Evasion] for the Mortal Strike debuff. Do not Vanish
- Shaman: Enhancement Shamans should use [Shamanistic Rage]. Resto shamans must not forget to [Earth Shield] themselves. If the shaman has a two handed weapon equipped, it is recommend to equip a shield for extra armor until the FR is gone.
- Warlock: First, Metamorphosis if available. Spam [Drain Life], ignoring interrupts. Keep up [Siphon Life] if available, use [Death Coil] when low on HP
- Warrior: Switch to [Defensive Stance] and equip 1H + shield. Do not use [Death Wish]
Tips
- [Pain Suppression] helps the FR target a lot. It may be worth having a priest respec to get it if the raid is continuously unable to beat this boss
- If it looks like a Fel Raged person is going to die, [Intervene] may be a life saver.
- Shamans not in the tank group should drop [Tranquil Air Totem] during Phase 1, and a DPS enhancing totem (like [Wrath of Air Totem]) during Phase 2
- Mages can take the fourth and fifth BBs on purpose and then remove them with [Ice Block], Paladins can do the same with [Divine Shield]
Alternate strategy
Positioning
Some raids fight Gurtogg at the waterfalls right in front of his initial position. The tanks line up at the right waterfall, the raid stands near the trough of the left waterfall, with the BB soakers in the trough.
Another alternative is to tank him on the wall behind his initial position. This gives the raid a lot of space to spread out to minimize the damage from Acit Geyser, but has the disadvantage that wipe recovery is much more difficult.
Two tanks
It's possible to manage this fight with only two tanks. This requires them both to have very good avoidance gear.
Quotes
Aggro:
- Horde will crush you!
Special:
- Drink your blood! Eat your flesh!
- I hunger!
Killing a player:
- Time to feast!
- More! I want more!
Enraged:
- I'll rip the meat from your bones!
Loot
Movies
- File:Icon-video-22x22.pngRogue PoV Kill Movie by 3ioB (US-SURAMAR)
- File:Icon-video-22x22.pngFirst Kill by Black Division (EU-Drak'thul)
- File:Icon-video-22x22.pngHunter PoV by Cookie (EU-Darkspear)
- File:Icon-video-22x22.pngFor more Killmovies of this encounter, see the Movies of boss kills article.
Patches and hotfixes
![]() Patch 2.1.0 (2007-05-22): Added
Patch 2.1.0 (2007-05-22): Added