Iskisk@legacy41547081 (talk | contribs) (image) |
|||
| Line 1: | Line 1: | ||
| + | __NOTOC__ |
||
| − | [[File:4x lvl79 multiboxing shamans.PNG|thumb|right|300px|4-man multiboxing [[draenei]] [[shaman]]s at front of [[Stormwind Gate|Stormwind City gates]].]] |
||
| + | This article contains a short overview of all [[raid boss]]es that were in or added to ''[[World of Warcraft]]'' before before the release of ''[[World of Warcraft: The Burning Crusade]]''. |
||
| − | '''Multiboxing''' is a term used to denote one user playing multiple accounts simultaneously. This can be done using one or more machines. Solutions exist for both the [[wikipedia:Personal computer|PC]] and [[Mac]]. There are also solutions for using both PC and Mac at the same time. The following pages contain more detailed information than presented here, [[Multiboxing hardware]], [[Multiboxing software]], [[Multiboxing macros]], and [[Scripts]]. |
||
| + | {| class=darktable |
||
| − | For some players there is not enough challenge in playing only one character at a time. Others look to recreate the feel of old time Computer Role Playing Games where a well designed team was used to adventure together. There are also some who don't want to rely on others to play the game when one character is not enough. |
||
| + | |+Classic raid instance bosses |
||
| + | |- |
||
| + | ![[#Zul'Gurub|Zul'Gurub]] !! [[#Ruins of Ahn'Qiraj|Ruins of Ahn'Qiraj]] !! [[#Molten Core|Molten Core]] !! [[#Blackwing Lair|Blackwing Lair]] !! [[#Onyxia's Lair|Onyxia's Lair]] !! [[#The Temple of Ahn'Qiraj|The Temple of Ahn'Qiraj]] !! [[#Naxxramas|Naxxramas]] |
||
| + | |- valign=top |
||
| + | | |
||
| + | [[#High Priestess Jeklik|High Priestess Jeklik]]<br /> |
||
| + | [[#High Priest Venoxis|High Priest Venoxis]]<br /> |
||
| + | [[#High Priestess Mar'li|High Priestess Mar'li]]<br /> |
||
| + | [[#High Priest Thekal|High Priest Thekal]]<br /> |
||
| + | [[#High Priestess Arlokk|High Priestess Arlokk]]<br /> |
||
| + | [[#Bloodlord Mandokir|Bloodlord Mandokir]]<br /> |
||
| + | [[#Jin'do the Hexxer|Jin'do the Hexxer]]<br /> |
||
| + | [[#Gahz'ranka|Gahz'ranka]]<br /> |
||
| + | [[#Gri'lek|Gri'lek]]<br /> |
||
| + | [[#Hazza'rah|Hazza'rah]]<br /> |
||
| + | [[#Renataki|Renataki]]<br /> |
||
| + | [[#Wushoolay|Wushoolay]]<br /> |
||
| + | [[#Hakkar the Soulflayer|Hakkar the Soulflayer]]<br /> |
||
| + | | |
||
| + | [[#Kurinnaxx|Kurinnaxx]]<br /> |
||
| + | [[#General Rajaxx|General Rajaxx]]<br /> |
||
| + | [[#Moam|Moam]]<br /> |
||
| + | [[#Buru the Gorger|Buru the Gorger]]<br /> |
||
| + | [[#Ayamiss the Hunter|Ayamiss the Hunter]]<br /> |
||
| + | [[#Ossirian the Unscarred|Ossirian the Unscarred]]<br /> |
||
| + | | |
||
| + | [[#Lucifron|Lucifron]]<br /> |
||
| + | [[#Magmadar|Magmadar]]<br /> |
||
| + | [[#Gehennas|Gehennas]]<br /> |
||
| + | [[#Garr|Garr]]<br /> |
||
| + | [[#Baron Geddon|Baron Geddon]]<br /> |
||
| + | [[#Shazzrah|Shazzrah]]<br /> |
||
| + | [[#Golemagg the Incinerator|Golemagg the Incinerator]]<br /> |
||
| + | [[#Sulfuron Harbinger|Sulfuron Harbinger]]<br /> |
||
| + | [[#Majordomo Executus|Majordomo Executus]]<br /> |
||
| + | [[#Ragnaros|Ragnaros]]<br /> |
||
| + | | |
||
| + | [[#Razorgore the Untamed|Razorgore the Untamed]]<br /> |
||
| + | [[#Vaelastrasz the Corrupt|Vaelastrasz the Corrupt]]<br /> |
||
| + | [[#Broodlord Lashlayer|Broodlord Lashlayer]]<br /> |
||
| + | [[#Flamegor|Flamegor]]<br /> |
||
| + | [[#Ebonroc|Ebonroc]]<br /> |
||
| + | [[#Firemaw|Firemaw]]<br /> |
||
| + | [[#Chromaggus|Chromaggus]]<br /> |
||
| + | [[#Nefarian|Nefarian]]<br /> |
||
| + | | |
||
| + | [[#Onyxia|Onyxia]] |
||
| + | | |
||
| + | [[#The Prophet Skeram|The Prophet Skeram]]<br /> |
||
| + | [[#Lord Kri|Lord Kri]]<br /> |
||
| + | [[#Princess Yauj|Princess Yauj]]<br /> |
||
| + | [[#Vem|Vem]]<br /> |
||
| + | [[#Battleguard Sartura|Battleguard Sartura]]<br /> |
||
| + | [[#Fankriss the Unyielding|Fankriss the Unyielding]]<br /> |
||
| + | [[#Viscidus|Viscidus]]<br /> |
||
| + | [[#Princess Huhuran|Princess Huhuran]]<br /> |
||
| + | [[#Emperor Vek'lor|Emperor Vek'lor]]<br /> |
||
| + | [[#Emperor Vek'nilash|Emperor Vek'nilash]]<br /> |
||
| + | [[#Ouro|Ouro]]<br /> |
||
| + | [[#C'Thun|C'Thun]]<br /> |
||
| + | | |
||
| + | [[#Anub'Rekhan|Anub'Rekhan]]<br /> |
||
| + | [[#Grand Widow Faerlina|Grand Widow Faerlina]]<br /> |
||
| + | [[#Maexxna|Maexxna]]<br /> |
||
| + | [[#Noth the Plaguebringer|Noth the Plaguebringer]]<br /> |
||
| + | [[#Heigan the Unclean|Heigan the Unclean]]<br /> |
||
| + | [[#Loatheb|Loatheb]]<br /> |
||
| + | [[#Instructor Razuvious|Instructor Razuvious]]<br /> |
||
| + | [[#Gothik the Harvester|Gothik the Harvester]]<br /> |
||
| + | [[#The Four Horsemen|The Four Horsemen]]<br /> |
||
| + | [[#Patchwerk|Patchwerk]]<br /> |
||
| + | [[#Grobbulus|Grobbulus]]<br /> |
||
| + | [[#Gluth|Gluth]]<br /> |
||
| + | [[#Thaddius|Thaddius]]<br /> |
||
| + | [[#Sapphiron|Sapphiron]]<br /> |
||
| + | [[#Kel'Thuzad|Kel'Thuzad]]<br /> |
||
| + | |} |
||
| + | ==[[Zul'Gurub]]== |
||
| − | ==Background of Multiboxing== |
||
| + | :''Removed in [[patch 4.0.3a]].'' |
||
| + | In order to quell [[Hakkar the Soulflayer]], the trolls of the land banded together and sent a contingent of High Priests into the ancient city of [[Zul'Gurub]]. Each priest was a powerful champion of the Primal Gods, but despite their best efforts they fell under the sway of Hakkar. Now the champions and their Primal God aspects feed the awesome power of the Soulflayer. |
||
| + | Any adventurers brave enough to venture into the foreboding ruins must overcome the High Priests and Hakkar's mighty lieutenants if they are to have any hope of confronting the mighty blood god. |
||
| − | As noted above in the term description, multiboxing is a game play style accepted by Blizzard <ref>http://forums.worldofwarcraft.com/thread.html?topicId=2856144935&postId=29491813990&sid=1#16</ref><ref>http://forums.worldofwarcraft.com/thread.html?topicId=3168405460&pageNo=1&sid=1</ref>. The multiboxing solutions documented here do not violate Blizzard's [[EULA]] for the World of Warcraft game. |
||
| + | ===[[High Priestess Jeklik]]=== |
||
| − | In order to multibox in World of Warcraft, you will need to have all of the following criteria areas addressed: |
||
| + | [[Image:JeklikBat.png|thumb|High Priestess Jeklik]] |
||
| + | One of [[Hakkar the Soulflayer|Hakkar's]] priests, Jeklik holds the aspect of the [[bat]].<br clear="right" /> |
||
| + | ===[[High Priest Venoxis]]=== |
||
| − | :One World of Warcraft registered account per game client you wish to multibox (example: 5 characters = 5 accounts)<ref>https://forums.worldofwarcraft.com/thread.html?topicId=77594054&postId=776776019#1</ref>. This means you will have to purchase multiple copies of the game, including all required expansions. |
||
| + | [[Image:Venorix.jpg|thumb|High Priest Venoxis]] |
||
| − | :The computing power to run the desired number of games. This can be achieved by using 1 computer or multiple computers. A simple computer costing under $700 is sufficient to multibox <ref>http://multiboxing.com/world-of-warcraft/minimum-requirements-to-multibox-5-world-of-warcrafts</ref> |
||
| + | The [[troll]] '''Venoxis''' was the High Priest of the [[Primal God]] [[Ula-tek]], the goddess serpent.<br clear="right" /> |
||
| − | :The ability to "broadcast" your game commands to all your running games. This can be done by using [[Multiboxing software]] or [[Multiboxing hardware]]. |
||
| + | ===[[High Priestess Mar'li]]=== |
||
| − | In addition, you will need to learn many multiboxing strategies, including [[Macro]] writing skills, and may need to pay special attention to your in-game [[UI]]. |
||
| + | [[Image:MarliSpider.png|thumb|Hight Priestess Mar'li]] |
||
| + | The [[troll]] '''Mar'li''' was the High Priestess of the [[Primal God]] [[Shadra]], the god spider.<br clear="right" /> |
||
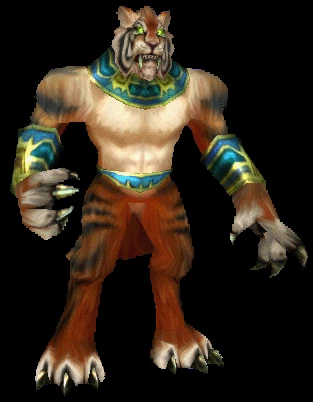
| + | ===[[High Priest Thekal]]=== |
||
| − | ==Difficulty== |
||
| + | [[Image:Thekal.gif|thumb|High Priest Thekal]] |
||
| − | How complex of a solution do you want? A software-only solution using one machine and multiple copies of the game is pretty straightforward. For many, the real complexity is in writing macros that allow each character to function properly in the group. Because characters are sharing hotkeys, a lot of care must be put into what effects each hotkey activates. The end result is that you can become very knowledgeable in using the game's [[Macro]] language and available [[Addons]]. |
||
| + | The [[troll]] '''Thekal''' was the High Priest of the [[Primal God]] [[Shirvallah]], the god tiger.<br clear="right" /> |
||
| + | ===[[High Priestess Arlokk]]=== |
||
| − | ==The basics== |
||
| + | [[Image:Arlokk.PNG|thumb|High Priestess Arlokk]] |
||
| − | This section will cover the basics of multiboxing. While hardware and software requirements will be mentioned, more extensive detail will be found on either of the following two pages [[Multiboxing Hardware Requirements]] and [[Multiboxing Software Requirements]] |
||
| + | The [[troll]] '''Arlokk''' was the High Priestess of the [[Primal God]] [[Bethekk]], the goddess panther.<br clear="right" /> |
||
| − | === |
+ | ===[[Bloodlord Mandokir]]=== |
| + | [[Image:MandoibV2.jpg|thumb|Bloodlord Mandokir]] |
||
| − | You will need to purchase the game, and depending on needs the expansion as well, for each account you wish to run simultaneously. |
||
| + | One of [[Hakkar the Soulflayer|Hakkar]]'s more powerful lieutenants, Mandokir is the leader of the [[Gurubashi tribe]] [[trolls]], the most powerful troll-tribe that resides inside the ancient city of [[Zul'Gurub]]. Mandokir and his people were reluctant at first to summon Hakkar into the mortal world and revolted against the plan, but as soon as Hakkar entered the world their resistance seized and they soon fulfilled his every command.<br clear="right" /> |
||
| + | ===[[Jin'do the Hexxer]]=== |
||
| − | A minimum of one installation of the game software must be present on each computer. |
||
| + | [[Image:Jindo.JPG|thumb|Jin'do the Hexxer]] |
||
| + | One of [[Hakkar the Soulflayer|Hakkar]]'s most powerful lieutenants, Jin'do was originally the leader of the [[Hakkari|Hakkari tribe]] [[trolls]]. After being exiled or murdered for the evil deeds they had done in Hakkar's name, they decided to wreak havoc upon the world and summon Hakkar into the mortal world. Jin'do and the remaining Hakkari trolls now reside inside the walls of the ancient [[Gurubashi]] capital of Zul'gurub.<br clear="right" /> |
||
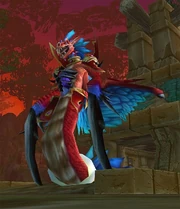
| + | ===[[Gahz'ranka]]=== |
||
| − | A single installation directory can be used to open multiple instances of the game client. It is not necessary to have multiple WoW directories on a machine to run multiple WoW Windows. |
||
| + | [[Image:Gahz'ranka.JPG|thumb|Gahz'ranka]] |
||
| + | Gahz'ranka is a giant sea-creature that lives in the waters of the ancient [[Gurubashi]] capital of [[Zul'Gurub]]. The famous fisherman [[Nat Pagle]] hunted the creature for a long time, but apparently failed to capture it. Gather a group of heroes and maybe some lure. Who knows, maybe you'll succeed where Nat failed...<br clear="right" /> |
||
| + | ===[[Gri'lek]]=== |
||
| − | The single directory installation option saves hard drive space and simplifies setup and maintenance of your user interface and add-ons. |
||
| + | ===[[Hazza'rah]]=== |
||
| + | ===[[Renataki]]=== |
||
| + | ===[[Wushoolay]]=== |
||
| + | ===[[Hakkar the Soulflayer]]=== |
||
| + | [[Image:Hakkar.jpg|thumb|Hakkar the Soulflayer]] |
||
| + | The long centuries following the [[Great Sundering]] of the world were difficult ones for the [[troll]] race. Famine and terror were commonplace within the broken kingdoms. The [[Gurubashi]] trolls, driven to desperate ends, sought aid from ancient, mystical forces. Though both of the troll kingdoms shared a central belief in a great pantheon of primitive gods, the Gurubashi fell under the sway of the darkest one. |
||
| + | '''Hakkar the Soulflayer''', a vile, bloodthirsty spirit, heard the trolls' call and decided to aid them. Hakkar gave his secrets of blood to the Gurubashi and helped them extend their civilization across most of [[Stranglethorn Vale]] and certain islands of the South Seas. Though he brought them great power, Hakkar wanted more and more for his efforts. |
||
| − | Some users prefer to maintain several copies of the game files on one computer. It is widely believed that multiple installations of the game client will improve performance, however this is only partly true. Multiple installations will improve performance only if each installation is on a different physical drive. |
||
| + | In recent times, the Atal'ai priests discovered that Hakkar's physical form could only be summoned within the ancient capital of the [[Gurubashi|Gurubashi Empire]], [[Zul'Gurub]]. Unfortunately, the priests have met with recent success in their quest to call forth Hakkar -- reports confirm the presence of the dreaded Soulflayer in the heart of the Gurubashi ruins. |
||
| − | If the multiple directory method of installation is chosen you will need to maintain add-ons and user interface changes for each installation separately. |
||
| + | In order to quell the blood god, the trolls of the land banded together and sent a contingent of High Priests into the ancient city. Each priest was a powerful champion of the [[Primal Gods]] -- Bat, Panther, Tiger, Spider, and Snake -- but despite their best efforts, they fell under the sway of Hakkar. Now the champions and their Primal God aspects feed the awesome power of the Soulflayer. Any adventurers brave enough to venture into the foreboding ruins must overcome the High Priests if they are to have any hope of confronting the mighty blood god. |
||
| − | Users of [[Mac]] computers can symbolic link the Data directory to save space when running multiple copies on one machine. |
||
| + | ==[[Ruins of Ahn'Qiraj]]== |
||
| − | Users of Windows XP or newer with NTFS can use Junction Links for the same effect. Windows Vista/7 can use the included MKLINK<ref>http://technet.microsoft.com/en-us/library/cc753194%28WS.10%29.aspx</ref> program to create a junction. Windows XP users have to resort to a third party program (e.g. Junction Link Magic). |
||
| + | :''Retuned in patch 4.0.3a to be a 10-player raid.'' |
||
| − | === |
+ | ===[[Kurinnaxx]]=== |
| + | [[Image:Kurinnaxx.jpg|thumb|Kurinnaxx]] |
||
| − | To run two or more copies on the same machine, it is recommended that it contain a dual core processor, discrete 3d graphics accelerator, and at least one gigabyte of memory. Additional copies on the same machine will require faster processors and more memory. When using multiple machines, try to keep all of them identical. |
||
| + | '''Kurinnaxx''', a large [[sand reaver]], is the first [[boss]] found in the [[Ruins of Ahn'Qiraj]]. He has a wide aggro radius and can see stealthed rogues.<br clear="right" /> |
||
| + | ===[[General Rajaxx]]=== |
||
| − | ===Key/mouse broadcasting software=== |
||
| + | [[Image:Rajaxx.jpg|thumb|General Rajaxx]] |
||
| − | There are multiple methods of broadcasting keystrokes from one client to another, either on the same machine or across multiple machines. |
||
| + | The mighty [[Qiraji]] known as '''General Rajaxx''' commands the Qiraji armies in battle. He was described in the War of the Shifting Sands as "a towering monstrosity, swinging clawed limbs, looming over all and always shouting commands to the insect soldiers of Qiraji and [[Silithid]] during battle." He is currently a [[boss]] found in the [[Ruins of Ahn'Qiraj]]. He is commonly thought to be [[Ragnaros]]'s equal or greater in physical size.<br clear="right" /> |
||
| + | ===[[Moam]]=== |
||
| − | Mouse broadcasting is the method from which you use and activate your mouse from 1 main game window and it has reflected actions upon other game windows. While this is not needed for all forms of multiboxing, it is a boon to those who play Mage / Warlock / Druid classes due to the requirement those classes have to target area-of-effect type of spells. |
||
| + | [[Image:Moam.jpg|thumb|Moam]] |
||
| + | Though the [[Scarab Wall]] prevented the [[Qiraji]] from venturing out of [[Ahn'Qiraj]], the insect empire refused to remain idle. In preparation for their reemergence in the world, [[C'Thun|the shadowy master of Ahn'Qiraj]] commanded Emperor Vek'lor to create a new obsidian statue superior to all other [[Obsidian Destroyer|Destroyers]]. Vek'lor sought his twin brother's aid in the task, and while Vek'nilash used his physical might to craft a grand body of volcanic rock, Vek'lor fortified the shell with powerful magic. |
||
| + | Emperor Vek'lor named the finished construct Moam, and observed as the dark master infused it with life. He was pleased and surprised to find that the improved Obsidian Destroyer was far more versatile than its earlier counterparts. The [[Twin Emperors]] intended to use Moam as a colossal weapon, knowing that its strengths would help it survive in the thick of melee as well as magical combat-but they did not expect for the construct's abilities to advance further without their own assistance.<br clear="right" /> |
||
| − | ===Additional hardware=== |
||
| − | Keyboard, Video, and Mouse, switches (KVMs for short) are an option when using multiple machines. A Vetra Keyboard Multiplexer is one example for controlling multiple machines. Additional monitors may also be needed, note that the the secondary characters do not need to be on large monitors and there benefits with using smaller monitors to view their actions. |
||
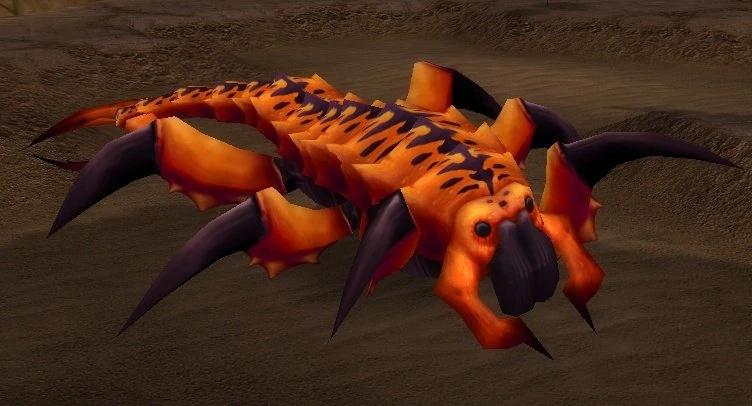
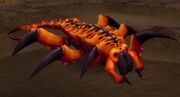
| + | ===[[Buru the Gorger]]=== |
||
| − | ==Game concerns== |
||
| + | [[Image:Buru2.jpg|thumb|Buru the Gorger]] |
||
| − | Some of the choices you make are strictly within the game. From server type, character types, to the races of the characters. |
||
| + | Buru guards the eggs of the [[Qiraji]]. It is only by the destruction of those eggs that Buru can be weakened until finally weak enough to break through his immensely thick armor.<br clear="right" /> |
||
| − | === |
+ | ===[[Ayamiss the Hunter]]=== |
| + | [[Image:Ayamiss the Hunter.jpg|thumb|Ayamiss the Hunter]] |
||
| − | ====Player versus Environment==== |
||
| + | Ayamiss is a powerful flying hunter in the ranks of the [[Qiraji]] army. She and her soldiers hover high above the ground, and when confronted, Ayamiss gets great pleasure in sacrificing random members of the opposing forces.<br clear="right" /> |
||
| − | Player versus Environment is the easy solution. Even if the eventual goal is to play on a Player versus Player server getting practice with multiboxing will be much easier on the PvE server. PvE is very forgiving. Events are scripted, generally start when you start them, and allow for as many tries as you want. |
||
| − | === |
+ | ===[[Ossirian the Unscarred]]=== |
| + | [[Image:Ossirian.jpg|thumb|Ossirian the Unscarred]] |
||
| − | Player versus Player interactions will require a unique approach when multiboxing, very different than [[PVE]] gameplay. Because of this uniqueness, you may find yourself in a situation where your typical [[macros]] for Player versus Environment do not apply to [[PVP]] gameplay. You may find that it will require more advance macros and more thought put into contingency plans. |
||
| + | During the [[War of the Shifting Sands]], as the [[Anubisath]] constructs crumbled under the [[dragonflight]]'s assault, a single Anubisath did the seemingly impossible - he found a way to fight back. |
||
| + | Ossirian targeted one of the leaders, the massive dragon [[Grakkarond]], and hurled his obsidian sword through the beast's wing. The crippled wyrm descended, crushing the [[Qiraji]] as it fell. The dragon mauled Ossirian nearly to death, but the remaining Anubisaths and Qiraji now had a target on the ground to focus on, and they swiftly converged and overwhelmed the noble dragon. |
||
| − | ===Server selection=== |
||
| − | Scout out the server and see what kind of ratio it has. Is it an old server or a new one? Old servers tend to have established PvP and knowledgeable players. It can be harder to find groups, not an issue if you are five boxing, and they tend to have a more vibrant auction system and economy. A good method to find a new server to multibox on is to ask in various forums if there are any existing multiboxing [[guilds]] on the server. If so, ask in advance if you may join the guild before making that server your new home. If you are playing on US servers, one of the largest multiboxing guilds in the entire game is on the [[Blackrock]] server, [[Horde]] side. |
||
| + | Ossirian's beaten body was dragged back to the [[Ruins of Ahn'Qiraj]] following the battle, where he should by all rights have perished. It is whispered that Ossirian found the favor of the malevolent force that reigns over the Qiraji, for in spite of his wounds, the construct survived.<br clear="right" /> |
||
| − | ===Class selection=== |
||
| − | Class selection. This depends on both your playstyle and the type of server you play on. For the ability to heal and dish out burst damage choose a [[Priest]] and four [[Mage]]s. Other options are to replace the Mages with [[Warlock]]s, replace the Priest with another healer class like a [[Druid]], [[Shaman]], or even a [[Paladin]]. |
||
| + | ==[[Molten Core]]== |
||
| − | A very popular one-class choice is to have multiple Shamans. Due to the macros, one set of shamans in a battleground can simultaneously cast [[Chain Lightning]], which can effectively destroy even the hardiest of twinks. |
||
| + | ===[[Lucifron]]=== |
||
| + | [[Image:Lucifron.JPG|thumb|Lucifron]] |
||
| + | Location: [[Molten Core]] <br />Raid 40 |
||
| + | The first of the five [[Flamewaker]]s defending Molten Core, Lucifron is the first 40-man raid boss most players encounter. His attacks are all Shadow based, but Shadow Resistance is not needed in any way. His guards can mind control players, while he himself has an AoE Magic effect called Impending Doom that will deal 2000 Shadow damage if not dispelled quickly, as well as a Curse that doubles the mana/rage/energy cost of all abilities. Drops the Tome of [[Tranquilizing Shot]], a necessity for future bosses.<br clear="right" /> |
||
| − | Due to game mechanics picking two classes is far easier to deal with than using three or more classes. Even if five different classes is more appropriate being able to direct it is another issue. It comes down to how consistent the actions between the classes are and how the hotkeys can best be shared between them. When you are beginning multiboxing it is recommended to limit the number of classes. |
||
| − | === |
+ | ===[[Magmadar]]=== |
| + | [[Image:Magmadar closeup.jpg|thumb|Magmadar]] |
||
| − | Some consideration of racial abilities for PvP is warranted. [[Undead]] have [[Will of the Forsaken]] which breaks [[Fear]] which is very bad when grouped up. Other good racial abilities are the [[Tauren]] [[Warstomp]] and [[Blood elf]] who have the ability chain two second silence effects. Race selection also limits class selection so some choices will not be available regardless. |
||
| + | Location: [[Molten Core]] <br />Raid 40 |
||
| + | A favored pet of [[Ragnaros]] and progenitor of the [[Core Hound]]s that roam throughout the Molten Core. Goes into deadly frenzies that only [[Hunter]]s can dispel, has an AoE Fear, and occasionally throws Lava Bombs that ignite the surrounding area, dealing massive Fire damage. Killing Magmadar prevents [[Core Hound]]s that roam the instance from spawning. Drops all [[Tier 1]] leg pieces.<br clear="right" /> |
||
| − | ===Naming=== |
||
| − | Believe it or not, the names you pick for your characters make a difference. By picking logical names you will be quicker to react and it will be easier to tell your characters apart. |
||
| + | ===[[Gehennas]]=== |
||
| − | An example, where you have four [[Mages]] and one [[Priest]]. Choose a unique multi-letter name and then prefix it to identify which character is which. Naming the first four characters mynameA, mynameB, mynameC, and mynameD, makes it easy to remember they are the the mages, whereas naming the priest mynameX provides enough distinction to separate him out. Why the last letter? Simple in PvP your opponent could say /target A and get the first character whose name starts with an A! You could also name them for their role in the party. Recognition of which character is which will come over time, using a naming strategy speeds up the process. |
||
| + | [[Image:Gehennas.jpg|thumb|Gehennas]] |
||
| + | Location: [[Molten Core]] <br />Raid 40 |
||
| + | The second of five [[Flamewaker]]s defending Molten Core. Will call down a powerful Rain of Fire on his attackers, and also has an AoE curse that greatly reduces healing.<br clear="right" /> |
||
| − | Conversely, if PvP is your primary objective, you may wish to pick names that all sound alike so that opponents using voice communication (e.g. Ventrilo) cannot easily designate one of your targets. Changing letter combinations (e.g. Aellii, Aellei, Aellie, Aelli) or substituting certain vowels (e.g. Boylston, Boylstun, Boylsten) may cause a slight delay in one of your characters being focused-fired upon in an Arena. |
||
| − | == |
+ | ===[[Garr]]=== |
| + | [[Image:Garr.jpg|thumb|Garr]] |
||
| − | ===Play area layout=== |
||
| + | Location: [[Molten Core]] <br />Raid 40 |
||
| − | Once again, this small detail makes a difference. If you run 5 or 6 monitors, I strongly suggest some logical order to how your characters are arranged and which computer runs which character. Your "main" is generally in the middle and the secondaries flank your main to either side. My personal choice is A in the lower left, B upper left, C upper right and D lower right. Clockwise with X in the lower middle. The upper middle is for browsing the internet, looking up quests, vent, etc. My key arrangement mirrors this and the X-Keys Desktop and Pro are perfect for this kind of setup as they have 8 keys wide and 5 vertical. Making your physical interface as intuitive as possible will speed the learning process and make far more logical sense when playing. |
||
| + | A powerful [[Elemental#Earth Elemental|Molten Rock Elemental]] that serves as one of [[Ragnaros]]' lieutenants and is partially responsible for [[Prince Thunderaan]]'s imprisonment. He is guarded by eight Firesworn elementals that he can combust at will. He also consumes buffs. Killing Garr prevents the [[Lava Surger]]s that roam the instance from spawning. Drops all [[Tier 1]] head pieces and one half of the [[Bindings of the Windseeker]].<br clear="right" /> |
||
| − | ===Getting started=== |
||
| − | If you choose the hardware method the hard part is paying for it all. You will need four identical machines. Literally, identical machines, down to the revision numbers on the components. I build my own machines but buying them is certainly an option. This project, done at its most basic hardware level, will cost $4280, not counting tax and shipping. Done right, it will push $5k, plus monthly fees. Depending on your perspective, this may be a lot of money. Nobody ever said multiboxing at this level was cheap but I can certainly think of far more expensive hobbies. |
||
| − | === |
+ | ===[[Baron Geddon]]=== |
| + | [[Image:Baron Geddon.jpg|thumb|Baron Geddon]] |
||
| − | Powerleveling does not really work in WoW, so leveling up is tricky if you already have a level 80 and want to add more characters. The best way to level is to level them all at the same time. You can do so with questing alone, questing and instances or just instances. Questing is a good bet as the experience is great, the mobs are easy and you get faction. However, you will want to avoid every single collection quest as you will need to do them five times. Not fun. I personally suggest instance grinding. Elites give great experience and about the time you get tired of an instance, you level out of it. The only downside is the time wasted learning the instance and at the lower levels, learning just how to multibox. One solution to the issue of learning of the instance is to download a dungeon map addon, so that you may become familiar with the dungeon you will be constantly running. |
||
| + | Location: [[Molten Core]] <br />Raid 40 |
||
| + | A powerful [[Elemental#Fire Elemental|Firelord]] that serves as one of [[Ragnaros]]' lieutenants and is partially responsible for [[Prince Thunderaan]]'s imprisonment. Turns players into living bombs that explode after 10 seconds, dealing massive Fire damage to nearby allies and more often than not, killing the player. When near death, he starts a spell called Armageddon, which will likely kill anyone nearby should he succeed. Drops one half of the [[Bindings of the Windseeker]].<br clear="right" /> |
||
| − | ===UI mods=== |
||
| − | Usually constrained to arranging the bars as you need them and letting you view the state of each of your characters. Pitbull and Bartender are two very good mods. |
||
| − | === |
+ | ===[[Shazzrah]]=== |
| + | [[Image:Shazzrah.jpg|thumb|Shazzrah]] |
||
| − | There are button mods out there that allow you to physically represent the buttons you have on your X-keys on your UI. There are even some out there that will change the buttons when you hold down your alt modifier key. |
||
| + | Location: [[Molten Core]] <br />Raid 40 |
||
| + | The third of the five [[Flamewaker]]s defending Molten Core. Spams a powerful Arcane Explosion and casts an AoE Curse that reduces Arcane Resistance. Will also randomly Blink towards players.<br clear="right" /> |
||
| − | ===Anchor mods=== |
||
| − | You will likely want to set it so that you cannot move the windows on your "secondary" machines. If you move one, they get desynched and clicking on them with your wireless mouse will not activate all of them. |
||
| + | ===[[Golemagg the Incinerator]]=== |
||
| − | ===Macros=== |
||
| + | [[Image:Golemagg the Incinerator_new.jpg|thumb|Golemagg the Incinerator]] |
||
| − | ====Quest accepting==== |
||
| + | Location: [[Molten Core]] <br />Raid 40 |
||
| − | There are quest accepting macros out there. They work pretty well for accepting quests on the "secondary" characters. Right click, hit the quest accept macro and you are done. Sharing quests is another way to do this but not every quest can be shared. |
||
| + | A massive [[Mountain Giant|Molten Giant]], Golemagg is the keeper of the valuable [[Sulfuron Ingot]]s needed to form [[Sulfuras]]. He has two [[Core Hound]] pets that can not be killed until he dies. When low on health, he begins attacking much faster and causing earthquakes. Drops all [[Tier 1]] chest pieces.<br clear="right" /> |
||
| − | ==== Pet macros==== |
||
| − | This macro will make your pet attack your current target if you have a target. Otherwise, it will attack the focus target. For example, if you have multiple warlocks and assign each one a target, their corresponding pets will attack those targets or assist your main and attack your main's target instead. |
||
| − | <pre> |
||
| − | /petattack |
||
| − | /stopmacro [target=target, exists] |
||
| − | /petattack [target=focustarget] |
||
| − | </pre> |
||
| + | ===[[Sulfuron Harbinger]]=== |
||
| − | ====What happens when my main dies?==== |
||
| + | [[Image:Sulfuron Harbinger.jpg|thumb|Sulfuron Harbinger]] |
||
| − | You need to setup your macros to allow for transitioning to another "main". This will mean physically moving to another mouse and changing your /assists or /focus to another character. This is doable with custom LUA scripts or simply a dedicated keyboard (or X-Key). I will leave that up to you - usually when my priest dies, I am out of mana and going down anyway. Often times it is faster to do this in battlegrounds as you rez with nearly full mana and health - but there are times when you will need to continue fighting and not just stand there. It took me quite a while to figure this one out - and I will leave this to you. |
||
| + | Location: [[Molten Core]] <br />Raid 40 |
||
| + | The fourth of the five [[Flamewaker]]s defending Molten Core. His true name is not known. He is guarded by four Flamewaker Priests, who won't hesitate to heal Sulfuron or each other.<br clear="right" /> |
||
| − | ===Xzin of Magtheridon (Xzin, Azin, Bzin, Czin, Dzin)=== |
||
| − | {{NPOV}} |
||
| − | My name is Xzin and I am (to the best of my knowledge) the only serious 5 boxer who was highly successful in PvP before the first WoW expansion came out. The reason for this is simple. I designed my setup from the beginning to support ultra low latency, maximum spell synergy and high burst damage dealing. Everything I did was carefully chosen to maximize my DPS and reaction times - even if there were other, slower or less reliable methods available. I took great pains to design a system that would work for me from the ground up and I had the resources to make it happen. Building bits and pieces will work but nothing is as good as doing it all at the same time with the exact same hardware. |
||
| + | ===[[Majordomo Executus]]=== |
||
| − | While I am not the first person ever to box (people were doing it in Dark Age of Camelot and other prior MMORPGs such as EverQuest and the like), I achieved rank 13 on all five characters at the same time and am well known on my server and battlegroup as a player who knows how to play and was nothing to sneeze at in PvP. At times, I have singlehandedly changed the course of AVs and was able to "solo" every 5 man dungeon - with only cloth characters and a single healer. |
||
| + | [[Image:Executus.jpg|thumb|Majordomo Executus]] |
||
| + | Location: [[Molten Core]] <br />Raid 40 |
||
| + | The fifth and final [[Flamewaker]] defending Molten Core, Executus is [[Ragnaros]]' most trusted lieutenant, and will only appear once the protective runes throughout the Core are extinguished. His encounter is the first truly complex 40-man encounter players encounter, calling for an interesting juggling of his eight guards. Once the guards are dead, Executus will surrender and leave to go summon Ragnaros himself. He leaves behind a chest of Epic loot, most notably items required for the [[Hunter]] and [[Priest]] epic quests.<br clear="right" /> |
||
| − | Below, I present my views on multiboxing and lay out a guide to what I did and where I obtained my hardware. My focus was PvP from the beginning and I never started with two or three characters and expanded to five. I started with one, decided the game was too boring that way and moved straight to five. Not to sound egotistical but if there was a better way to do this, I certainly would love to know. Seriously. I would like to add it to my setup. Lastly, my setup is expensive. There are somewhat cheaper ways to do what I have done but not too many corners can be cut. Be prepared to lay out at least $5,000 or more to do this seriously. The setup I have listed below should be considered the bare minimum needed to do this. If you have decided that this is what you want to do - great. Read on. If not then well.... go back to playing normally or dual boxing. There is to the best of my knowledge no way to do this (well) for under two or three thousand US dollars. |
||
| + | ===[[Ragnaros (tactics)|Ragnaros]]=== |
||
| − | So you want to four box (or more?) WoW? This is a serious decision and needs to be thought about BEFORE purchasing hardware or setting things up. To be done successfully, first identify your target goals. Do you want to PvE, requiring a more balanced group and a less time critical interface, or PvP, which requires maximum flexibility with somewhat more limited class selections, minimal latency and the full gamut of specialized hardware? |
||
| + | [[Image:Ragnaros.jpg|thumb|Ragnaros]] |
||
| + | Location: [[Molten Core]] <br />Raid 40 |
||
| + | One of the four [[Elemental Lieutenants]] of the [[Old Gods]], Ragnaros is a being so powerful that his entrance into this world created the volcanic wastelands surrounding [[Blackrock Mountain]]. However, he is only a shadow of his former self, having been separated from the powers of the [[Elemental Plane]] when he was summoned into [[Azeroth (world)|Azeroth]]. He is the final boss in Molten Core. High Fire Resistance is a must for those who wish to challenge him. Drops all [[Tier 2]] leg pieces, as well as the primary requirements for the legendary weapons, [[Sulfuras]] and [[Thunderfury]].<br clear="right" /> |
||
| − | Hopefully you are coming across this guide as a Wiki. If so, please feel free to modify it and improve upon it. I am sure there is more that I could add here but I eventually tired of spelling this all out. I spent literally months figuring all of this out and quite a bit of money deciding on what works and what does not. I hope that the community will add on to this and potentially come up with something better. If nothing else, I hope this guide helps you out and makes your five boxing that much easier to do. Make sure you understand why you are doing things the way you are doing though - I set this up for myself and I know how it all fits together. Your success will depend greatly upon your ability to thoroughly understand your setup and improve upon it. |
||
| + | ==[[Blackwing Lair]]== |
||
| − | Before you begin, please be aware that increasing capabilities of graphics cards, processors, software drivers and software utilities are making it possible to multibox two (or potentially more) copies of WoW on a single machine with the same feature sets as my hardware method, described below. I am still a bit new to those options so I will not speak to them just yet, but I have tested a "low" high end processor (around $180) dual core system with a 8600 GT graphics card and 2 gigs of ram - running around the bank gives 55+ fps on both screens (minimum settings, except terrain distance, which is set to max) at a resolution of 1600 x 1280 per account. So, the hardware is able to make it happen without making huge FPS sacrifices (yes, I know you can play at 20 fps with huge graphics lag spikes but that is not acceptable for PvP). The hard part is how to send two mice to two copies of WoW on the same computer as well as broadcasting keyboard entry. If I am able to figure out how to do this, I would be able to theoretically use 6 computers to control 10 accounts.... meaning I can shave off $2000 of computer costs as well as remove the need for as many (possibly any) Vetras or KVMs. The only downside is this DOES require the use of "third party" programs. I cannot make any statement as to if Blizzard would consider banning somebody for using these programs but the fact that it has to hook into mouse and keyboard functions does put it in the "somewhat gray area' category. That said though, many other drivers, common network admin utilities and other simple things like the G15 keyboard do the exact same thing..... and none of the programs are bots or in anyway automate gameplay in a way to allow unattended gaming. I suppose Autohotkey could be scripted but then again I am not sure exactly how that would help you.... it is not like you could walk away and smash face in the BGs or have your character leveled for you. You still need to send input to the keyboard and move the mouse around. |
||
| + | ===[[Razorgore the Untamed]]=== |
||
| + | [[Image:Razorgore.jpg|thumb|Razorgore the Untamed]] |
||
| + | Location: [[Blackwing Lair]] <br />Raid 40 |
||
| + | The most powerful known [[Dragonspawn]] in the world, Razorgore serves no master but himself. However, the [[dragon]] [[Nefarian]] found a way around that, creating a powerful orb that would allow the [[Blackrock Clan]] to control Razorgore, and uses the Dragonspawn to defend a clutch of Chromatic dragon eggs. He is the first boss in Blackwing Lair. The encounter involves using the orb to make Razorgore destroy the eggs, all while fighting off 40 other Orcs and Dragonspawn. It is known as one of the most chaotic encounters in the game, if not ''the'' most. Drops all [[Tier 2]] bracers.<br clear="right" /> |
||
| − | If you are going to four box, you might as well five box. You get the ability to run your own group, can enter 5v5 Arenas, fill out an entire group yourself and the hardware costs are not too much greater to buy five over four. I personally suggest going for all five instead of four but you can work with four. However, if you are going to do four (about $850 more), you might consider only doing three. You get the benefits of being able to do a 3v3 arena team and three is much less complex than four. |
||
| + | ===[[Vaelastrasz|Vaelastrasz the Corrupt]]=== |
||
| − | ==See also== |
||
| + | [[Image:Vaelastrasz.jpg|thumb|Vaelastrasz the Corrupt]] |
||
| − | *[[Multiboxing hardware]] |
||
| + | Location: [[Blackwing Lair]] <br />Raid 40 |
||
| − | *[[Multiboxing software]] |
||
| + | Vaelastrasz the Red was the keeper of the red shard of the [[Scepter of the Shifting Sands]]. He had sworn to destroy the [[dragon]] [[Nefarian]], but lost the battle inside Blackwing Lair, losing the shard as a result. The raid comes upon Vaelastrasz just as Nefarian completes his corruption, and the mighty red dragon is helpless as Nefarian orders him to kill his allies. However, before the corruption is complete Vaelastrasz gives the players a buff called Essence of the Red, granting them unlimited mana, rage, and energy. However, this buff only last three minutes, and is crucial to the encounter. The dragon will also give players Burning Adrenaline, which makes all their spells instant cast but also eventually kills them. Drops all [[Tier 2]] belts.<br clear="right" /> |
||
| − | == External links == |
||
| − | ;Community forums |
||
| − | :[http://multiboxing.com/forums Multiboxing.com Forums] |
||
| − | :[http://www.dual-boxing.com/forums.php Dual Boxing Forums] |
||
| − | :[http://www.dual-boxing.fr/forum/ French Dual Boxing Forums] |
||
| − | ;Resources |
||
| − | :[http://www.dual-boxing.com/wiki Dual-Boxing Wiki] |
||
| − | :[http://www.dual-boxing.fr French guide about software, macro and hardware] |
||
| − | :[http://www.multiboxing-guide.info/ Multiboxing Guides] |
||
| − | ;Interviews |
||
| − | :[http://www.wowinsider.com/2006/12/15/interview-with-xzin-the-man-with-ten-arms/ WoW Insider Interview with Xzin] |
||
| − | :[http://www.escapistmagazine.com/articles/view/issues/issue_191/5813-Multiboxing-to-Level-80-Nirvana.5 Multiboxing to Level 80 Nirvana] |
||
| − | ;Guides and Strategies |
||
| − | :[http://multiboxing.com/category/world-of-warcraft/wow-multiboxing-guides/ Large list of strategies, frequently updated] |
||
| − | ;Game Theory |
||
| − | :[http://www.sirlin.net/archive/the-man-who-would-solo-a-40-man-raid/ Sirlin Game Design Theory] |
||
| − | ;GM Conversations |
||
| − | :[http://dual-boxing.com/wiki/index.php/GM_Conversations Dual-Boxing.com GM Conversation links] |
||
| − | :[http://www.imagedump.com/index.cgi?pick=setandget&tp=454222&poll_id=0&category_id=19&warned=y Xzin GM Conversation] |
||
| − | :[http://forums.wow-europe.com/thread.html?topicId=3111662873&sid=1&pageNo=3 Blizzard recent post on subject] |
||
| − | :[http://mousecloner.com/blizresponse.php Mousecloner.com GM conversations and Blizzard forum postings] |
||
| − | ;Others |
||
| − | :Toxicmoon also known as [http://www.bradster.net Bradster]. A five box gamer that has released many boxing videos. Two of his PvP videos was placed in the feature moved section of the popular site [http://www.warcraftmovies.com/ Warcraft Movies]. |
||
| − | === |
+ | ===[[Broodlord Lashlayer]]=== |
| + | [[Image:Broodlord Lashlayer.jpg|thumb|Broodlord Lashlayer]] |
||
| − | *[http://multiboxing.com/category/world-of-warcraft/multiboxing-videos/ Lots of multiboxing videos] |
||
| + | Location: [[Blackwing Lair]] <br />Raid 40 |
||
| − | *[http://www.dual-boxing.com/wiki/index.php/Videos Dual-Boxing.com video links] |
||
| − | *[http://video.google.com/videoplay?docid=3697765098130473147 Xzin Video #1] |
||
| − | *[http://video.google.com/videoplay?docid=3471302298396612214 Xzin Video #2] |
||
| − | *[http://www.warcraftmovies.com/movieview.php?id=50089 Ellay 2k Arenas] |
||
| − | *[http://www.youtube.com/watch?v=EIc0QgDiCxs Konnichiwa - S4 Arenas] |
||
| − | *[http://vboxing.net/videos V-boxing Videos] |
||
| − | *[http://www.SmileYouAreOnTv.com/ Moorea's HD live 5 boxing video stream - 80 Heroic instances, pvp...] |
||
| − | *[http://www.multiboxing-guide.info/Multiboxing-Videos.html Shaman PvP Multiboxing Videos] |
||
| + | A large black [[Drakonid]], Broodlord Lashlayer oversees the suppression rooms in Blackwing Lair, keeping the many kidnapped [[dragon]] whelps in check. The encounter starts long before the raid even lays eyes on Lashlayer, as they battle their way through the complex suppression rooms. Drops all [[Tier 2]] boots, and acquiring his head is the first of many steps in the quest to open the [[Gates of Ahn'Qiraj]].<br clear="right" /> |
||
| − | ===Blogs=== |
||
| + | ===[[Flamegor]]=== |
||
| − | *[http://mrstoneskin.blogspot.com/ Mr. Stoneskins blog!] |
||
| + | [[Image:Flamegor.jpg|thumb|Flamegor]] |
||
| − | *[http://sixteentotems.blogspot.com/ Slat's Blog - (1x Paladin, 4x Shaman)] |
||
| + | Location: [[Blackwing Lair]] <br />Raid 40 |
||
| − | *[http://noobwow5boxer.blogspot.com/ Simulacra's Blog (1x Paladin, 4x Shaman)] |
||
| − | *[http://5konnichiwa.blogspot.com/ Konnichiwa Blog - (5xShaman)] |
||
| − | *[http://captn-log.blogspot.com/ Captns Log - WoW] |
||
| − | *[http://www.teamwizzy.com Team Wizzy - DAoC] |
||
| − | *[http://www.dual-boxing.com/wiki/index.php/Blogs Dual-boxing.com blog links] |
||
| − | *[http://sites.google.com/site/recipeofdualbox/ Russian instruction for create dual-box] |
||
| + | The third of three black [[drake]]s found in Blackwing Lair. Like the other drakes, he uses Wing Buffet to reduce aggro, as well as the deadly Shadowflame, which needs to be mitigated by [[Onyxia Scale Cloak]]s. His unique ability is Fire Nova, a direct damage attack that hits all enemies within his line of sight. However, he uses this only when frenzied, which can be dispelled by [[Hunter]]s. Drops all [[Tier 2]] gloves.<br clear="right" /> |
||
| − | ==References== |
||
| + | |||
| − | {{Reflist}} |
||
| + | ===[[Ebonroc]]=== |
||
| − | [[Category:Game terms]] |
||
| + | [[Image:Ebonroc.jpg|thumb|Ebonroc]] |
||
| − | [[Category:Multiboxing]] |
||
| + | Location: [[Blackwing Lair]] <br />Raid 40 |
||
| + | |||
| + | The second of three black [[drake]]s found in Blackwing Lair. Like the other drakes, he uses Wing Buffet to reduce aggro, as well as the deadly Shadowflame, which needs to be mitigated by [[Onyxia Scale Cloak]]s. His unique ability is Shadow of Ebonroc, which applies a debuff to whoever is on top of the hate list. Whenever Ebonroc hits someone who has the debuff, he regains 25000 health. Drops all [[Tier 2]] gloves.<br clear="right" /> |
||
| + | |||
| + | ===[[Firemaw]]=== |
||
| + | [[Image:Firemaw.jpg|thumb|Firemaw]] |
||
| + | Location: [[Blackwing Lair]] <br />Raid 40 |
||
| + | |||
| + | The first of three black [[drake]]s found in Blackwing Lair. Like the other drakes, he uses Wing Buffet to reduce aggro, as well as the deadly Shadowflame, which needs to be mitigated by [[Onyxia Scale Cloak]]s. His unique ability is Flame Buffet, which applies a stackable Fire DoT to all enemies within his line of sight. Drops all [[Tier 2]] gloves.<br clear="right" /> |
||
| + | |||
| + | ===[[Chromaggus]]=== |
||
| + | [[Image:Chromaggus.jpg|thumb|Chromaggus]] |
||
| + | Location: [[Blackwing Lair]] <br />Raid 40 |
||
| + | |||
| + | The only known [[Drakeadon]] in existence. The encounter is largely random, as his two heads will each have a random breath attack, and he casts random Brood Afflictions, applying nasty debuffs to all players. His skin also "shimmers," changing his vulnerability to certain schools of magic. Goes in frenzies that can be dispelled by [[Hunter]]s, and enrages at 20% health. Drops all [[Tier 2]] shoulder pieces.<br clear="right" /> |
||
| + | |||
| + | ===[[Nefarian (tactics)|Nefarian]]=== |
||
| + | [[Image:Nefarian.jpg|thumb|Nefarian]] |
||
| + | Location: [[Blackwing Lair]] <br />Raid 40 |
||
| + | |||
| + | Son of the Black [[Dragon Aspect]], [[Neltharion]], and lord of the [[black dragonflight]]. He allied the Black [[Dragon]]s with the [[Blackrock Clan]], and is attempting to create a [[chromatic dragonflight]]. He also stole the red shard of the [[Scepter of the Shifting Sands]] from [[Vaelastrasz]] after defeating him, and threatened to destroy it. He is the final boss in Blackwing Lair. In Phase 1 of the encounter, players must fight off wave after wave of randomly colored [[Drakonid]]s, all while an invulnerable Nefarian wanders amongst the raid in human form, randomly shadow bolting, mind controlling and fearing people. Nefarian leaves shortly after. Once 42 Drakonids are killed, Nefarian returns in dragon form, opening up with a Shadowflame that hits all members of the raid. He will then proceed to randomly call out classes, forcing all players of that class to do something bad based on their class (ie. forcing Druids into Cat Form, summoning hostile Infernals, etc.). At 20%, he resurrects all the dead Drakonids as Bone Constructs. Drops all [[Tier 2]] chest pieces.<br clear="right" /> |
||
| + | |||
| + | ==[[Onyxia's Lair (original)|Onyxia's Lair]]== |
||
| + | :''Removed in [[patch 3.2.2]]. Retuned for [[Onyxia's Lair|level 80]] players.'' |
||
| + | |||
| + | ===[[Onyxia (original)|Onyxia]]=== |
||
| + | [[Image:Onyxia.JPG|thumb|Onyxia]] |
||
| + | Daughter of the Black [[Dragon Aspect]], [[Neltharion]], and brood mother of the [[black dragonflight]]. When she isn't meddling in human affairs or plotting with her brother, [[Nefarian]], she is in her lair in [[Dustwallow Marsh]], fiercely protecting her eggs. Although small for a [[dragon]] her age, she is no less dangerous. The encounter is divided into three distinct phases. In the first phase, she is on the ground and is extremely difficult to tank. In the second phase, she takes flight and breathes fire down on her foes. In the final phase, she lands once again and begins fearing her attackers, all while the ground erupts beneath their feet. Drops all [[Tier 2]] head pieces, as well the sinew required for the [[Hunter]] epic quest.<br clear="right" /> |
||
| + | |||
| + | ==[[Temple of Ahn'Qiraj|The Temple of Ahn'Qiraj]]== |
||
| + | ===[[The Prophet Skeram]]=== |
||
| + | [[Image:Skeram temple.jpg|thumb|The Prophet Skeram]] |
||
| + | Location: [[Temple of Ahn'Qiraj|The Temple of Ahn'Qiraj]] <br />Raid 40 |
||
| + | |||
| + | Religious leader of the [[Qiraji]] and author of the [[Prophecy of C'Thun]], the Prophet Skeram is the first boss in Ahn'Qiraj. Creates two mirror images of himself at 25% health intervals, and both the images and himself can Blink, Earth Shock, and Arcane Explosion. He also casts True Fulfillment on random targets, mind controlling them while increasing their damage, movement and resistance, and making their spells instant-cast.<br clear="right" /> |
||
| + | |||
| + | ===[[Kri|Lord Kri]]=== |
||
| + | [[Image:Kri.jpg|thumb|Lord Kri]] |
||
| + | Location: [[Temple of Ahn'Qiraj|The Temple of Ahn'Qiraj]] <br />Raid 40 |
||
| + | |||
| + | One of the three optional [[Silithid Colossi]] found in Ahn'Qiraj, players must fight Lord Kri at the same time as [[Princess Yauj]] and [[Vem]]. Loot received from the encounter depends on the order the Colossi are killed in, and killing Lord Kri last is the hardest method and yields the best loot. He has an AoE Toxic Volley that hits all players in the room for Nature damage while applying a Poison DoT. When he dies, his corpse leaves behind a deadly toxic cloud.<br clear="right" /> |
||
| + | |||
| + | ===[[Princess Yauj]]=== |
||
| + | [[Image:Yauj.jpg|thumb|Princess Yauj]] |
||
| + | Location: [[Temple of Ahn'Qiraj|The Temple of Ahn'Qiraj]] <br />Raid 40 |
||
| + | |||
| + | One of the three optional [[Silithid Colossi]] found in Ahn'Qiraj, players must fight Princess Yauj at the same time as [[Kri|Lord Kri]] and [[Vem]]. Loot received from the encounter depends on the order the Colossi are killed in, and killing Princess Yauj last is the intermediary route, yielding good loot but not the best. She has an AoE Fear, and heals herself as well. Upon death, she releases a swarm of [[Silithid]]s.<br clear="right" /> |
||
| + | |||
| + | ===[[Vem]]=== |
||
| + | [[Image:Three bugs.jpg|thumb|Triumvirate]] |
||
| + | Location: [[Temple of Ahn'Qiraj|The Temple of Ahn'Qiraj]] <br />Raid 40 |
||
| + | |||
| + | One of the three optional [[Silithid Colossi]] found in Ahn'Qiraj, players must fight Vem at the same time as [[Kri|Lord Kri]] and [[Princess Yauj]]. Loot received from the encounter depends on the order the Colossi are killed in, and killing Vem last is the easiest method and yields the lowest quality loot. Vem can charge his opponents.<br clear="right" /> |
||
| + | |||
| + | ===[[Battleguard Sartura]]=== |
||
| + | [[Image:Battleguard Sartura.jpg|thumb|Battleguard Sartura]] |
||
| + | Location: [[Temple of Ahn'Qiraj|The Temple of Ahn'Qiraj]] <br />Raid 40 |
||
| + | |||
| + | A [[Qiraji Battleguard]] in Ahn'Qiraj, Sartura and her three guards are nasty opponents. All of them constantly reset aggro lists, the guards punt their opponents, and Sartura enrages at 20%. And if she isn't dead within 10 minutes, she goes into a super-enrage that is sure to wipe the raid.<br clear="right" /> |
||
| + | |||
| + | ===[[Fankriss the Unyielding]]=== |
||
| + | [[Image:Fankriss the Unyielding.jpg|thumb|Fankriss the Unyielding]] |
||
| + | Location: [[Temple of Ahn'Qiraj|The Temple of Ahn'Qiraj]] <br />Raid 40 |
||
| + | |||
| + | One of only two known [[silithid]] [[Sandreaver]]s, Fankriss summons many, ''many'' bugs during the encounter. He has an ability called Mortal Wound which cleaves through opponents and severely hinders healing.<br clear="right" /> |
||
| + | |||
| + | ===[[Viscidus]]=== |
||
| + | [[Image:Viscidus.jpg|thumb|Viscidus]] |
||
| + | Location: [[Temple of Ahn'Qiraj|The Temple of Ahn'Qiraj]] <br />Raid 40 |
||
| + | |||
| + | A giant [[Slime]], Viscidus is the second optional encounter in Ahn'Qiraj, and is a highly Nature Resistance intensive fight. Not only that, but he is a very interesting fight as well. He normally takes only 50% of normal damage. However, if he is hit by enough Frost attacks (whatever the source), he will freeze. Once frozen, physical attackers move in and attack him until he shatters, exploding into 20 globs. Once these globs reunite, Viscidus appears again. Killing a glob deals 5% damage to his total health, and is the most efficient way of killing him. Drops the bindings required for the [[Temple of Ahn'Qiraj Quest Loot|AQ Set]] boots and shoulder pieces.<br clear="right" /> |
||
| + | |||
| + | ===[[Princess Huhuran]]=== |
||
| + | [[Image:Huhuran.jpg|thumb|Princess Huhuran]] |
||
| + | Location: [[Temple of Ahn'Qiraj|The Temple of Ahn'Qiraj]] <br />Raid 40 |
||
| + | |||
| + | A lone [[Silithid]] [[Silithid Wasp|Wasp]], Huhuran is a Nature Resistance intensive fight. Goes into frenzies that need to be dispelled by [[Hunter]]s. Has deadly Nature AoE that she uses when frenzied or enraged, spews Noxious Poison, and uses an AoE Wyvern Sting that not only put players to sleep, but deals thousands of Nature damage if dispelled. Enrages at 30%. Drops the bindings required for the [[Temple of Ahn'Qiraj Quest Loot|AQ Set]] boots and shoulder pieces.<br clear="right" /> |
||
| + | |||
| + | ===[[Twin Emperors|Emperor Vek'lor]]=== |
||
| + | [[Image:Vek'lor.jpg|thumb|Emperor Vek'lor]] |
||
| + | Location: [[Temple of Ahn'Qiraj|The Temple of Ahn'Qiraj]] <br />Raid 40 |
||
| + | |||
| + | Fought alongside his twin brother, [[Twin Emperors|Vek'nilash]], this [[Qiraji]] Emperor is immune to all physical damage, resulting in an interesting tanking situation. He spams Shadow Bolt and casts Blizzard. He reacts with an incredibly powerful attack that will wipe the raid if someone hits him with a physical attack. And for good measure, he constantly teleport-switches with his twin, who has a similar reaction to magical attacks. Drops a circlet required for the [[Temple of Ahn'Qiraj Quest Loot|AQ Set]] head pieces.<br clear="right" /> |
||
| + | |||
| + | ===[[Twin Emperors|Emperor Vek'nilash]]=== |
||
| + | [[Image:Vek'nilash.jpg|thumb|Emperor Vek'nilash]] |
||
| + | Location: [[Temple of Ahn'Qiraj|The Temple of Ahn'Qiraj]] <br />Raid 40 |
||
| + | |||
| + | Fought alongside his twin brother, [[Twin Emperors|Vek'lor]], this [[Qiraji]] Emperor is immune to all magical damage. He has an Uppercut attack that knocks back opponents, and Unbalancing Strike, which deals massive damage and lowers Defense by 100. He reacts with an incredibly powerful attack that will wipe the raid if someone hits him with a magical attack. And for good measure, he constantly teleport-switches with his twin, who has a similar reaction to physical attacks. Drops a circlet required for the [[Temple of Ahn'Qiraj Quest Loot|AQ Set]] head pieces.<br clear="right" /> |
||
| + | |||
| + | ===[[Ouro the Sandworm|Ouro]]=== |
||
| + | [[Image:Ouro.jpg|thumb|Ouro the Sandworm]] |
||
| + | Location: [[Temple of Ahn'Qiraj|The Temple of Ahn'Qiraj]] <br />Raid 40 |
||
| + | |||
| + | The ancient [[Silithid Sand Worm]], Ouro, is a being of legendary power. He is rumored to have been created by the [[Old God]] [[C'Thun]] himself as a mockery of life. He is the last optional boss in Ahn'Qiraj, and is Nature Resist intensive. During combat, he has a powerful breath attack called Sand Blast which deals large Nature damage, and an AoE knockback attack that often results in him targeting ranged attackers and healers. He also submerges at set intervals. When submerged, Dirt Mounds begin tearing around the room at random, dealing Nature damage to anyone caught their path. Once he reaches 20%, he enrages AND starts summoning Dirt Mounds without submerging. Drops the items required for the [[Temple of Ahn'Qiraj Quest Loot|AQ Set]] leg pieces.<br clear="right" /> |
||
| + | |||
| + | ===[[C'Thun]]=== |
||
| + | [[Image:Cthun-p2.jpg|thumb|C'Thun]] |
||
| + | Location: [[Temple of Ahn'Qiraj|The Temple of Ahn'Qiraj]] <br />Raid 40 |
||
| + | |||
| + | One of the [[Old Gods]] who ruled [[Azeroth (world)|Azeroth]] prior to the coming of the [[Titans]], C'Thun has been plotting his revenge since the day he was defeated by a nameless Titan in the deserts of [[Silithus]]. It was he who created the [[Aqir]], ancestors of the [[Qiraji]] and the [[Nerubian]]s, in the image of the [[Silithid]]. And it is he who drives the Qiraji on their relentless campaign. He is the final boss in Ahn'Qiraj. During phase 1 of the fight, players must contend with his Eye, which shoots immensely powerful beams of energy, and an assortment of minor tentacles. In phase 2, his body surfaces and giant tentacles appear, including mouth tentacles that swallow players whole. Those players plummet down into his stomach, full of disgestive acid, and must defeat some tentacles inside his stomach in order to weaken him. Drops the items required for the [[Temple of Ahn'Qiraj Quest Loot|AQ Set]] chest pieces.<br clear="right" /> |
||
| + | |||
| + | ==[[Naxxramas (original)|Naxxramas]]== |
||
| + | :''Removed in [[patch 3.0.1]]. Moved to Northrend in [[patch 3.0.2]] retuned for [[Naxxramas|level 80]] players.'' |
||
| + | |||
| + | An ancient [[Nerubian]] ziggurat, Naxxramas was torn free from the ground by agents of the [[Lich King]] to serve as [[Kel'Thuzad]]'s base of operations as he spreads the plague throughout [[Lordaeron]]. |
||
| + | |||
| + | Due to Kel'Thuzad fighting a war against the [[Scarlet Crusade]], the [[Argent Dawn]], the [[Forsaken]] and the humans of the [[Alliance]], as well as constant incursions of adventurers from every race and nation into the Scourge-controlled Plaguelands on a daily basis, his forces have been severely taxed to maintain the security of his necropolis. But now the gates of Naxxramas are open, Kel'Thuzad's new forces are rapidly sweeping away all opposition to the Scourge. |
||
| + | |||
| + | |||
| + | ===[[Anub'Rekhan (original)|Anub'Rekhan]]=== |
||
| + | [[Image:Anub'Rekhan.jpg|thumb|Anub'Rekhan]] |
||
| + | A powerful Crypt Lord who guards the hallways of the Spider Wing in [[Naxxramas]].<br clear="right" /> |
||
| + | |||
| + | ===[[Grand Widow Faerlina (original)|Grand Widow Faerlina]]=== |
||
| + | [[Image:Faerlina.jpg|thumb|Grand Widow Faerlina]] |
||
| + | As her name suggests, Faerlina is a powerful spider in the form of a female [[Human]], clad in [[Warlock]] [[Tier 3]]. She uses poison volleys, Rain of Fire and enrages, giving her abilities more destructive power.<br clear="right" /> |
||
| + | |||
| + | ===[[Maexxna (original)|Maexxna]]=== |
||
| + | [[Image:Maexxna.jpg|thumb|Maexxna]] |
||
| + | Maexxna is the final boss in the Spider Wing section of [[Naxxramas]]. She awaits all who dare oppose her in her giant web in the outer ring of Naxxramas. She uses powerful poisons and traps players into her webs.<br clear="right" /> |
||
| + | |||
| + | ===[[Noth the Plaguebringer (original)|Noth the Plaguebringer]]=== |
||
| + | [[Image:Noth the Plaguebringer.jpg|thumb|Noth the Plaguebringer]] |
||
| + | Once a notable Wizard and alchemist of [[Dalaran]] Noth heard the Lich king's call as [[Arthas]] and [[Kel'Thuzad]] did, he was quick to turn his back on the light and joined the [[Scourge]] where he believed that real power lay. During the [[third war]] Noth saw that many innocent lives were needed to feed the growing might of the Scourge and he came to a point where he started opposing himself, Kel'Thuzad resolved the matter by freezing his heart in his chest with his frost magic. Noth the Plaguebringer, now more undead than Human is an extremely powerful Necromancer with a various array of deadly spells and curses.<br clear="right" /> |
||
| + | |||
| + | ===[[Heigan the Unclean (original)|Heigan the Unclean]]=== |
||
| + | [[Image:Heigan the Unclean.jpg|thumb|Heigan the Unclean]] |
||
| + | A powerful [[undead]] sorcerer who resides in [[Naxxramas]]' Plague Wing.<br clear="right" /> |
||
| + | |||
| + | ===[[Loatheb (original)|Loatheb]]=== |
||
| + | [[Image:Naxx2.jpg|thumb|Loatheb]] |
||
| + | The final [[boss]] in the Plague Wing. Loatheb uses an evil combination of incapacitating the healers by placing a one minute cooldown of every spell and placing a damage over time spell on all members of the group.<br clear="right" /> |
||
| + | |||
| + | ===[[Instructor Razuvious (original)|Instructor Razuvious]]=== |
||
| + | [[Image:Instructor Razuvious.JPG|thumb|Instructor Razuvious]] |
||
| + | Instructor Razuvious trains the [[warrior]] recruits of [[Naxxramas]] and poses an interesting fight. The Instructor himself deals insane amounts of damage; to such extend that the only way to tank him is to [[Mind Control]] one of his 4 students and cycle through them as the Mind Controls run out. Above that, his fearsome shouts will drain and almost destroy anyone who hears them...<br clear="right" /> |
||
| + | |||
| + | ===[[Gothik the Harvester (original)|Gothik the Harvester]]=== |
||
| + | [[Image:Gothik the harvester.jpg|thumb|Gothik the Harvester]] |
||
| + | As his name suggests, Gothik is the Harvester of Souls for the undead armies of the [[Lich King]].<br clear="right" /> |
||
| + | |||
| + | ===[[Four Horsemen (original)|The Four Horsemen]]=== |
||
| + | [[Image:FourHorsemen.jpg|thumb|The Four Horsemen]] |
||
| + | '''The Four Horsemen''' are four powerful death knights in the service of [[Kel'Thuzad]], in his dread citadel of [[Naxxramas]]. They are [[Highlord Mograine]], [[Thane Korth'azz]], [[Lady Blaumeux]], and [[Sir Zeliek]]. |
||
| + | |||
| + | They appear to be based on the mythical [[wikipedia:Four Horsemen of the Apocalypse|Four Horsemen of the Apocalypse]] from the [[wikipedia:Book of Revelation|Book of Revelation]], said to bring the end of the world - Zeliek as the White Rider of Conquest, Mograine as the Red Rider of War, Blaumeux as the Black Rider of Famine, and Korth'azz as the Pale Rider of Death.<br clear="right" /> |
||
| + | |||
| + | ===[[Patchwerk (original)|Patchwerk]]=== |
||
| + | [[Image:Patchwerk.jpg|thumb|Patchwerk]] |
||
| + | His name comes from "patchwork"; as an Abomination, he's a disgusting amalgamation of flesh, bones, meat, metal, and threads. He is [[Kel'Thuzad]]'s avatar of war.<br clear="right" /> |
||
| + | |||
| + | ===[[Grobbulus (original)|Grobbulus]]=== |
||
| + | [[Image:Grobbulus.jpg|thumb|Grobbulus]] |
||
| + | A poison and slime sprewing abomination that guards the halls of [[Naxxramas]]' [[Abomination]] Wing.<br clear="right" /> |
||
| + | |||
| + | ===[[Gluth (original)|Gluth]]=== |
||
| + | [[Image:Gluth.jpg|thumb|Gluth]] |
||
| + | An abomination patchwork that should resemble a kind of dog or a similar creature.<br clear="right" /> |
||
| + | |||
| + | ===[[Thaddius (original)|Thaddius]]=== |
||
| + | [[Image:Thaddius.jpg|thumb|Thaddius]] |
||
| + | '''Thaddius''' is a [[boss]] in [[Naxxramas]]. The theme of this boss is similar to that of Frankenstein's Monster, creating something akin to an [[Abomination]] in that it is sewn together of human parts, but also part machinery. |
||
| + | |||
| + | While Thaddius is being powered up, his two "guardians" in the form of [[Wight]]s, [[Stalagg]] and [[Feugen]], attack you.<br clear="right" /> |
||
| + | |||
| + | ===[[Sapphiron (original)|Sapphiron]]=== |
||
| + | [[Image:Sapphiron2.jpg|thumb|Sapphiron]] |
||
| + | An ancient servant of [[Malygos]], - the Hand of Magic - Sapphiron was a [[blue dragon]] who lived with a powerful brood in [[Northrend]] by the [[Dragonblight]], where he communed with the ancient spirits of the dead dragons. Sapphiron was magnificently powerful, and protected the lands of [[Icecrown]] as best he could. Though [[Ner'zhul]]'s malevolent influence defiled the Dragonblight, Sapphiron continued to guard his hoard of treasure from intruders. |
||
| + | |||
| + | [[Anub'arak]], the King of [[Azjol-Nerub]], thought that perhaps by equipping themselves with Sapphiron's treasures, he and [[Arthas]] might be more prepared for the perilous journey through Azjol-Nerub. Arthas agreed, and journeyed into Sapphiron's lair with Anub'arak. |
||
| + | |||
| + | Sapphiron greeted the undead as they approached him. He found Arthas's honesty about stealing his treasure quite refreshing. Sapphiron and his drakes attacked with all their might, unleashing their strange, cold magics upon them. In the end, despite all odds, Arthas was victorious, and Sapphiron was defeated. As a final, clinching victory, however, Arthas used what remained of his dwindling power to recreate Sapphiron as a frost wyrm to serve the [[Scourge]].<br clear="right" /> |
||
| + | |||
| + | ===[[Kel'Thuzad (original)|Kel'Thuzad]]=== |
||
| + | [[Image:Kel'thuzad Ingame.png|thumb|Kel'Thuzad]] |
||
| + | Formerly a sorcerer of Dalaran, Kel'Thuzad was one of the principal agents of the [[Lich King]], responsible for the spreading of the [[Plague]] of undeath across [[Lordaeron]]. After being slain by [[Arthas]] during the events of the [[Third War]], he was reborn as a [[lich]]. He then aided Arthas in summoning [[Archimonde]], a powerful lord of the [[Burning Legion]]. However, Kel'Thuzad's true loyalty was to the Lich King, and not the Burning Legion. After the Legion's defeat, Kel'Thuzad supported Arthas in wresting power from the Dreadlords. When Arthas left for [[Northrend]] during the events of [[The Frozen Throne]], he left Kel'Thuzad as his agent to command the [[Scourge]] in Lordaeron. He now commands Scourge forces in the [[Plaguelands]] from his necropolis floating above [[Stratholme]], [[Naxxramas]].<br clear="right" /> |
||
| + | |||
| + | [[Category:Raids]] |
||
| + | [[Category:Bosses| ]] |
||
Revision as of 09:53, 18 July 2011
This article contains a short overview of all raid bosses that were in or added to World of Warcraft before before the release of World of Warcraft: The Burning Crusade.
Zul'Gurub
- Removed in patch 4.0.3a.
In order to quell Hakkar the Soulflayer, the trolls of the land banded together and sent a contingent of High Priests into the ancient city of Zul'Gurub. Each priest was a powerful champion of the Primal Gods, but despite their best efforts they fell under the sway of Hakkar. Now the champions and their Primal God aspects feed the awesome power of the Soulflayer.
Any adventurers brave enough to venture into the foreboding ruins must overcome the High Priests and Hakkar's mighty lieutenants if they are to have any hope of confronting the mighty blood god.
High Priestess Jeklik

High Priestess Jeklik
One of Hakkar's priests, Jeklik holds the aspect of the bat.
High Priest Venoxis
High Priest Venoxis
The troll Venoxis was the High Priest of the Primal God Ula-tek, the goddess serpent.
High Priestess Mar'li

Hight Priestess Mar'li
The troll Mar'li was the High Priestess of the Primal God Shadra, the god spider.
High Priest Thekal

High Priest Thekal
The troll Thekal was the High Priest of the Primal God Shirvallah, the god tiger.
High Priestess Arlokk
High Priestess Arlokk
The troll Arlokk was the High Priestess of the Primal God Bethekk, the goddess panther.
Bloodlord Mandokir
Bloodlord Mandokir
One of Hakkar's more powerful lieutenants, Mandokir is the leader of the Gurubashi tribe trolls, the most powerful troll-tribe that resides inside the ancient city of Zul'Gurub. Mandokir and his people were reluctant at first to summon Hakkar into the mortal world and revolted against the plan, but as soon as Hakkar entered the world their resistance seized and they soon fulfilled his every command.
Jin'do the Hexxer
Jin'do the Hexxer
One of Hakkar's most powerful lieutenants, Jin'do was originally the leader of the Hakkari tribe trolls. After being exiled or murdered for the evil deeds they had done in Hakkar's name, they decided to wreak havoc upon the world and summon Hakkar into the mortal world. Jin'do and the remaining Hakkari trolls now reside inside the walls of the ancient Gurubashi capital of Zul'gurub.
Gahz'ranka
Gahz'ranka
Gahz'ranka is a giant sea-creature that lives in the waters of the ancient Gurubashi capital of Zul'Gurub. The famous fisherman Nat Pagle hunted the creature for a long time, but apparently failed to capture it. Gather a group of heroes and maybe some lure. Who knows, maybe you'll succeed where Nat failed...
Gri'lek
Hazza'rah
Renataki
Wushoolay
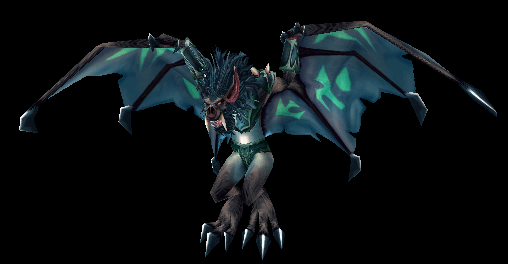
Hakkar the Soulflayer

Hakkar the Soulflayer
The long centuries following the Great Sundering of the world were difficult ones for the troll race. Famine and terror were commonplace within the broken kingdoms. The Gurubashi trolls, driven to desperate ends, sought aid from ancient, mystical forces. Though both of the troll kingdoms shared a central belief in a great pantheon of primitive gods, the Gurubashi fell under the sway of the darkest one.
Hakkar the Soulflayer, a vile, bloodthirsty spirit, heard the trolls' call and decided to aid them. Hakkar gave his secrets of blood to the Gurubashi and helped them extend their civilization across most of Stranglethorn Vale and certain islands of the South Seas. Though he brought them great power, Hakkar wanted more and more for his efforts.
In recent times, the Atal'ai priests discovered that Hakkar's physical form could only be summoned within the ancient capital of the Gurubashi Empire, Zul'Gurub. Unfortunately, the priests have met with recent success in their quest to call forth Hakkar -- reports confirm the presence of the dreaded Soulflayer in the heart of the Gurubashi ruins.
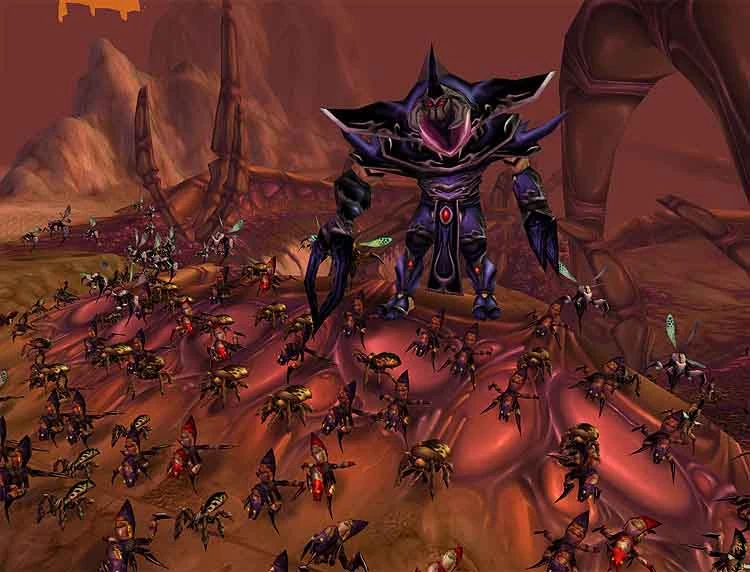
In order to quell the blood god, the trolls of the land banded together and sent a contingent of High Priests into the ancient city. Each priest was a powerful champion of the Primal Gods -- Bat, Panther, Tiger, Spider, and Snake -- but despite their best efforts, they fell under the sway of Hakkar. Now the champions and their Primal God aspects feed the awesome power of the Soulflayer. Any adventurers brave enough to venture into the foreboding ruins must overcome the High Priests if they are to have any hope of confronting the mighty blood god.
Ruins of Ahn'Qiraj
- Retuned in patch 4.0.3a to be a 10-player raid.
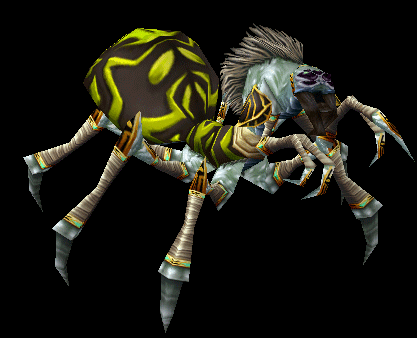
Kurinnaxx
Kurinnaxx
Kurinnaxx, a large sand reaver, is the first boss found in the Ruins of Ahn'Qiraj. He has a wide aggro radius and can see stealthed rogues.
General Rajaxx

General Rajaxx
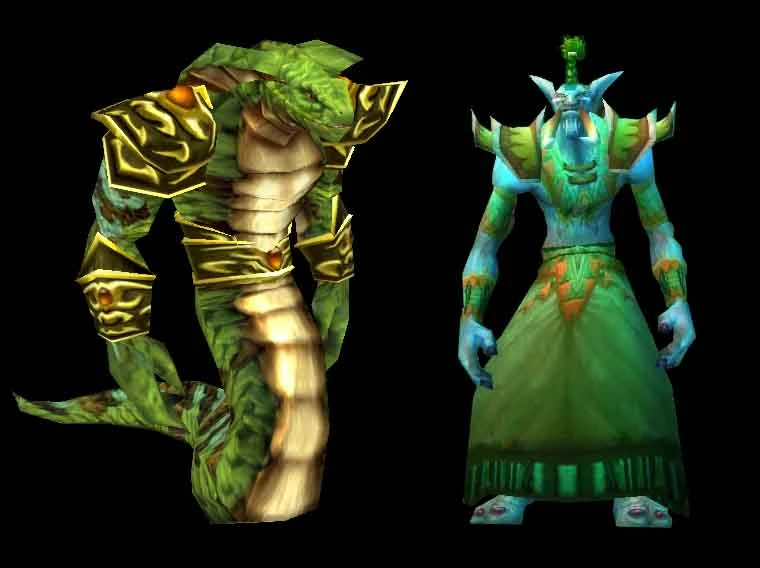
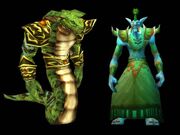
The mighty Qiraji known as General Rajaxx commands the Qiraji armies in battle. He was described in the War of the Shifting Sands as "a towering monstrosity, swinging clawed limbs, looming over all and always shouting commands to the insect soldiers of Qiraji and Silithid during battle." He is currently a boss found in the Ruins of Ahn'Qiraj. He is commonly thought to be Ragnaros's equal or greater in physical size.
Moam

Moam
Though the Scarab Wall prevented the Qiraji from venturing out of Ahn'Qiraj, the insect empire refused to remain idle. In preparation for their reemergence in the world, the shadowy master of Ahn'Qiraj commanded Emperor Vek'lor to create a new obsidian statue superior to all other Destroyers. Vek'lor sought his twin brother's aid in the task, and while Vek'nilash used his physical might to craft a grand body of volcanic rock, Vek'lor fortified the shell with powerful magic.
Emperor Vek'lor named the finished construct Moam, and observed as the dark master infused it with life. He was pleased and surprised to find that the improved Obsidian Destroyer was far more versatile than its earlier counterparts. The Twin Emperors intended to use Moam as a colossal weapon, knowing that its strengths would help it survive in the thick of melee as well as magical combat-but they did not expect for the construct's abilities to advance further without their own assistance.
Buru the Gorger

Buru the Gorger
Buru guards the eggs of the Qiraji. It is only by the destruction of those eggs that Buru can be weakened until finally weak enough to break through his immensely thick armor.
Ayamiss the Hunter

Ayamiss the Hunter
Ayamiss is a powerful flying hunter in the ranks of the Qiraji army. She and her soldiers hover high above the ground, and when confronted, Ayamiss gets great pleasure in sacrificing random members of the opposing forces.
Ossirian the Unscarred

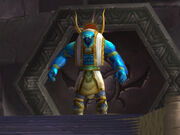
Ossirian the Unscarred
During the War of the Shifting Sands, as the Anubisath constructs crumbled under the dragonflight's assault, a single Anubisath did the seemingly impossible - he found a way to fight back.
Ossirian targeted one of the leaders, the massive dragon Grakkarond, and hurled his obsidian sword through the beast's wing. The crippled wyrm descended, crushing the Qiraji as it fell. The dragon mauled Ossirian nearly to death, but the remaining Anubisaths and Qiraji now had a target on the ground to focus on, and they swiftly converged and overwhelmed the noble dragon.
Ossirian's beaten body was dragged back to the Ruins of Ahn'Qiraj following the battle, where he should by all rights have perished. It is whispered that Ossirian found the favor of the malevolent force that reigns over the Qiraji, for in spite of his wounds, the construct survived.
Molten Core
Lucifron
Lucifron
Location: Molten Core
Raid 40
The first of the five Flamewakers defending Molten Core, Lucifron is the first 40-man raid boss most players encounter. His attacks are all Shadow based, but Shadow Resistance is not needed in any way. His guards can mind control players, while he himself has an AoE Magic effect called Impending Doom that will deal 2000 Shadow damage if not dispelled quickly, as well as a Curse that doubles the mana/rage/energy cost of all abilities. Drops the Tome of ![]() [Tranquilizing Shot], a necessity for future bosses.
[Tranquilizing Shot], a necessity for future bosses.
Magmadar
Magmadar
Location: Molten Core
Raid 40
A favored pet of Ragnaros and progenitor of the Core Hounds that roam throughout the Molten Core. Goes into deadly frenzies that only Hunters can dispel, has an AoE Fear, and occasionally throws Lava Bombs that ignite the surrounding area, dealing massive Fire damage. Killing Magmadar prevents Core Hounds that roam the instance from spawning. Drops all Tier 1 leg pieces.
Gehennas
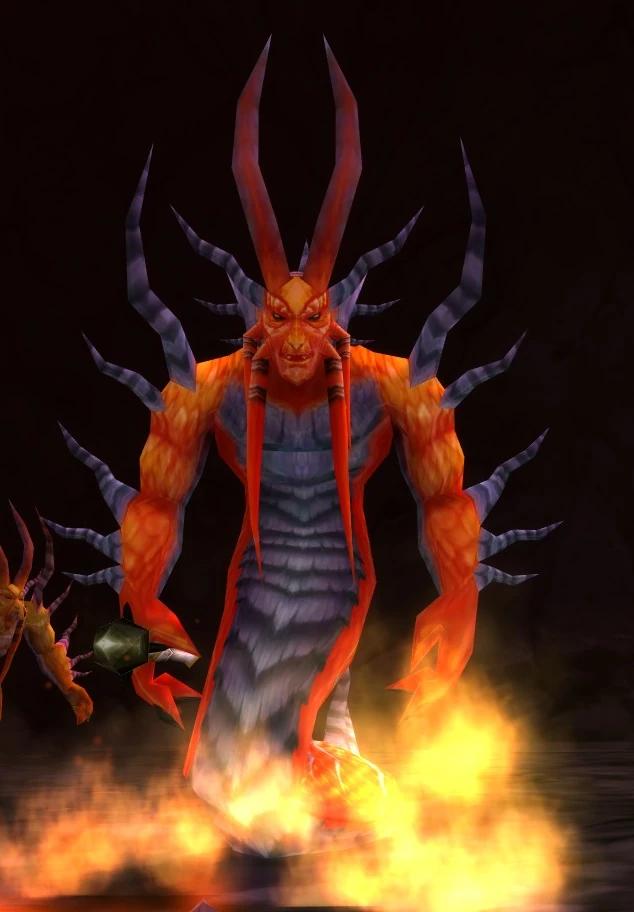
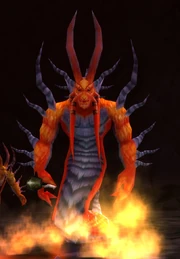
Gehennas
Location: Molten Core
Raid 40
The second of five Flamewakers defending Molten Core. Will call down a powerful Rain of Fire on his attackers, and also has an AoE curse that greatly reduces healing.
Garr


Garr
Location: Molten Core
Raid 40
A powerful Molten Rock Elemental that serves as one of Ragnaros' lieutenants and is partially responsible for Prince Thunderaan's imprisonment. He is guarded by eight Firesworn elementals that he can combust at will. He also consumes buffs. Killing Garr prevents the Lava Surgers that roam the instance from spawning. Drops all Tier 1 head pieces and one half of the ![]() [Bindings of the Windseeker].
[Bindings of the Windseeker].
Baron Geddon

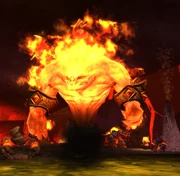
Baron Geddon
Location: Molten Core
Raid 40
A powerful Firelord that serves as one of Ragnaros' lieutenants and is partially responsible for Prince Thunderaan's imprisonment. Turns players into living bombs that explode after 10 seconds, dealing massive Fire damage to nearby allies and more often than not, killing the player. When near death, he starts a spell called Armageddon, which will likely kill anyone nearby should he succeed. Drops one half of the ![]() [Bindings of the Windseeker].
[Bindings of the Windseeker].
Shazzrah


Shazzrah
Location: Molten Core
Raid 40
The third of the five Flamewakers defending Molten Core. Spams a powerful Arcane Explosion and casts an AoE Curse that reduces Arcane Resistance. Will also randomly Blink towards players.
Golemagg the Incinerator

Golemagg the Incinerator
Location: Molten Core
Raid 40
A massive Molten Giant, Golemagg is the keeper of the valuable Sulfuron Ingots needed to form Sulfuras. He has two Core Hound pets that can not be killed until he dies. When low on health, he begins attacking much faster and causing earthquakes. Drops all Tier 1 chest pieces.
Sulfuron Harbinger

Sulfuron Harbinger
Location: Molten Core
Raid 40
The fourth of the five Flamewakers defending Molten Core. His true name is not known. He is guarded by four Flamewaker Priests, who won't hesitate to heal Sulfuron or each other.
Majordomo Executus

Majordomo Executus
Location: Molten Core
Raid 40
The fifth and final Flamewaker defending Molten Core, Executus is Ragnaros' most trusted lieutenant, and will only appear once the protective runes throughout the Core are extinguished. His encounter is the first truly complex 40-man encounter players encounter, calling for an interesting juggling of his eight guards. Once the guards are dead, Executus will surrender and leave to go summon Ragnaros himself. He leaves behind a chest of Epic loot, most notably items required for the Hunter and Priest epic quests.
Ragnaros
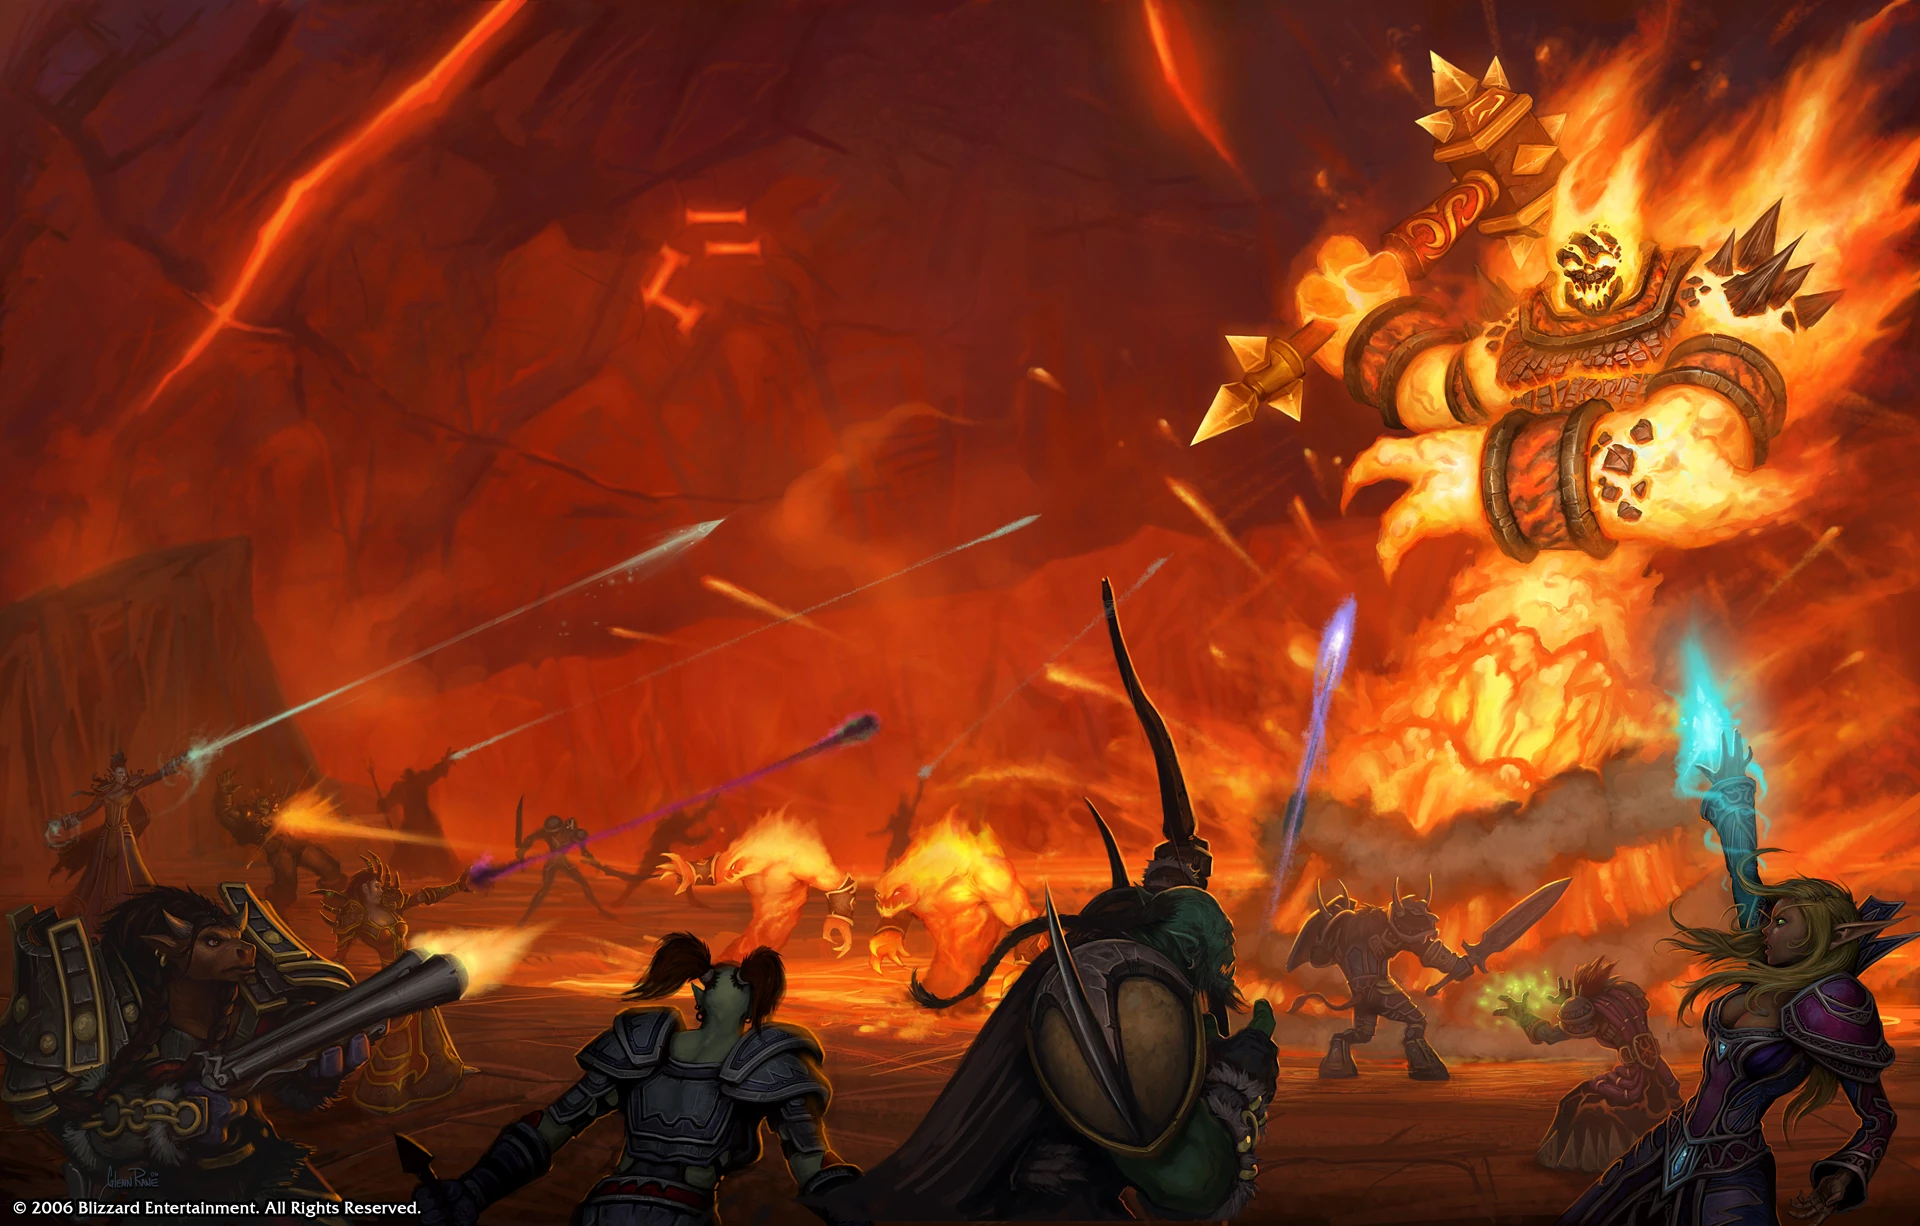
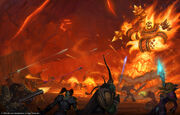
Ragnaros
Location: Molten Core
Raid 40
One of the four Elemental Lieutenants of the Old Gods, Ragnaros is a being so powerful that his entrance into this world created the volcanic wastelands surrounding Blackrock Mountain. However, he is only a shadow of his former self, having been separated from the powers of the Elemental Plane when he was summoned into Azeroth. He is the final boss in Molten Core. High Fire Resistance is a must for those who wish to challenge him. Drops all Tier 2 leg pieces, as well as the primary requirements for the legendary weapons, Sulfuras and Thunderfury.
Blackwing Lair
Razorgore the Untamed
Razorgore the Untamed
Location: Blackwing Lair
Raid 40
The most powerful known Dragonspawn in the world, Razorgore serves no master but himself. However, the dragon Nefarian found a way around that, creating a powerful orb that would allow the Blackrock Clan to control Razorgore, and uses the Dragonspawn to defend a clutch of Chromatic dragon eggs. He is the first boss in Blackwing Lair. The encounter involves using the orb to make Razorgore destroy the eggs, all while fighting off 40 other Orcs and Dragonspawn. It is known as one of the most chaotic encounters in the game, if not the most. Drops all Tier 2 bracers.
Vaelastrasz the Corrupt
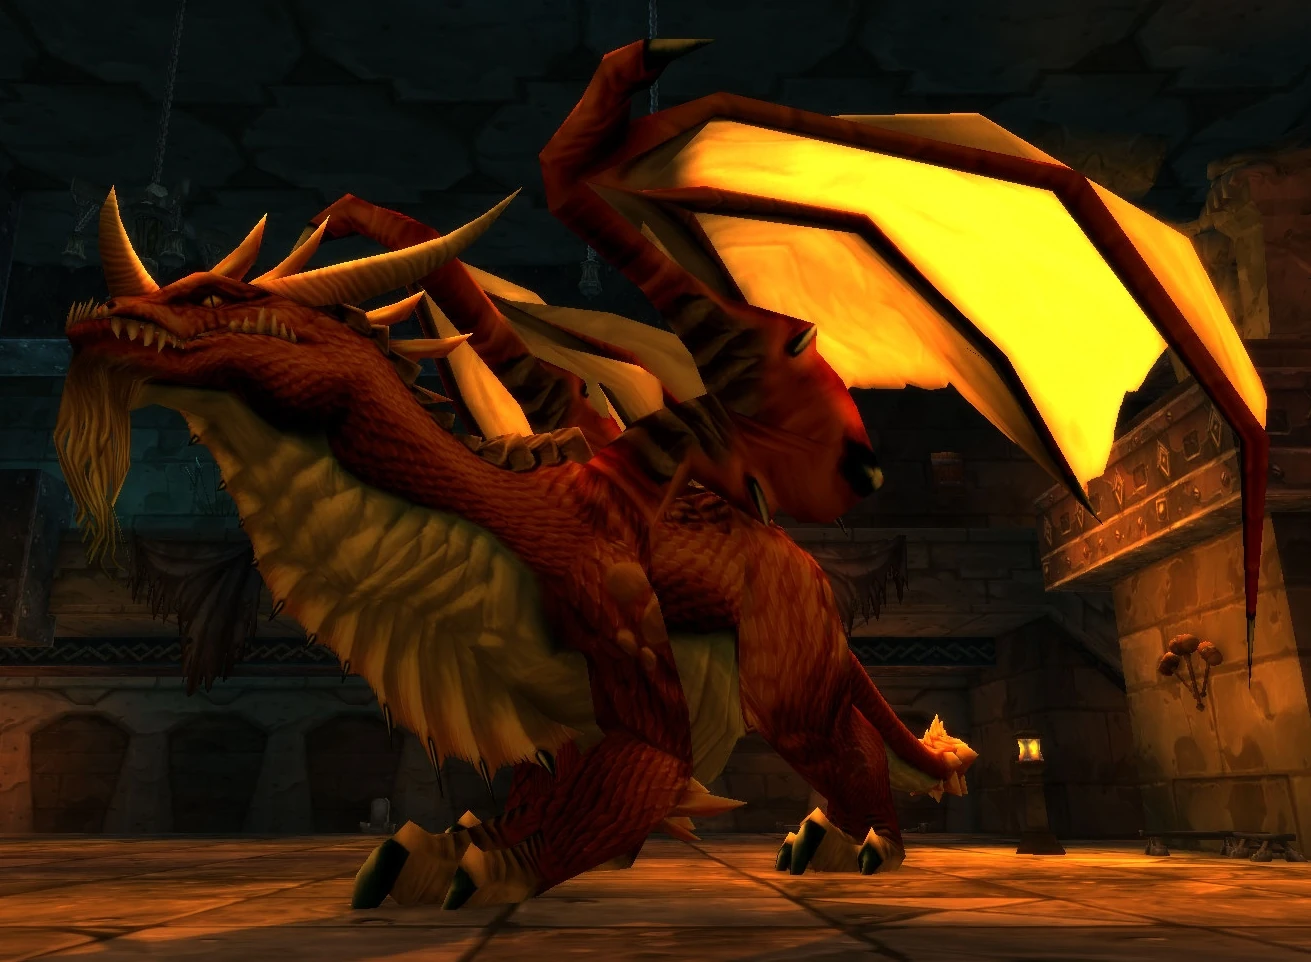

Vaelastrasz the Corrupt
Location: Blackwing Lair
Raid 40
Vaelastrasz the Red was the keeper of the red shard of the Scepter of the Shifting Sands. He had sworn to destroy the dragon Nefarian, but lost the battle inside Blackwing Lair, losing the shard as a result. The raid comes upon Vaelastrasz just as Nefarian completes his corruption, and the mighty red dragon is helpless as Nefarian orders him to kill his allies. However, before the corruption is complete Vaelastrasz gives the players a buff called Essence of the Red, granting them unlimited mana, rage, and energy. However, this buff only last three minutes, and is crucial to the encounter. The dragon will also give players Burning Adrenaline, which makes all their spells instant cast but also eventually kills them. Drops all Tier 2 belts.
Broodlord Lashlayer
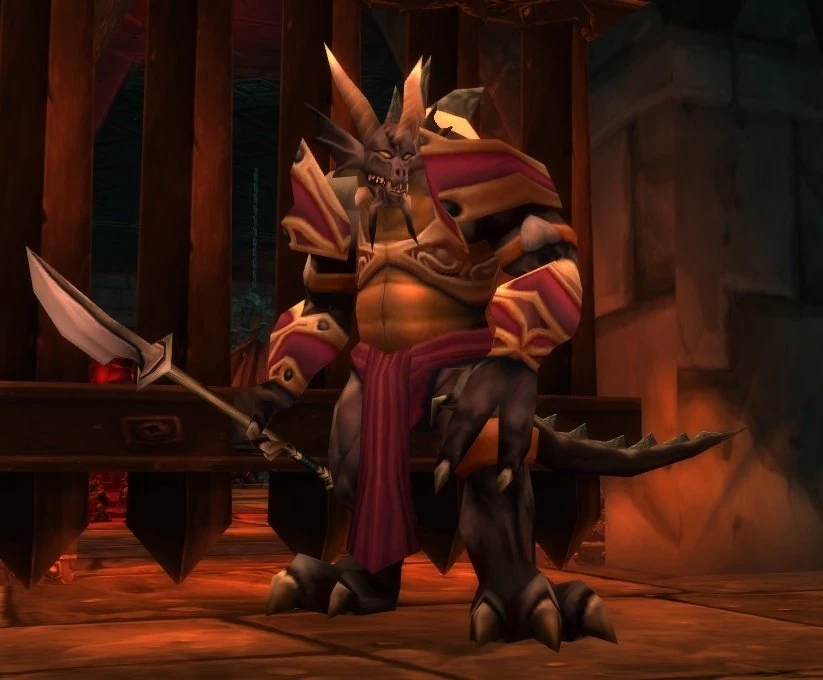

Broodlord Lashlayer
Location: Blackwing Lair
Raid 40
A large black Drakonid, Broodlord Lashlayer oversees the suppression rooms in Blackwing Lair, keeping the many kidnapped dragon whelps in check. The encounter starts long before the raid even lays eyes on Lashlayer, as they battle their way through the complex suppression rooms. Drops all Tier 2 boots, and acquiring his head is the first of many steps in the quest to open the Gates of Ahn'Qiraj.
Flamegor
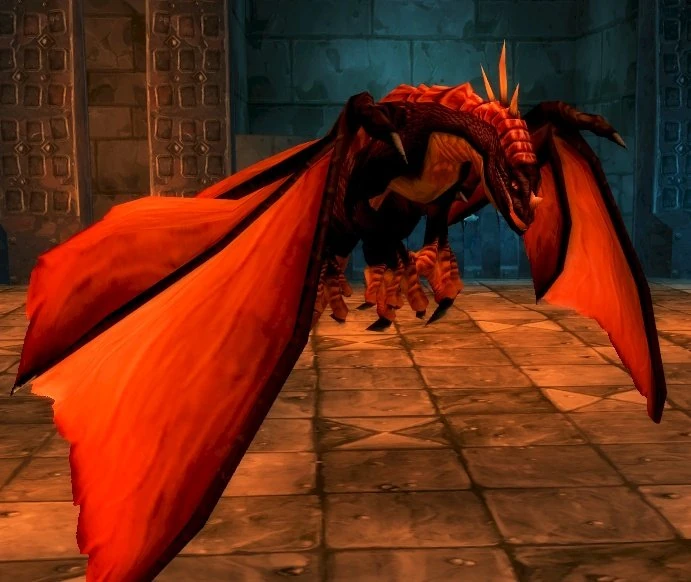

Flamegor
Location: Blackwing Lair
Raid 40
The third of three black drakes found in Blackwing Lair. Like the other drakes, he uses Wing Buffet to reduce aggro, as well as the deadly Shadowflame, which needs to be mitigated by Onyxia Scale Cloaks. His unique ability is Fire Nova, a direct damage attack that hits all enemies within his line of sight. However, he uses this only when frenzied, which can be dispelled by Hunters. Drops all Tier 2 gloves.
Ebonroc
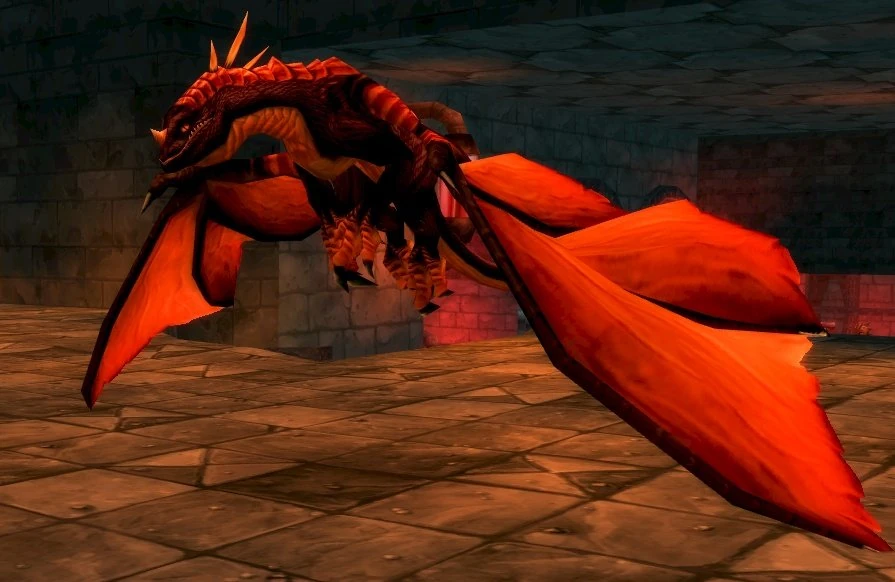
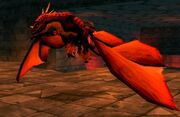
Ebonroc
Location: Blackwing Lair
Raid 40
The second of three black drakes found in Blackwing Lair. Like the other drakes, he uses Wing Buffet to reduce aggro, as well as the deadly Shadowflame, which needs to be mitigated by Onyxia Scale Cloaks. His unique ability is Shadow of Ebonroc, which applies a debuff to whoever is on top of the hate list. Whenever Ebonroc hits someone who has the debuff, he regains 25000 health. Drops all Tier 2 gloves.
Firemaw
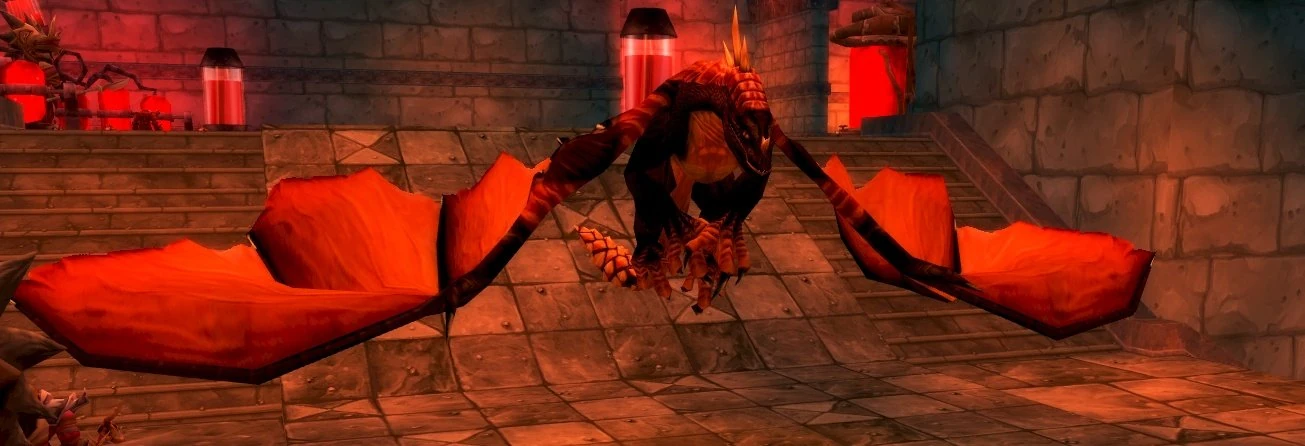

Firemaw
Location: Blackwing Lair
Raid 40
The first of three black drakes found in Blackwing Lair. Like the other drakes, he uses Wing Buffet to reduce aggro, as well as the deadly Shadowflame, which needs to be mitigated by Onyxia Scale Cloaks. His unique ability is Flame Buffet, which applies a stackable Fire DoT to all enemies within his line of sight. Drops all Tier 2 gloves.
Chromaggus
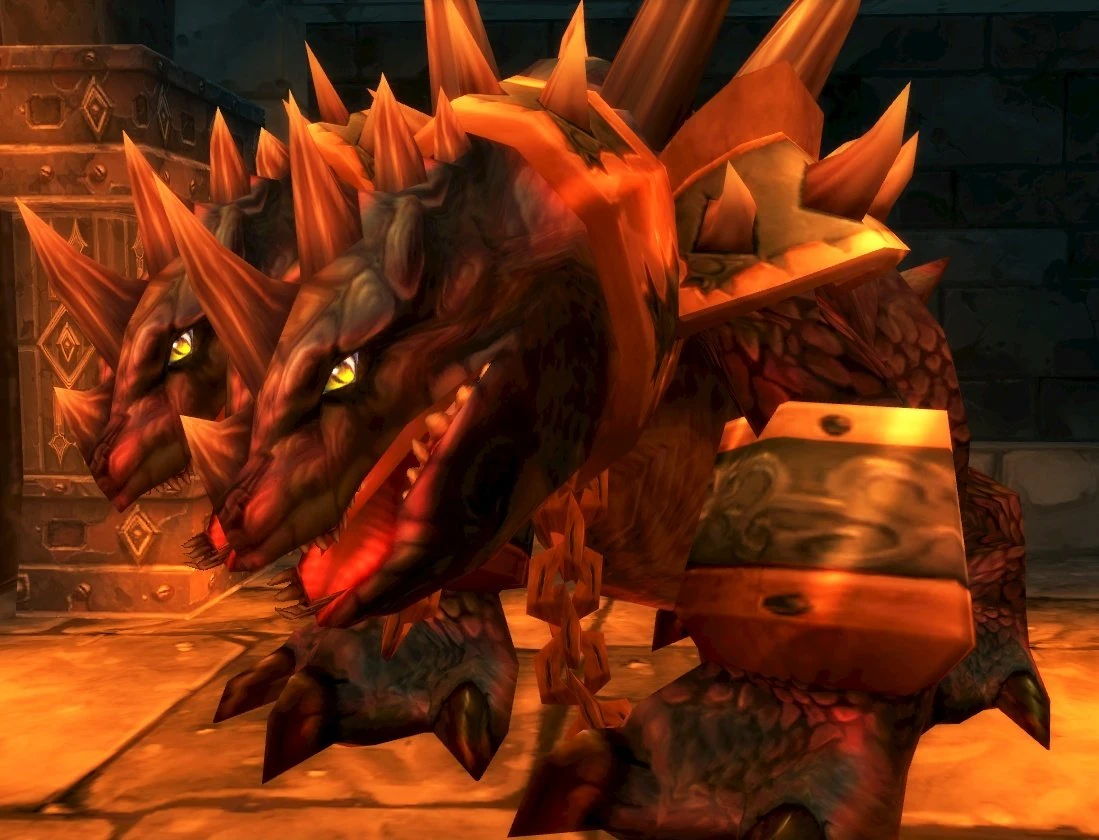

Chromaggus
Location: Blackwing Lair
Raid 40
The only known Drakeadon in existence. The encounter is largely random, as his two heads will each have a random breath attack, and he casts random Brood Afflictions, applying nasty debuffs to all players. His skin also "shimmers," changing his vulnerability to certain schools of magic. Goes in frenzies that can be dispelled by Hunters, and enrages at 20% health. Drops all Tier 2 shoulder pieces.
Nefarian
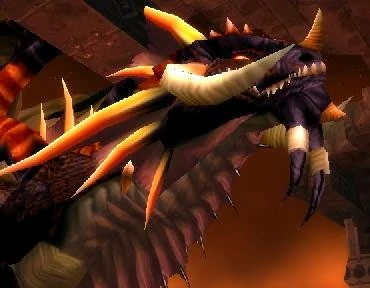
Nefarian
Location: Blackwing Lair
Raid 40
Son of the Black Dragon Aspect, Neltharion, and lord of the black dragonflight. He allied the Black Dragons with the Blackrock Clan, and is attempting to create a chromatic dragonflight. He also stole the red shard of the Scepter of the Shifting Sands from Vaelastrasz after defeating him, and threatened to destroy it. He is the final boss in Blackwing Lair. In Phase 1 of the encounter, players must fight off wave after wave of randomly colored Drakonids, all while an invulnerable Nefarian wanders amongst the raid in human form, randomly shadow bolting, mind controlling and fearing people. Nefarian leaves shortly after. Once 42 Drakonids are killed, Nefarian returns in dragon form, opening up with a Shadowflame that hits all members of the raid. He will then proceed to randomly call out classes, forcing all players of that class to do something bad based on their class (ie. forcing Druids into Cat Form, summoning hostile Infernals, etc.). At 20%, he resurrects all the dead Drakonids as Bone Constructs. Drops all Tier 2 chest pieces.
Onyxia's Lair
- Removed in patch 3.2.2. Retuned for level 80 players.
Onyxia
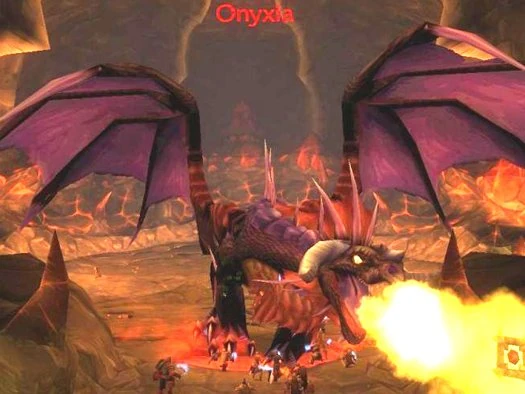

Onyxia
Daughter of the Black Dragon Aspect, Neltharion, and brood mother of the black dragonflight. When she isn't meddling in human affairs or plotting with her brother, Nefarian, she is in her lair in Dustwallow Marsh, fiercely protecting her eggs. Although small for a dragon her age, she is no less dangerous. The encounter is divided into three distinct phases. In the first phase, she is on the ground and is extremely difficult to tank. In the second phase, she takes flight and breathes fire down on her foes. In the final phase, she lands once again and begins fearing her attackers, all while the ground erupts beneath their feet. Drops all Tier 2 head pieces, as well the sinew required for the Hunter epic quest.
The Temple of Ahn'Qiraj
The Prophet Skeram

The Prophet Skeram
Location: The Temple of Ahn'Qiraj
Raid 40
Religious leader of the Qiraji and author of the Prophecy of C'Thun, the Prophet Skeram is the first boss in Ahn'Qiraj. Creates two mirror images of himself at 25% health intervals, and both the images and himself can Blink, Earth Shock, and Arcane Explosion. He also casts True Fulfillment on random targets, mind controlling them while increasing their damage, movement and resistance, and making their spells instant-cast.
Lord Kri
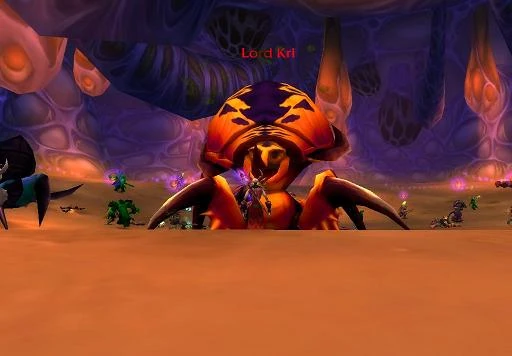

Lord Kri
Location: The Temple of Ahn'Qiraj
Raid 40
One of the three optional Silithid Colossi found in Ahn'Qiraj, players must fight Lord Kri at the same time as Princess Yauj and Vem. Loot received from the encounter depends on the order the Colossi are killed in, and killing Lord Kri last is the hardest method and yields the best loot. He has an AoE Toxic Volley that hits all players in the room for Nature damage while applying a Poison DoT. When he dies, his corpse leaves behind a deadly toxic cloud.
Princess Yauj
Princess Yauj
Location: The Temple of Ahn'Qiraj
Raid 40
One of the three optional Silithid Colossi found in Ahn'Qiraj, players must fight Princess Yauj at the same time as Lord Kri and Vem. Loot received from the encounter depends on the order the Colossi are killed in, and killing Princess Yauj last is the intermediary route, yielding good loot but not the best. She has an AoE Fear, and heals herself as well. Upon death, she releases a swarm of Silithids.
Vem
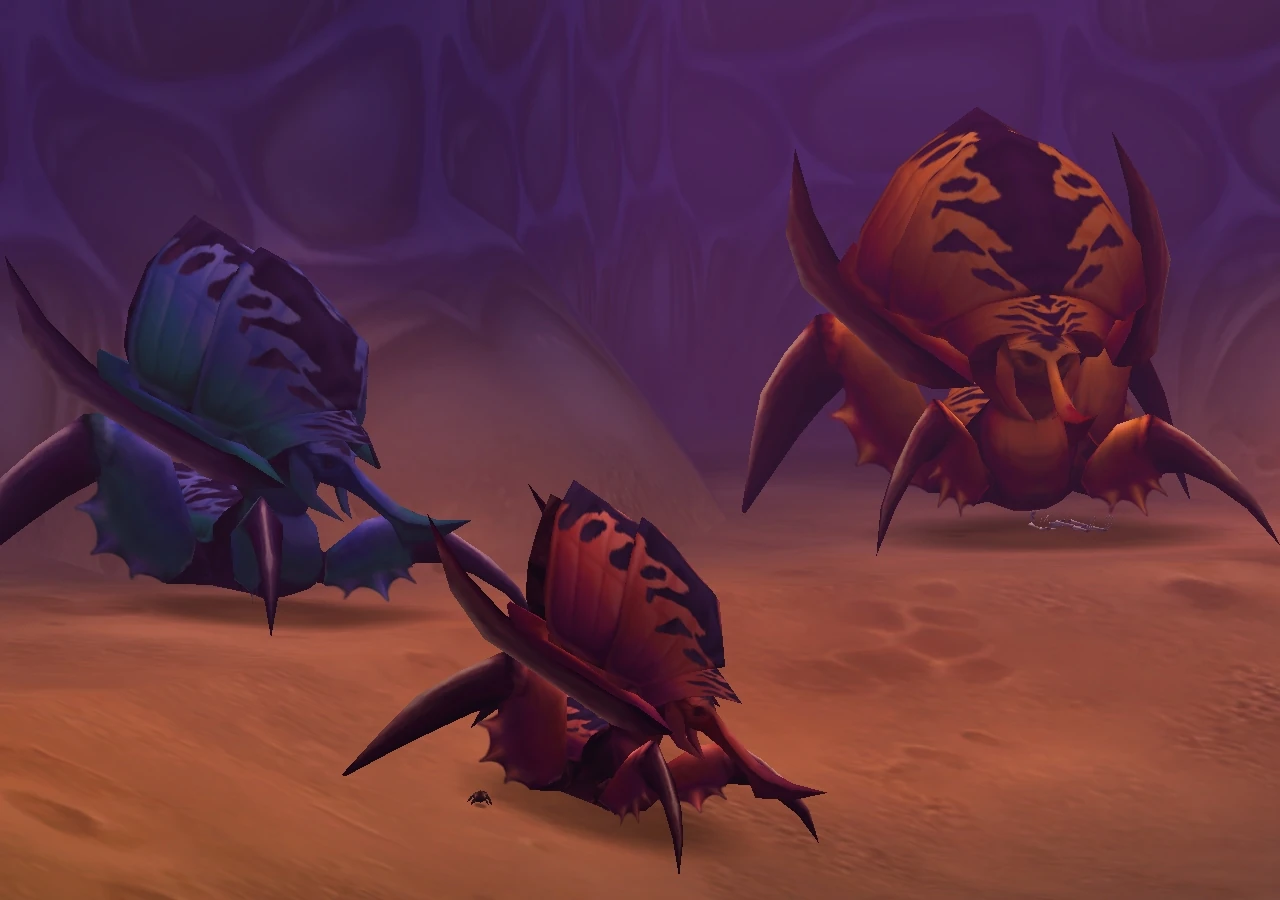
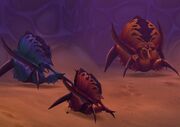
Triumvirate
Location: The Temple of Ahn'Qiraj
Raid 40
One of the three optional Silithid Colossi found in Ahn'Qiraj, players must fight Vem at the same time as Lord Kri and Princess Yauj. Loot received from the encounter depends on the order the Colossi are killed in, and killing Vem last is the easiest method and yields the lowest quality loot. Vem can charge his opponents.
Battleguard Sartura

Battleguard Sartura
Location: The Temple of Ahn'Qiraj
Raid 40
A Qiraji Battleguard in Ahn'Qiraj, Sartura and her three guards are nasty opponents. All of them constantly reset aggro lists, the guards punt their opponents, and Sartura enrages at 20%. And if she isn't dead within 10 minutes, she goes into a super-enrage that is sure to wipe the raid.
Fankriss the Unyielding
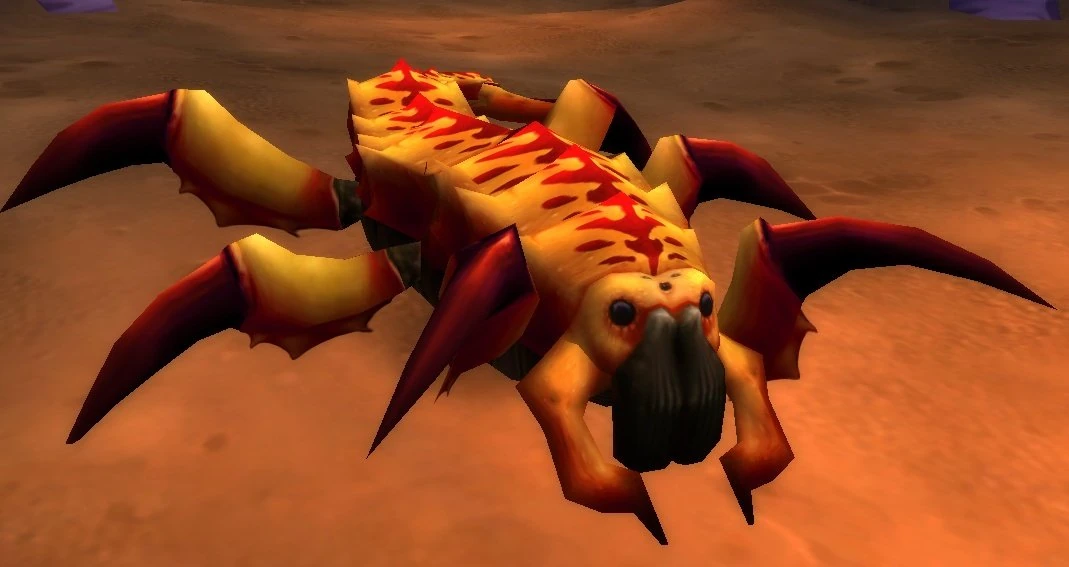

Fankriss the Unyielding
Location: The Temple of Ahn'Qiraj
Raid 40
One of only two known silithid Sandreavers, Fankriss summons many, many bugs during the encounter. He has an ability called Mortal Wound which cleaves through opponents and severely hinders healing.
Viscidus
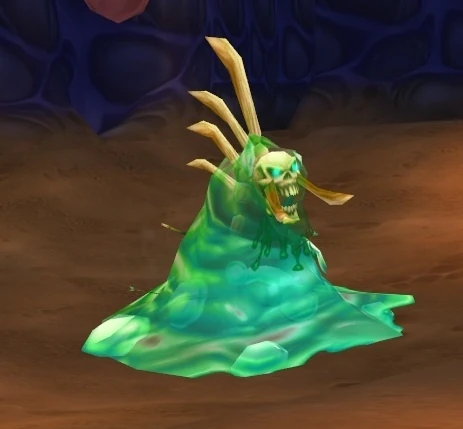
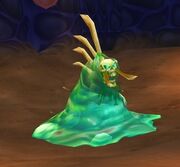
Viscidus
Location: The Temple of Ahn'Qiraj
Raid 40
A giant Slime, Viscidus is the second optional encounter in Ahn'Qiraj, and is a highly Nature Resistance intensive fight. Not only that, but he is a very interesting fight as well. He normally takes only 50% of normal damage. However, if he is hit by enough Frost attacks (whatever the source), he will freeze. Once frozen, physical attackers move in and attack him until he shatters, exploding into 20 globs. Once these globs reunite, Viscidus appears again. Killing a glob deals 5% damage to his total health, and is the most efficient way of killing him. Drops the bindings required for the AQ Set boots and shoulder pieces.
Princess Huhuran
Princess Huhuran
Location: The Temple of Ahn'Qiraj
Raid 40
A lone Silithid Wasp, Huhuran is a Nature Resistance intensive fight. Goes into frenzies that need to be dispelled by Hunters. Has deadly Nature AoE that she uses when frenzied or enraged, spews Noxious Poison, and uses an AoE Wyvern Sting that not only put players to sleep, but deals thousands of Nature damage if dispelled. Enrages at 30%. Drops the bindings required for the AQ Set boots and shoulder pieces.
Emperor Vek'lor

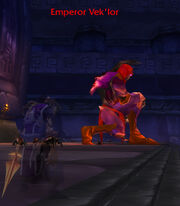
Emperor Vek'lor
Location: The Temple of Ahn'Qiraj
Raid 40
Fought alongside his twin brother, Vek'nilash, this Qiraji Emperor is immune to all physical damage, resulting in an interesting tanking situation. He spams Shadow Bolt and casts Blizzard. He reacts with an incredibly powerful attack that will wipe the raid if someone hits him with a physical attack. And for good measure, he constantly teleport-switches with his twin, who has a similar reaction to magical attacks. Drops a circlet required for the AQ Set head pieces.
Emperor Vek'nilash
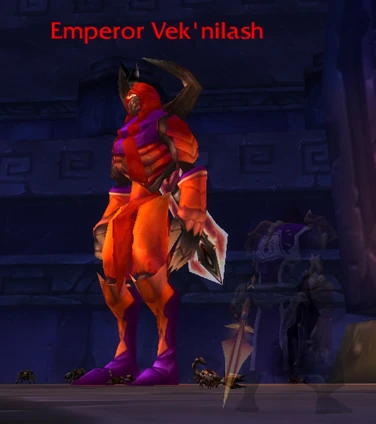

Emperor Vek'nilash
Location: The Temple of Ahn'Qiraj
Raid 40
Fought alongside his twin brother, Vek'lor, this Qiraji Emperor is immune to all magical damage. He has an Uppercut attack that knocks back opponents, and Unbalancing Strike, which deals massive damage and lowers Defense by 100. He reacts with an incredibly powerful attack that will wipe the raid if someone hits him with a magical attack. And for good measure, he constantly teleport-switches with his twin, who has a similar reaction to physical attacks. Drops a circlet required for the AQ Set head pieces.
Ouro
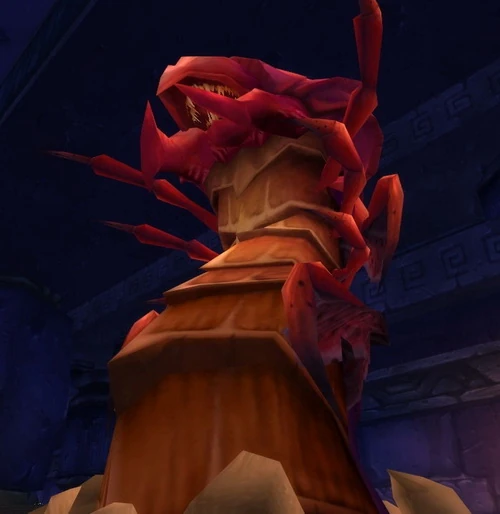

Ouro the Sandworm
Location: The Temple of Ahn'Qiraj
Raid 40
The ancient Silithid Sand Worm, Ouro, is a being of legendary power. He is rumored to have been created by the Old God C'Thun himself as a mockery of life. He is the last optional boss in Ahn'Qiraj, and is Nature Resist intensive. During combat, he has a powerful breath attack called Sand Blast which deals large Nature damage, and an AoE knockback attack that often results in him targeting ranged attackers and healers. He also submerges at set intervals. When submerged, Dirt Mounds begin tearing around the room at random, dealing Nature damage to anyone caught their path. Once he reaches 20%, he enrages AND starts summoning Dirt Mounds without submerging. Drops the items required for the AQ Set leg pieces.
C'Thun
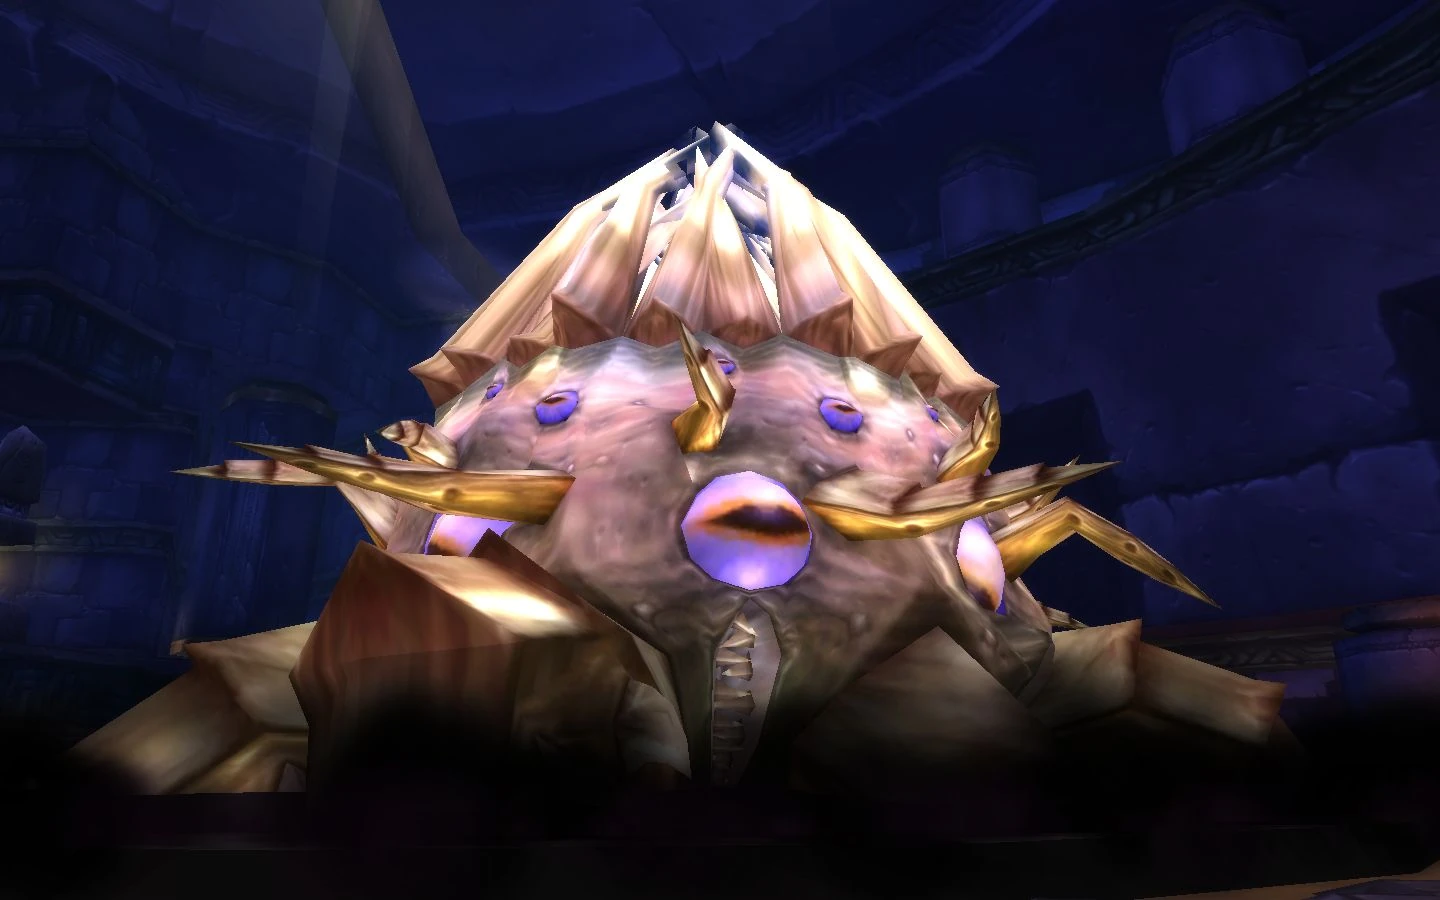
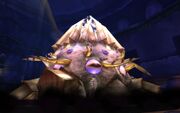
C'Thun
Location: The Temple of Ahn'Qiraj
Raid 40
One of the Old Gods who ruled Azeroth prior to the coming of the Titans, C'Thun has been plotting his revenge since the day he was defeated by a nameless Titan in the deserts of Silithus. It was he who created the Aqir, ancestors of the Qiraji and the Nerubians, in the image of the Silithid. And it is he who drives the Qiraji on their relentless campaign. He is the final boss in Ahn'Qiraj. During phase 1 of the fight, players must contend with his Eye, which shoots immensely powerful beams of energy, and an assortment of minor tentacles. In phase 2, his body surfaces and giant tentacles appear, including mouth tentacles that swallow players whole. Those players plummet down into his stomach, full of disgestive acid, and must defeat some tentacles inside his stomach in order to weaken him. Drops the items required for the AQ Set chest pieces.
Naxxramas
- Removed in patch 3.0.1. Moved to Northrend in patch 3.0.2 retuned for level 80 players.
An ancient Nerubian ziggurat, Naxxramas was torn free from the ground by agents of the Lich King to serve as Kel'Thuzad's base of operations as he spreads the plague throughout Lordaeron.
Due to Kel'Thuzad fighting a war against the Scarlet Crusade, the Argent Dawn, the Forsaken and the humans of the Alliance, as well as constant incursions of adventurers from every race and nation into the Scourge-controlled Plaguelands on a daily basis, his forces have been severely taxed to maintain the security of his necropolis. But now the gates of Naxxramas are open, Kel'Thuzad's new forces are rapidly sweeping away all opposition to the Scourge.
Anub'Rekhan
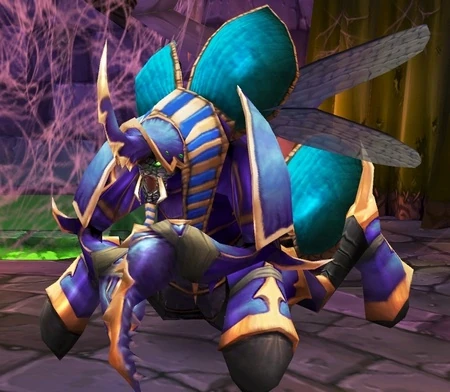
Anub'Rekhan
A powerful Crypt Lord who guards the hallways of the Spider Wing in Naxxramas.
Grand Widow Faerlina

Grand Widow Faerlina
As her name suggests, Faerlina is a powerful spider in the form of a female Human, clad in Warlock Tier 3. She uses poison volleys, Rain of Fire and enrages, giving her abilities more destructive power.
Maexxna
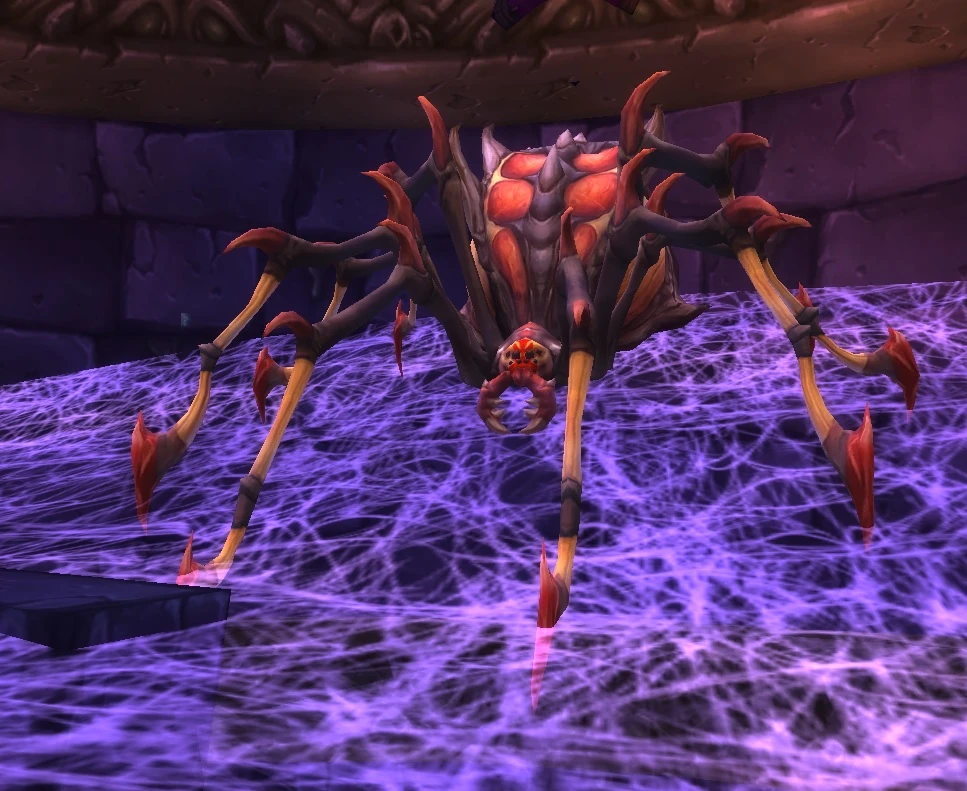

Maexxna
Maexxna is the final boss in the Spider Wing section of Naxxramas. She awaits all who dare oppose her in her giant web in the outer ring of Naxxramas. She uses powerful poisons and traps players into her webs.
Noth the Plaguebringer


Noth the Plaguebringer
Once a notable Wizard and alchemist of Dalaran Noth heard the Lich king's call as Arthas and Kel'Thuzad did, he was quick to turn his back on the light and joined the Scourge where he believed that real power lay. During the third war Noth saw that many innocent lives were needed to feed the growing might of the Scourge and he came to a point where he started opposing himself, Kel'Thuzad resolved the matter by freezing his heart in his chest with his frost magic. Noth the Plaguebringer, now more undead than Human is an extremely powerful Necromancer with a various array of deadly spells and curses.
Heigan the Unclean


Heigan the Unclean
A powerful undead sorcerer who resides in Naxxramas' Plague Wing.
Loatheb

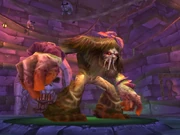
Loatheb
The final boss in the Plague Wing. Loatheb uses an evil combination of incapacitating the healers by placing a one minute cooldown of every spell and placing a damage over time spell on all members of the group.
Instructor Razuvious
Instructor Razuvious
Instructor Razuvious trains the warrior recruits of Naxxramas and poses an interesting fight. The Instructor himself deals insane amounts of damage; to such extend that the only way to tank him is to ![]() [Mind Control] one of his 4 students and cycle through them as the Mind Controls run out. Above that, his fearsome shouts will drain and almost destroy anyone who hears them...
[Mind Control] one of his 4 students and cycle through them as the Mind Controls run out. Above that, his fearsome shouts will drain and almost destroy anyone who hears them...
Gothik the Harvester


Gothik the Harvester
As his name suggests, Gothik is the Harvester of Souls for the undead armies of the Lich King.
The Four Horsemen
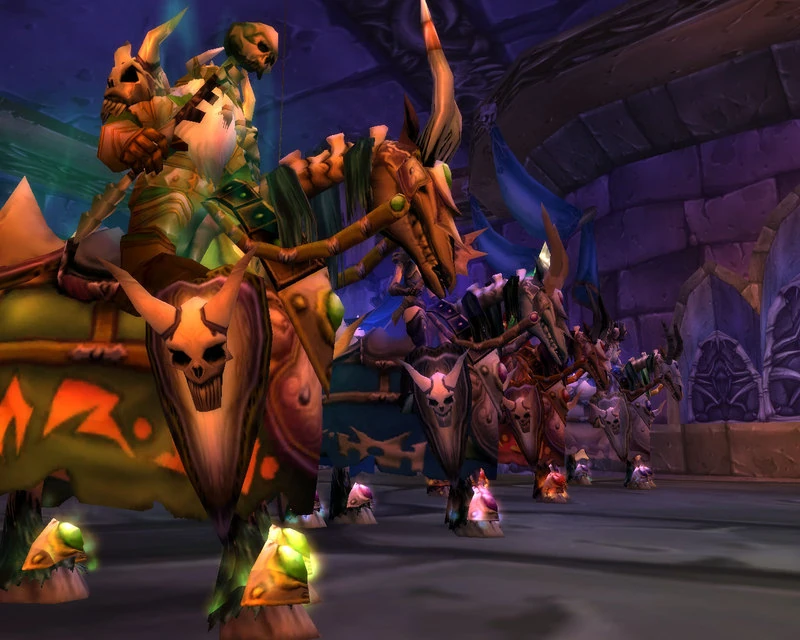

The Four Horsemen
The Four Horsemen are four powerful death knights in the service of Kel'Thuzad, in his dread citadel of Naxxramas. They are Highlord Mograine, Thane Korth'azz, Lady Blaumeux, and Sir Zeliek.
They appear to be based on the mythical Four Horsemen of the Apocalypse from the Book of Revelation, said to bring the end of the world - Zeliek as the White Rider of Conquest, Mograine as the Red Rider of War, Blaumeux as the Black Rider of Famine, and Korth'azz as the Pale Rider of Death.
Patchwerk
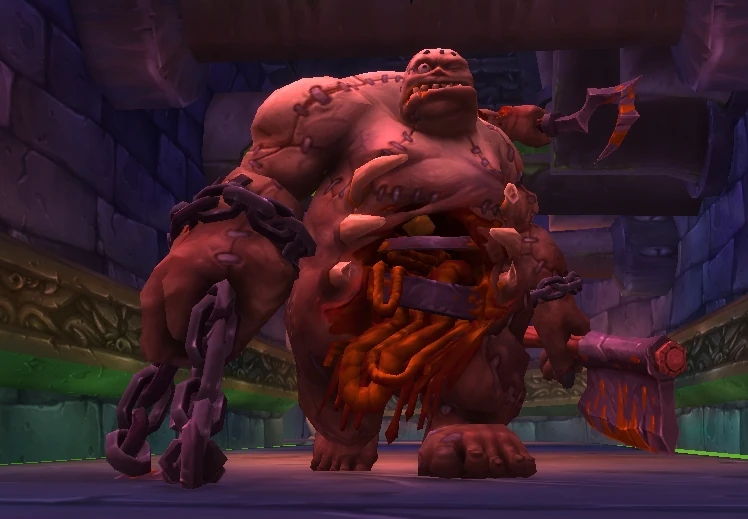
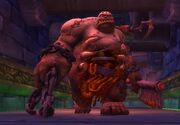
Patchwerk
His name comes from "patchwork"; as an Abomination, he's a disgusting amalgamation of flesh, bones, meat, metal, and threads. He is Kel'Thuzad's avatar of war.
Grobbulus

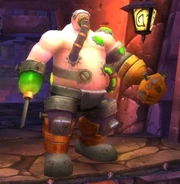
Grobbulus
A poison and slime sprewing abomination that guards the halls of Naxxramas' Abomination Wing.
Gluth
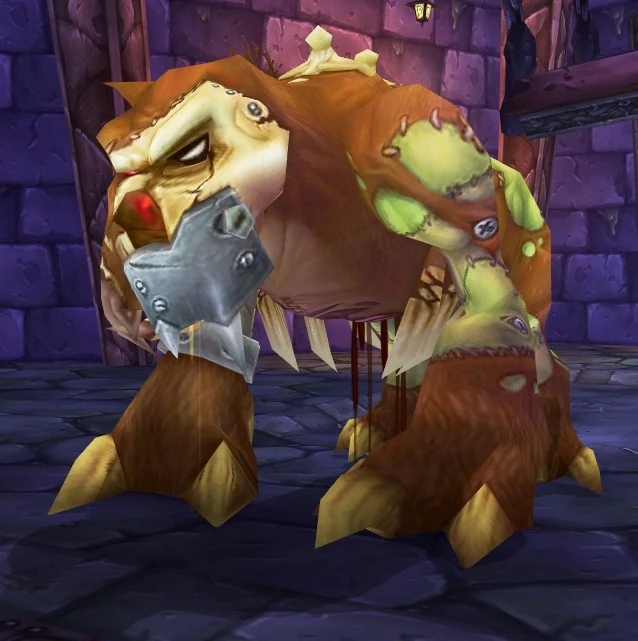
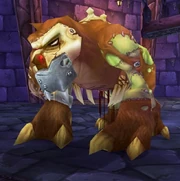
Gluth
An abomination patchwork that should resemble a kind of dog or a similar creature.
Thaddius
Thaddius
Thaddius is a boss in Naxxramas. The theme of this boss is similar to that of Frankenstein's Monster, creating something akin to an Abomination in that it is sewn together of human parts, but also part machinery.
While Thaddius is being powered up, his two "guardians" in the form of Wights, Stalagg and Feugen, attack you.
Sapphiron
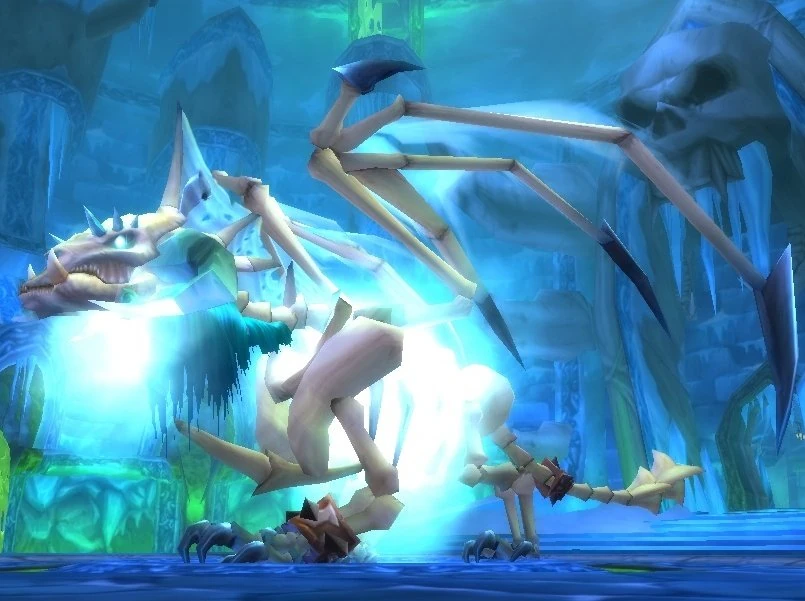

Sapphiron
An ancient servant of Malygos, - the Hand of Magic - Sapphiron was a blue dragon who lived with a powerful brood in Northrend by the Dragonblight, where he communed with the ancient spirits of the dead dragons. Sapphiron was magnificently powerful, and protected the lands of Icecrown as best he could. Though Ner'zhul's malevolent influence defiled the Dragonblight, Sapphiron continued to guard his hoard of treasure from intruders.
Anub'arak, the King of Azjol-Nerub, thought that perhaps by equipping themselves with Sapphiron's treasures, he and Arthas might be more prepared for the perilous journey through Azjol-Nerub. Arthas agreed, and journeyed into Sapphiron's lair with Anub'arak.
Sapphiron greeted the undead as they approached him. He found Arthas's honesty about stealing his treasure quite refreshing. Sapphiron and his drakes attacked with all their might, unleashing their strange, cold magics upon them. In the end, despite all odds, Arthas was victorious, and Sapphiron was defeated. As a final, clinching victory, however, Arthas used what remained of his dwindling power to recreate Sapphiron as a frost wyrm to serve the Scourge.
Kel'Thuzad

Kel'Thuzad
Formerly a sorcerer of Dalaran, Kel'Thuzad was one of the principal agents of the Lich King, responsible for the spreading of the Plague of undeath across Lordaeron. After being slain by Arthas during the events of the Third War, he was reborn as a lich. He then aided Arthas in summoning Archimonde, a powerful lord of the Burning Legion. However, Kel'Thuzad's true loyalty was to the Lich King, and not the Burning Legion. After the Legion's defeat, Kel'Thuzad supported Arthas in wresting power from the Dreadlords. When Arthas left for Northrend during the events of The Frozen Throne, he left Kel'Thuzad as his agent to command the Scourge in Lordaeron. He now commands Scourge forces in the Plaguelands from his necropolis floating above Stratholme, Naxxramas.