| Line 1: | Line 1: | ||
| + | {{Infobox zone |
||
| − | === Characters === |
||
| + | |ss=ZulDrakView.jpg |
||
| − | {{I-note|If you want to use the table format below for your characters, feel free to, but kudos would be appreciated.|Info}} |
||
| + | |name=Zul'Drak |
||
| − | {| style="background: #000; border: 3px #000 solid; border-spacing: 0; font-size: 90%; moz-border-radius:0.5em 0" cellspacing="0" align="left" |
||
| + | |loc=Northeastern [[Northrend]] |
||
| − | |- |
||
| + | }} |
||
| − | {{3D Cell|align=center|css=-moz-border-radius-topleft:0.5em|attr=rowspan="2" colspan="3"}} '''Character''' |
||
| + | |||
| − | {{3D Cell|align=center|attr=rowspan="2"}} '''Server''' |
||
| + | '''''UNDER CONSTRUCTION''''' related to [[User:GoldenYak/Spider_Kingdom_Expansion_Concept|Spider Kingdom Expansion Concept]] |
||
| − | {{3D Cell|align=center|attr=rowspan="2"}} '''Guild''' |
||
| + | |||
| − | {{3D Cell|align=center|attr=colspan="4"}} '''Spec''' |
||
| + | '''Zul'Drak''' is an area located in eastern [[Northrend]]. For generations, the [[Drakkari]] [[ice trolls]] ruled a sprawling empire that filled the region with temples and cities. The wrath of the [[Lich King]] brought about the end of the troll's reign in a few short years. The [[Scourge]] invasion decimated the Drakkari, driving the survivors into a desperate gambit. Drakkari mystics began sacrificing their [[Loa]] animal gods, hoping to take the spirit beings' power for themselves and use it against the Scourge. Their dark plot failed, as the Drakkari were betrayed from within and overwhelmed from without, and all of their great champions who were imbued with the essence of the Loas were slain. |
||
| − | {{3D Cell|align=center|attr=colspan="8"|css=-moz-border-radius-topright:0.5em}} '''Skills''' |
||
| + | |||
| + | With the death of the Lich King, the Scourge forces in this region have been reduced to mindless undead. The great floating necropoli and plague-spreaders that the Scourge brought to wage war have fallen into ruin, releasing an unholy blight across the lower tiers of Zul'Drak. Undead are running wild, fueled by the plague, attacking anything that lives. |
||
| + | |||
| + | The [[Ashen Verdict]] maintains a presence in Zul'Drak, but their forces have begun to fracture under the weight of the danger in the region. |
||
| + | |||
| + | == History == |
||
| + | [[File:Zul'Drak_Concept.jpg|thumb|The Drakkari empire has devoted itself to chaos.]] |
||
| + | The Drakkari were one of the few civilizations in Northrend capable of withstanding the onslaught of the undead Scourge. The Scourge forces were only able to advance into Zul'Drak through subterfuge, recruiting the renegade ice troll [[Drakuru]] and using him as an agent against the magical defenses of Zul'Drak. After Drakuru unwound the protective enchantments of Drak'Tharon Keep, he was transformed into a death knight by the Lich King himself, and granted leadership over a vast army of the undead, which he led into Zul'Drak. Though Drakuru eventually fell from the Lich King's favor, the Scourge forces he brought into Zul'Drak have wrought terrible carnage, spreading the undead plague and blighting the landscape to the point where it may never recover. |
||
| + | |||
| + | To halt the onslaught of the Scourge, the Drakkari turned on and slew their animal gods, the [[Loa]]. Using the essence of the slain gods to empower their champions, the Drakkari hoped to create a force that could destroy the Scourge. In the end, all their power was only able to slow the advance of the undead, and eventually forces of the Alliance and the Horde were drawn into the conflict. The Drakkari were opposed by their fellow trolls and distant relatives, the [[Zandalari]], who arrived in Zul'Drak to stop the ice trolls insane schemes. Eventually, with all of the empowered Drakkari were slain, and the majority of their forces withdrew to the upper regions of Zul'Drak and their primary fortress, [[Gundrak]]. |
||
| + | |||
| + | ==Cataclysm== |
||
| + | |||
| + | The Drakkari saw the devastation of the [[Cataclysm]] as a judgment upon them for their sins against their animal gods. As the ground cracked apart and the sky rained fire, the trolls cried out to any force that might deliver them from the nightmare their lives had become. Their call was answered by the [[User:GoldenYak/Twilight's_Hammer_of_Northrend|Twilight's Hammer]]. Agents of the vile cult arrived in Zul'Drak to find the Drakkari spiritually vulnerable, and moved quickly to introduce the ice trolls to the worship of the Old Gods. Eager to find a new focus of worship, the Drakkari rapidly converted their faith to honoring the Old Gods and calling upon their power. The Twilight's Hammer have taken advantage of both the Drakkari's fervent devotion and the tremendous natural energies that saturate Zul'Drak in the wake of their gods deaths. |
||
| + | |||
| + | |||
| + | {{cata-section}} |
||
| + | |||
| + | Areas affected: |
||
| + | |||
| + | *Necropolis [[Zeramas]] and Necropolis [[Voltarus]] have fallen from the sky. [[User:GoldenYak/The_Scourge_Remnants#The_San.27layn_and_the_Sin_Scourge|Scourge Remnants]] remain holed up within. |
||
| + | *[[Blight_(Plague)|Blight]] has spread from the fallen necropoli, turning the lower tier of Zul'Drak into a swamp of plague and undeath. |
||
| + | *The [[Knights of the Ebon Blade]] are devoted to destroying the Scourge Remnants in the region, while the [[Argent Crusade]] wants to focus on cleansing the corruption and evacuating survivors. |
||
| + | *[[Overlord Drakuru|Drakuru's]] [[Blightblood_Troll|Blightblood trolls]] are running rampant, spreading carnage throughout Zul'Drak's lower levels. |
||
| + | *Portions of Drak'Sotra have sunk underground, and [[nerubians]] have risen up, bringing along [[Faceless Ones]]. The Argent Crusade is focused on holding back the tide. |
||
| + | *With many of the troll gods of Zul'Drak dead, the Drakkari are looking for something new to worship. The Twilight's Hammer have arrived to spread their dark gospel. Twilight's Hammer forces and elementals have replaced Scourge forces throughout Zul'Drak. |
||
| + | *[[Zim'Torga]] has been destroyed by the Drakkari and the Twilight's Hammer. The Zandalari there have been forced to retreat. |
||
| + | *The upper tier of Zul'Drak has been conquered by the Twilight's Hammer. Their rituals have already begun shaping elementium and twisting the region. |
||
| + | *The [[Mam'toth Crater]] has broken open, revealing underground tunnels infested with nerubians and encrusted with saronite deposits. A mining operation has been set up by the Twilight's Hammer, who have developed an interest in refining saronite. |
||
| + | *The Twilight's Hammer are corrupting the shrines of the Drakkari gods, attempting to resurrect them as twisted, evil shadows of their former selves. |
||
| + | *The upper temple at [[Gundrak]] has been rebuilt into a massive twilight portal, where the Drakkari and the Twilight's Hammer are attempting to summon forth a gigantic Faceless One - '''Zildrohar the Traveler.''' |
||
| + | |||
| + | ==People and culture== |
||
| + | Zul'Drak is the Drakkari homeland. Their culture is believed to have existed long before the Great Sundering. Though their empire stood strong for thousands of years, the onslaught of the Scourge has reduced it to a shadow of its former self. As the hordes of undead swarmed through the ruins of Zul'Drak, the Drakkari turned on their own gods, the [[Loa]]. By destroying these ancient and powerful begins, the Drakkari hoped to acquire their power and use it against the Scourge. |
||
| + | |||
| + | In the wake of their gods death, the Drakkari were at a loss. Their gambit had held off the Scourge for a time, and the death of the Lich King had spared their empire, but without the focus of their worship, the Drakkari spirit seemed to have been crushed. When the Twilight's Hammer arrived in Northrend, they saw an opportunity to bring the Drakkari under their sway, replacing the [[Loa|Loas]] with worship of the [[Old Gods]]. |
||
| + | |||
| + | ==Geography== |
||
| + | The lower tier of Zul'Drak has become a mire of death and decay, with the Scourge's [[blight]] spreading throughout the woodlands and poisoning everything it touches. The middle tier remains largely secure by the Argent Dawn and the Knights of the Ebon Blade, who are holding back the encroaching taint from the lower tier. In the upper tier, the once snow-covered plains have been twisted, transformed by the Twilight's Hammer and the eldritch corruption of their summonings. Elementium spires erupt from the earth, twining around and through the ruins of the Drakkari. |
||
| + | |||
| + | === Map and subregions === |
||
| + | [[File:zuldrak_goldenyak.jpg|right|thumb|350px|Zul'Drak, post-Cataclysm]] |
||
| + | {| class="darktable" |
||
| + | | [[Altar of Har'koa]]{{·}} [[Altar of Mam'toth]]{{·}} [[Altar of Quetz'lun]]{{·}} [[Altar of Rhunok]]{{·}} [[Altar of Sseratus]]{{·}} [[Amphitheater of Anguish]]{{·}} [[Argent Stand|The Argent Stand]]{{·}} [[Dabra'Jin]]{{·}} [[Dargath's Demise]]{{·}} [[Dead Fields|The Dead Fields]]{{·}} [[Drak'Agal]]{{·}} [[Drak'Mabwa]]{{·}} [[Drak'Tharon Keep]]{{·}} [[Ebon Watch]]{{·}} [[Gundrak]]{{·}} [[Light's Breach]]{{·}} [[Kolramas]]{{·}} [[Mam'toth Crater]]{{·}} [[Pools of Jin'Alai]]{{·}} [[Reliquary of Agony]]{{·}} [[Reliquary of Pain]]{{·}} [[Thrym's End]]{{·}} [[Voltarus]]{{·}} [[Zeramas]]{{·}} [[Zim'Rhuk]]{{·}} [[Zim'Torga]]{{·}} [[Zol'maz Stronghold]] |
||
| + | |} |
||
| + | |||
| + | ===Instances=== |
||
| + | {| class="darktable" |
||
| + | ! Instance Name |
||
| + | ! Level Range |
||
| + | ! Approximate Run Time |
||
|- |
|- |
||
| + | | {{portal|Drak'Tharon Keep|wotlk}} || 74-76 |
||
| − | {{3D Cell|align=center|attr=colspan="2"}} '''Main''' |
||
| + | | 25 min - 40 min |
||
| − | {{3D Cell|align=center|attr=colspan="2"}} '''Off''' |
||
| − | {{3D Cell|align=center|attr=colspan="4"}} '''Professions''' |
||
| − | {{3D Cell|align=center}} [[File:APB Skill Cooking.png|link=Cooking]] |
||
| − | {{3D Cell|align=center}} [[File:APB Skill First Aid.png|link=First Aid]] |
||
| − | {{3D Cell|align=center}} [[File:APB Skill Fishing.png|link=Fishing]] |
||
| − | {{3D Cell|align=center}} [[File:APB Skill Riding.png|link=Riding]] |
||
|- |
|- |
||
| + | | {{portal|Gundrak|wotlk}} || 76-78 |
||
| − | {{3D Cell|#f58cba|#d47aa1|#b46789|black|join=right}} {{RaceIcon|Blood Elf|Male}}{{ClassIcon|Paladin}} |
||
| + | | 20 min - 40 min |
||
| − | {{3D Cell|#f58cba|#d47aa1|#b46789|black|join=both}} <span class="plainlinks">[http://eu.wowarmory.com/character-sheet.xml?r=Moonglade&n=Baldibar <span style="color:black">Baldibar</span>]</span> |
||
| + | |} |
||
| − | {{3D Cell|#f58cba|#d47aa1|#b46789|black|join=left|align=right}} 80 |
||
| + | |||
| − | {{3D Cell|#f58cba|#d47aa1|#b46789|black}} [[Server:Moonglade Europe|<span style="color:black">Moonglade EU</span>]] |
||
| + | == Quests and Storylines == |
||
| − | {{3D Cell|#f58cba|#d47aa1|#b46789|black}} <span class="plainlinks">[http://eu.wowarmory.com/guild-info.xml?r=Moonglade&gn=Blood+Pigs <span style="color:black">Blood Pigs</span>]</span> |
||
| + | |||
| − | {{3D Cell|#f58cba|#d47aa1|#b46789|black|join=right}} [[File:APB Paladin Holy.png|link=Paladin talents#Holy|Holy]] |
||
| + | ===The Lower Tier=== |
||
| − | {{3D Cell|#f58cba|#d47aa1|#b46789|black|join=left|align=center}} 31/5/0 |
||
| + | |||
| − | {{3D Cell|#f58cba|#d47aa1|#b46789|black|join=right}} [[File:APB Paladin Retribution.png|link=Paladin talents#Retribution|Retribution]] |
||
| + | The crashed Scourge [[Necropolis|necropoli]] in the region have caused the blight to engulf the entire lower tier, turning it into the deadly '''Blightlands'''. Towering plague mushrooms have overtaken the forests, blotting out the sky and showering the earth with spores. Drakuru's Blightblood trolls are running rampant through the lower tier, spreading the plague further. Undead trolls have instinctively flocked to the side of these mighty creatures, making it extremely difficult to destroy them. The Knights of the Ebon Blade have a heavy presence in this region, being largely immune to the blight, and have many quests related to destroying the undead. The [[User:GoldenYak/The_Scourge_Remnants#The_San.27layn_and_the_Sin_Scourge|San'layn]] have a small presence in the ruins of the Necropoli, desperately trying to salvage what they can from the wreckage. Players will learn that their faction has been almost completely destroyed by [[User:GoldenYak/Death_Queen_Angerboda|Angerboda's]] forces, and the few San'layn that remain are being forced into subservience to [[Amal'thazad]] and his [[User:GoldenYak/The_Scourge_Remnants#Amal.27thazad_and_the_Cult_of_the_Endless_Cold_Scourge|death cult]]. |
||
| − | {{3D Cell|#f58cba|#d47aa1|#b46789|black|join=left|align=center}} 3/2/31 |
||
| + | |||
| − | {{3D Cell|#f58cba|#d47aa1|#b46789|black|join=right}} {{User:ArmoryProfileBot/Profession|Jewelcrafting}} |
||
| + | ===The Middle Tier=== |
||
| − | {{3D Cell|#f58cba|#d47aa1|#b46789|black|join=left|align=center}} 450 |
||
| + | |||
| − | {{3D Cell|#f58cba|#d47aa1|#b46789|black|join=right}} {{User:ArmoryProfileBot/Profession|Mining}} |
||
| + | The [[Argent Crusade]] has remained entrenched in the [[Argent Stand]], fighting against marauding undead from the lower tier and the Drakkari of the upper tier. Several [[Zandalari]] trolls from [[Zim'Torga]] have joined the Argent Crusade, soliciting their help against the increased Drakkari hostility in the upper tier. The Crusaders will require aid both in securing their position, dealing with the local threats, and their efforts to cleanse the encroaching blight from the lower tier. Many Drakkari refugees have come to the Argent Stand as well seeking aid, driven nearly mad by their ordeals. Some of them babble that the slain [[Loa]] gods are returning for revenge. |
||
| − | {{3D Cell|#f58cba|#d47aa1|#b46789|black|join=left|align=center}} 450 |
||
| + | |||
| − | {{3D Cell|#f58cba|#d47aa1|#b46789|black|align=center}} 87 |
||
| + | Drakkari have retaken the ruins surrounding the [[Altar of Sseratus]], and quests in the area involve fighting a path to the altar itself to witness ice troll druids conducting a ritual. The druids call upon the power of the [[Emerald Dream]] to restore the fallen god, but it becomes clear that they are tampering with evil forces, and Zandalari accompanying the player will sense the power of the [[Nightmare]]. The corpse of Sseratus is imbued with evil energy and returns as a dark, corrupted version of his former self - '''Madcoil'''. The Drakkari are driven into an insane frenzy by the return of their gods, forcing the Argent Crusade troops in the region to fall back to the Argent Stand. Further quests will direct the players to seek out the Zandalari at Zim'Torga for answers. |
||
| − | {{3D Cell|#f58cba|#d47aa1|#b46789|black|align=center}} 421 |
||
| + | |||
| − | {{3D Cell|#f58cba|#d47aa1|#b46789|black|align=center}} 1 |
||
| + | ===The Upper Tier=== |
||
| − | {{3D Cell|#f58cba|#d47aa1|#b46789|black|align=center}} 375 |
||
| + | |||
| − | |- |
||
| + | At Zim'Torga, Drakkari forces are joined by captive elementals and ice trolls who have gained twisted, druid-like powers of shape-shifting. The Zandalari are unable to hold out against the onslaught, and things go from bad to worse when the Drakkari unleash Madcoil upon the grove. The quest chain in the region culminates with [[Har'koa]] attacking Madcoil and slaying him. However, the forces of the Twilight Hammer suddenly arrive, with [[Faceless Ones]] in tow, led by [[User:GoldenYak/Twilight's_Hammer_of_Northrend#Twilight_Lord_Urizen|Twilight Lord Urizen]], one of the Hammer's most powerful agents in Northrend. Har'koa is slain and revived by Urizen as '''Nightfell,''' another evil Loa like Madcoil. |
||
| − | {{3D Cell|#c41f3b|#a31a31|#801426|black|join=right}} {{RaceIcon|Orc|Male}}{{ClassIcon|Death Knight}} |
||
| + | |||
| − | {{3D Cell|#c41f3b|#a31a31|#801426|black|join=both}} <span class="plainlinks">[http://eu.wowarmory.com/character-sheet.xml?r=Moonglade&n=Arashicage <span style="color:black">Arashicage</span>]</span> |
||
| + | The Zandalari are forced to abadon Zim'Torga, and briefly fall back to the Argent Stand. From there, players will aid the Zandalari and the Crusaders in retaking the upper tier. First, Nightfell must be slain at the [[Altar of Har'koa]]. Players will also confront '''Gotarr,''' an evil version of [[Rhunok]], and '''Gromul'Junn''', the twisted mammoth god that was once [[Mam'toth]]. At the [[Altar of Quetz'lun]], players discover that the wind serpent loa has gone completely insane, and the dark netherworld she has created threatens to spill over into the material plane. The Twilight's Hammer are feeding [[Quetz'lun]]'s evil and insanity by sending in Drakkari troops to battle her and her undead minions, exploiting the carnage to fuel their dark rituals and summon more Faceless Ones to Zul'Drak. |
||
| − | {{3D Cell|#c41f3b|#a31a31|#801426|black|join=left|align=right}} 80 |
||
| + | |||
| − | {{3D Cell|#c41f3b|#a31a31|#801426|black}} [[Server:Moonglade Europe|<span style="color:black">Moonglade EU</span>]] |
||
| + | ===Gundrak=== |
||
| − | {{3D Cell|#c41f3b|#a31a31|#801426|black}} |
||
| + | |||
| − | {{3D Cell|#c41f3b|#a31a31|#801426|black|join=right}} [[File:APB Deathknight Unholy.png|link=Death knight talents#Unholy|Unholy]] |
||
| + | The steps to [[Gundrak]] are guarded by '''Icheron''', the rhino god [[Akali]]'s twisted double. The great temple at Gundrak itself has been dismantled by the Twilight's Hammer and rebuilt into a massive twilight portal. There, Urizen is conducting a ritual using the stolen energies of the Loas to summon forth a gigantic Facless One known as '''Zildrohar the Traveler'''. The final battle of Zul'Drak culminates with the Zandalari and the Argent Crusade launching an aerial assault upon the half-summoned Zildrohar. Players will ride an Argent Hippogryph into battle and use it and their Crusader and troll allies to banish Zildrohar back to the void he is trapped in. |
||
| − | {{3D Cell|#c41f3b|#a31a31|#801426|black|join=left|align=center}} 4/0/32 |
||
| + | |||
| − | {{3D Cell|#c41f3b|#a31a31|#801426|black|align=center|join=right|attr=colspan="2"}} |
||
| + | Zildrohar's banishment causes many of the Twilight's Hammer forces, including Urizen, to be drawn into oblivion along with the giant Faceless One. In the aftermath, the Zandalari vow to continue their efforts to redeem their Drakkari relatives, and offer daily quests for players to continue the battle against the remaining Twilight's Hammer forces. |
||
| − | {{3D Cell|#c41f3b|#a31a31|#801426|black|join=right}} {{User:ArmoryProfileBot/Profession|Blacksmithing}} |
||
| + | |||
| − | {{3D Cell|#c41f3b|#a31a31|#801426|black|join=left|align=center}} 417 |
||
| + | [[File:FacelessOneComic.jpg|right|thumb|350px|'''Zildrohar the Traveler''' is an ancient fiend on par with [[Soggoth the Slitherer]] and [[Husk_of_Sor'getha|Sor'getha]].]] |
||
| − | {{3D Cell|#c41f3b|#a31a31|#801426|black|join=right}} {{User:ArmoryProfileBot/Profession|Mining}} |
||
| + | |||
| − | {{3D Cell|#c41f3b|#a31a31|#801426|black|join=left|align=center}} 450 |
||
| + | ===Changes to Instances in Zul'Drak=== |
||
| − | {{3D Cell|#c41f3b|#a31a31|#801426|black|align=center}} |
||
| + | |||
| − | {{3D Cell|#c41f3b|#a31a31|#801426|black|align=center}} 398 |
||
| + | *References to the Scourge and the Lich King have been changed to involve the [[User:GoldenYak/The_Scourge_Remnants|Scourge Remnants]]. |
||
| − | {{3D Cell|#c41f3b|#a31a31|#801426|black|align=center}} |
||
| + | *Drakkari trolls in Gundrak have been joined by agents of the [[User:GoldenYak/Twilight's_Hammer_of_Northrend|Twilight's Hammer]]. |
||
| − | {{3D Cell|#c41f3b|#a31a31|#801426|black|align=center}} 300 |
||
| + | *[[Slad'ran]] has been replaced by '''Hiss'Ruk, Avatar of Madcoil.''' They are functionally similar, but Hiss'Ruk's powers are themed around twilight energy rather than poison. |
||
| − | |- |
||
| + | *The [[Drakkari Colossus]] has been replaced by the '''Avatar of Zildrohar.''' |
||
| − | {{3D Cell|#ff7d0a|#dd6c09|#bb5c07|black|join=right}} {{RaceIcon|Tauren|Male}}{{ClassIcon|Druid}} |
||
| + | *[[Moorabi]] has been replaced by '''Angr'ul, Avatar of Gromul'Junn.''' They are functionally similar. |
||
| − | {{3D Cell|#ff7d0a|#dd6c09|#bb5c07|black|join=both}} <span class="plainlinks">[http://eu.wowarmory.com/character-sheet.xml?r=Moonglade&n=Megatitan <span style="color:black">Megatitan</span>]</span> |
||
| + | *In heroic mode, the Shrine of Eck has been infested with '''Undying Tendrils.''' |
||
| − | {{3D Cell|#ff7d0a|#dd6c09|#bb5c07|black|join=left|align=right}} 80 |
||
| + | *[[Gal'darah]] has been replaced by '''Frost King Malakk.''' Rather than transforming into a rhino, Malakk changes into a [[Faceless One]]. |
||
| − | {{3D Cell|#ff7d0a|#dd6c09|#bb5c07|black}} [[Server:Moonglade Europe|<span style="color:black">Moonglade EU</span>]] |
||
| + | |||
| − | {{3D Cell|#ff7d0a|#dd6c09|#bb5c07|black}} |
||
| + | == Gallery == |
||
| − | {{3D Cell|#ff7d0a|#dd6c09|#bb5c07|black|join=right}} [[File:APB Druid Feral Combat.png|link=Druid talents#Feral Combat|Feral Combat]] |
||
| + | <gallery> |
||
| − | {{3D Cell|#ff7d0a|#dd6c09|#bb5c07|black|join=left|align=center}} 0/33/3 |
||
| + | Image:Zul'Drak2.jpg|Zul'Drak is crumbling into ruin in the wake of the [[Cataclysm]]. |
||
| − | {{3D Cell|#ff7d0a|#dd6c09|#bb5c07|black|join=right}} [[File:APB Druid Feral Combat.png|link=Druid talents#Feral Combat|Feral Combat]] |
||
| + | Image:Characters_urizen.jpg|[[User:GoldenYak/Twilight's_Hammer_of_Northrend#Twilight_Lord_Urizen|Twilight Lord Urizen]] has come to Zul'Drak to spread the gospel of the [[Old Gods]]. |
||
| − | {{3D Cell|#ff7d0a|#dd6c09|#bb5c07|black|join=left|align=center}} 0/33/3 |
||
| + | Image:Zul'Drak5.jpg|The Drakkari sacrificed their own gods, and new, darker powers seek to replace them. |
||
| − | {{3D Cell|#ff7d0a|#dd6c09|#bb5c07|black|join=right}} {{User:ArmoryProfileBot/Profession|Leatherworking}} |
||
| + | Image:Zul'Drak9.jpg|The Scourge blight engineered by [[Overlord Drakuru]] has spread throughout the lower tier. |
||
| − | {{3D Cell|#ff7d0a|#dd6c09|#bb5c07|black|join=left|align=center}} 439 |
||
| + | Image:Zul'Drak10.jpg|The Amphitheater of Anguish boasts new challenges. |
||
| − | {{3D Cell|#ff7d0a|#dd6c09|#bb5c07|black|join=right}} {{User:ArmoryProfileBot/Profession|Skinning}} |
||
| + | Image:Kolramas.jpg|All of the [[Scourge]] Necropoli have fallen, but their danger is still grave. |
||
| − | {{3D Cell|#ff7d0a|#dd6c09|#bb5c07|black|join=left|align=center}} 450 |
||
| + | Image:Zul'Drak12.jpg|The Argent Stand remains a stronghold of light against the darkness. |
||
| − | {{3D Cell|#ff7d0a|#dd6c09|#bb5c07|black|align=center}} |
||
| + | Image:Zul'Drak13.jpg|At [[Gundrak]], the great ziggurat has been remade into a massive twilight portal. |
||
| − | {{3D Cell|#ff7d0a|#dd6c09|#bb5c07|black|align=center}} 1 |
||
| + | </gallery> |
||
| − | {{3D Cell|#ff7d0a|#dd6c09|#bb5c07|black|align=center}} |
||
| + | |||
| − | {{3D Cell|#ff7d0a|#dd6c09|#bb5c07|black|align=center}} 300 |
||
| + | [[Category:Fan fiction| ]] |
||
| − | |- |
||
| − | {{3D Cell|#2459ff|#1f4ddd|#1a41bb|black|join=right}} {{RaceIcon|Troll|Male}}{{ClassIcon|Shaman}} |
||
| − | {{3D Cell|#2459ff|#1f4ddd|#1a41bb|black|join=both}} <span class="plainlinks">[http://eu.wowarmory.com/character-sheet.xml?r=Moonglade&n=Shakazahn <span style="color:black">Shakazahn</span>]</span> |
||
| − | {{3D Cell|#2459ff|#1f4ddd|#1a41bb|black|join=left|align=right}} 80 |
||
| − | {{3D Cell|#2459ff|#1f4ddd|#1a41bb|black}} [[Server:Moonglade Europe|<span style="color:black">Moonglade EU</span>]] |
||
| − | {{3D Cell|#2459ff|#1f4ddd|#1a41bb|black}} |
||
| − | {{3D Cell|#2459ff|#1f4ddd|#1a41bb|black|join=right}} [[File:APB Shaman Elemental Combat.png|link=Shaman talents#Elemental|Elemental Combat]] |
||
| − | {{3D Cell|#2459ff|#1f4ddd|#1a41bb|black|join=left|align=center}} 32/4/0 |
||
| − | {{3D Cell|#2459ff|#1f4ddd|#1a41bb|black|join=right}} [[File:APB Shaman Restoration.png|link=Shaman talents#Restoration|Restoration]] |
||
| − | {{3D Cell|#2459ff|#1f4ddd|#1a41bb|black|join=left|align=center}} 1/3/32 |
||
| − | {{3D Cell|#2459ff|#1f4ddd|#1a41bb|black|join=right}} {{User:ArmoryProfileBot/Profession|Herbalism}} |
||
| − | {{3D Cell|#2459ff|#1f4ddd|#1a41bb|black|join=left|align=center}} 450 |
||
| − | {{3D Cell|#2459ff|#1f4ddd|#1a41bb|black|join=right}} {{User:ArmoryProfileBot/Profession|Alchemy}} |
||
| − | {{3D Cell|#2459ff|#1f4ddd|#1a41bb|black|join=left|align=center}} 450 |
||
| − | {{3D Cell|#2459ff|#1f4ddd|#1a41bb|black|align=center}} |
||
| − | {{3D Cell|#2459ff|#1f4ddd|#1a41bb|black|align=center}} 375 |
||
| − | {{3D Cell|#2459ff|#1f4ddd|#1a41bb|black|align=center}} |
||
| − | {{3D Cell|#2459ff|#1f4ddd|#1a41bb|black|align=center}} 300 |
||
| − | |- |
||
| − | {{3D Cell|#ffffff|#dddddd|#bbbbbb|black|join=right}} {{RaceIcon|Undead|Male}}{{ClassIcon|Priest}} |
||
| − | {{3D Cell|#ffffff|#dddddd|#bbbbbb|black|join=both}} <span class="plainlinks">[http://eu.wowarmory.com/character-sheet.xml?r=Moonglade&n=Baldibur <span style="color:black">Baldibur</span>]</span> |
||
| − | {{3D Cell|#ffffff|#dddddd|#bbbbbb|black|join=left|align=right}} 80 |
||
| − | {{3D Cell|#ffffff|#dddddd|#bbbbbb|black}} [[Server:Moonglade Europe|<span style="color:black">Moonglade EU</span>]] |
||
| − | {{3D Cell|#ffffff|#dddddd|#bbbbbb|black}} |
||
| − | {{3D Cell|#ffffff|#dddddd|#bbbbbb|black|join=right}} [[File:APB Priest Shadow Magic.png|link=Priest talents#Shadow|Shadow]] |
||
| − | {{3D Cell|#ffffff|#dddddd|#bbbbbb|black|join=left|align=center}} 3/0/33 |
||
| − | {{3D Cell|#ffffff|#dddddd|#bbbbbb|black|join=right}} [[File:APB Priest Discipline.png|link=Priest talents#Discipline|Discipline]] |
||
| − | {{3D Cell|#ffffff|#dddddd|#bbbbbb|black|join=left|align=center}} 33/0/3 |
||
| − | {{3D Cell|#ffffff|#dddddd|#bbbbbb|black|join=right}} {{User:ArmoryProfileBot/Profession|Enchanting}} |
||
| − | {{3D Cell|#ffffff|#dddddd|#bbbbbb|black|join=left|align=center}} 450 |
||
| − | {{3D Cell|#ffffff|#dddddd|#bbbbbb|black|join=right}} {{User:ArmoryProfileBot/Profession|Tailoring}} |
||
| − | {{3D Cell|#ffffff|#dddddd|#bbbbbb|black|join=left|align=center}} 450 |
||
| − | {{3D Cell|#ffffff|#dddddd|#bbbbbb|black|align=center}} 11 |
||
| − | {{3D Cell|#ffffff|#dddddd|#bbbbbb|black|align=center}} 375 |
||
| − | {{3D Cell|#ffffff|#dddddd|#bbbbbb|black|align=center}} 150 |
||
| − | {{3D Cell|#ffffff|#dddddd|#bbbbbb|black|align=center}} 375 |
||
| − | |- |
||
| − | {{3D Cell|#abd473|#94b763|#7d9b54|black|join=right}} {{RaceIcon|Orc|Male}}{{ClassIcon|Hunter}} |
||
| − | {{3D Cell|#abd473|#94b763|#7d9b54|black|join=both}} <span class="plainlinks">[http://eu.wowarmory.com/character-sheet.xml?r=Moonglade&n=Sortharion <span style="color:black">Sortharion</span>]</span> |
||
| − | {{3D Cell|#abd473|#94b763|#7d9b54|black|join=left|align=right}} 80 |
||
| − | {{3D Cell|#abd473|#94b763|#7d9b54|black}} [[Server:Moonglade Europe|<span style="color:black">Moonglade EU</span>]] |
||
| − | {{3D Cell|#abd473|#94b763|#7d9b54|black}} |
||
| − | {{3D Cell|#abd473|#94b763|#7d9b54|black|join=right}} [[File:APB Hunter Marksmanship.png|link=Hunter talents#Marksmanship|Marksmanship]] |
||
| − | {{3D Cell|#abd473|#94b763|#7d9b54|black|join=left|align=center}} 3/31/2 |
||
| − | {{3D Cell|#abd473|#94b763|#7d9b54|black|align=center|join=right|attr=colspan="2"}} |
||
| − | {{3D Cell|#abd473|#94b763|#7d9b54|black|join=right}} |
||
| − | {{3D Cell|#abd473|#94b763|#7d9b54|black|join=left|align=center}} |
||
| − | {{3D Cell|#abd473|#94b763|#7d9b54|black|join=right}} |
||
| − | {{3D Cell|#abd473|#94b763|#7d9b54|black|join=left|align=center}} |
||
| − | {{3D Cell|#abd473|#94b763|#7d9b54|black|align=center}} 40 |
||
| − | {{3D Cell|#abd473|#94b763|#7d9b54|black|align=center}} 375 |
||
| − | {{3D Cell|#abd473|#94b763|#7d9b54|black|align=center}} 1 |
||
| − | {{3D Cell|#abd473|#94b763|#7d9b54|black|align=center}} 300 |
||
| − | |- |
||
| − | {{3D Cell|#69ccf0|#5bb1d0|#4d96b0|black|join=right}} {{RaceIcon|Troll|Male}}{{ClassIcon|Mage}} |
||
| − | {{3D Cell|#69ccf0|#5bb1d0|#4d96b0|black|join=both}} <span class="plainlinks">[http://eu.wowarmory.com/character-sheet.xml?r=Moonglade&n=Shakazan <span style="color:black">Shakazan</span>]</span> |
||
| − | {{3D Cell|#69ccf0|#5bb1d0|#4d96b0|black|join=left|align=right}} 80 |
||
| − | {{3D Cell|#69ccf0|#5bb1d0|#4d96b0|black}} [[Server:Moonglade Europe|<span style="color:black">Moonglade EU</span>]] |
||
| − | {{3D Cell|#69ccf0|#5bb1d0|#4d96b0|black}} |
||
| − | {{3D Cell|#69ccf0|#5bb1d0|#4d96b0|black|join=right}} [[File:APB Mage Fire.png|link=Mage talents#Fire|Fire]] |
||
| − | {{3D Cell|#69ccf0|#5bb1d0|#4d96b0|black|join=left|align=center}} 0/33/3 |
||
| − | {{3D Cell|#69ccf0|#5bb1d0|#4d96b0|black|align=center|join=right|attr=colspan="2"}} |
||
| − | {{3D Cell|#69ccf0|#5bb1d0|#4d96b0|black|join=right}} |
||
| − | {{3D Cell|#69ccf0|#5bb1d0|#4d96b0|black|join=left|align=center}} |
||
| − | {{3D Cell|#69ccf0|#5bb1d0|#4d96b0|black|join=right}} |
||
| − | {{3D Cell|#69ccf0|#5bb1d0|#4d96b0|black|join=left|align=center}} |
||
| − | {{3D Cell|#69ccf0|#5bb1d0|#4d96b0|black|align=center}} |
||
| − | {{3D Cell|#69ccf0|#5bb1d0|#4d96b0|black|align=center}} |
||
| − | {{3D Cell|#69ccf0|#5bb1d0|#4d96b0|black|align=center}} |
||
| − | {{3D Cell|#69ccf0|#5bb1d0|#4d96b0|black|align=center}} 300 |
||
| − | |- |
||
| − | {{3D Cell|#c79c6e|#ac875f|#927250|black|join=right}} {{RaceIcon|Tauren|Male}}{{ClassIcon|Warrior}} |
||
| − | {{3D Cell|#c79c6e|#ac875f|#927250|black|join=both}} <span class="plainlinks">[http://eu.wowarmory.com/character-sheet.xml?r=Moonglade&n=Groumnir <span style="color:black">Groumnir</span>]</span> |
||
| − | {{3D Cell|#c79c6e|#ac875f|#927250|black|join=left|align=right}} 77 |
||
| − | {{3D Cell|#c79c6e|#ac875f|#927250|black}} [[Server:Moonglade Europe|<span style="color:black">Moonglade EU</span>]] |
||
| − | {{3D Cell|#c79c6e|#ac875f|#927250|black}} |
||
| − | {{3D Cell|#c79c6e|#ac875f|#927250|black|join=right}} [[File:APB Warrior Fury.png|link=Warrior talents#Fury|Fury]] |
||
| − | {{3D Cell|#c79c6e|#ac875f|#927250|black|join=left|align=center}} 3/32/0 |
||
| − | {{3D Cell|#c79c6e|#ac875f|#927250|black|align=center|join=right|attr=colspan="2"}} |
||
| − | {{3D Cell|#c79c6e|#ac875f|#927250|black|join=right}} {{User:ArmoryProfileBot/Profession|Alchemy}} |
||
| − | {{3D Cell|#c79c6e|#ac875f|#927250|black|join=left|align=center}} 403 |
||
| − | {{3D Cell|#c79c6e|#ac875f|#927250|black|join=right}} {{User:ArmoryProfileBot/Profession|Herbalism}} |
||
| − | {{3D Cell|#c79c6e|#ac875f|#927250|black|join=left|align=center}} 465 |
||
| − | {{3D Cell|#c79c6e|#ac875f|#927250|black|align=center}} 416 |
||
| − | {{3D Cell|#c79c6e|#ac875f|#927250|black|align=center}} 450 |
||
| − | {{3D Cell|#c79c6e|#ac875f|#927250|black|align=center}} 418 |
||
| − | {{3D Cell|#c79c6e|#ac875f|#927250|black|align=center}} 300 |
||
| − | |- |
||
| − | {{3D Cell|#fff569|#ddd45b|#bbb44d|black|join=right}} {{RaceIcon|Orc|Male}}{{ClassIcon|Rogue}} |
||
| − | {{3D Cell|#fff569|#ddd45b|#bbb44d|black|join=both}} <span class="plainlinks">[http://eu.wowarmory.com/character-sheet.xml?r=Moonglade&n=Gorumnir <span style="color:black">Gorumnir</span>]</span> |
||
| − | {{3D Cell|#fff569|#ddd45b|#bbb44d|black|join=left|align=right}} 75 |
||
| − | {{3D Cell|#fff569|#ddd45b|#bbb44d|black}} [[Server:Moonglade Europe|<span style="color:black">Moonglade EU</span>]] |
||
| − | {{3D Cell|#fff569|#ddd45b|#bbb44d|black}} |
||
| − | {{3D Cell|#fff569|#ddd45b|#bbb44d|black|join=right}} [[File:APB Rogue Combat.png|link=Rogue_talents#Combat|Combat]] |
||
| − | {{3D Cell|#fff569|#ddd45b|#bbb44d|black|join=left|align=center}} 3/31/0 |
||
| − | {{3D Cell|#fff569|#ddd45b|#bbb44d|black|align=center|join=right|attr=colspan="2"}} |
||
| − | {{3D Cell|#fff569|#ddd45b|#bbb44d|black|join=right}} {{User:ArmoryProfileBot/Profession|Herbalism}} |
||
| − | {{3D Cell|#fff569|#ddd45b|#bbb44d|black|join=left|align=center}} 450 |
||
| − | {{3D Cell|#fff569|#ddd45b|#bbb44d|black|join=right}} {{User:ArmoryProfileBot/Profession|Inscription}} |
||
| − | {{3D Cell|#fff569|#ddd45b|#bbb44d|black|join=left|align=center}} 447 |
||
| − | {{3D Cell|#fff569|#ddd45b|#bbb44d|black|align=center}} |
||
| − | {{3D Cell|#fff569|#ddd45b|#bbb44d|black|align=center}} 374 |
||
| − | {{3D Cell|#fff569|#ddd45b|#bbb44d|black|align=center}} |
||
| − | {{3D Cell|#fff569|#ddd45b|#bbb44d|black|align=center}} 225 |
||
| − | |- |
||
| − | {{3D Cell|#9482c9|#8071af|#6c5f94|black|join=right}} {{RaceIcon|Undead|Male}}{{ClassIcon|Warlock}} |
||
| − | {{3D Cell|#9482c9|#8071af|#6c5f94|black|join=both}} <span class="plainlinks">[http://eu.wowarmory.com/character-sheet.xml?r=Moonglade&n=Rashgaroth <span style="color:black">Rashgaroth</span>]</span> |
||
| − | {{3D Cell|#9482c9|#8071af|#6c5f94|black|join=left|align=right}} 71 |
||
| − | {{3D Cell|#9482c9|#8071af|#6c5f94|black}} [[Server:Moonglade Europe|<span style="color:black">Moonglade EU</span>]] |
||
| − | {{3D Cell|#9482c9|#8071af|#6c5f94|black}} |
||
| − | {{3D Cell|#9482c9|#8071af|#6c5f94|black|join=right}} [[File:APB Warlock Destruction.png|link=Warlock talents#Destruction|Destruction]] |
||
| − | {{3D Cell|#9482c9|#8071af|#6c5f94|black|join=left|align=center}} 0/3/31 |
||
| − | {{3D Cell|#9482c9|#8071af|#6c5f94|black|align=center|join=right|attr=colspan="2"}} |
||
| − | {{3D Cell|#9482c9|#8071af|#6c5f94|black|join=right}} {{User:ArmoryProfileBot/Profession|Engineering}} |
||
| − | {{3D Cell|#9482c9|#8071af|#6c5f94|black|join=left|align=center}} 428 |
||
| − | {{3D Cell|#9482c9|#8071af|#6c5f94|black|join=right}} {{User:ArmoryProfileBot/Profession|Mining}} |
||
| − | {{3D Cell|#9482c9|#8071af|#6c5f94|black|join=left|align=center}} 393 |
||
| − | {{3D Cell|#9482c9|#8071af|#6c5f94|black|align=center}} |
||
| − | {{3D Cell|#9482c9|#8071af|#6c5f94|black|align=center}} 395 |
||
| − | {{3D Cell|#9482c9|#8071af|#6c5f94|black|align=center}} |
||
| − | {{3D Cell|#9482c9|#8071af|#6c5f94|black|align=center}} 150 |
||
| − | |- |
||
| − | {{3D Cell|#f58cba|#d47aa1|#b46789|black|join=right}} {{RaceIcon|Dwarf|Male}}{{ClassIcon|Paladin}} |
||
| − | {{3D Cell|#f58cba|#d47aa1|#b46789|black|join=both}} <span class="plainlinks">[http://www.wowarmory.com/character-sheet.xml?r=Draka&n=Baldibar <span style="color:black">Baldibar</span>]</span> |
||
| − | {{3D Cell|#f58cba|#d47aa1|#b46789|black|join=left|align=right}} 70 |
||
| − | {{3D Cell|#f58cba|#d47aa1|#b46789|black}} [[Server:Draka US|<span style="color:black">Draka US</span>]] |
||
| − | {{3D Cell|#f58cba|#d47aa1|#b46789|black}} <span class="plainlinks">[http://www.wowarmory.com/guild-info.xml?r=Draka&gn=Schecter+Shreaders <span style="color:black">Schecter Shreaders</span>]</span> |
||
| − | {{3D Cell|#f58cba|#d47aa1|#b46789|black|join=right}} [[File:APB Paladin Retribution.png|link=Paladin talents#Retribution|Retribution]] |
||
| − | {{3D Cell|#f58cba|#d47aa1|#b46789|black|join=left|align=center}} 5/5/51 |
||
| − | {{3D Cell|#f58cba|#d47aa1|#b46789|black|join=right}} [[File:APB Paladin Protection.png|link=Paladin talents#Protection|Protection]] |
||
| − | {{3D Cell|#f58cba|#d47aa1|#b46789|black|join=left|align=center}} 0/56/5 |
||
| − | {{3D Cell|#f58cba|#d47aa1|#b46789|black|join=right}} {{User:ArmoryProfileBot/Profession|Blacksmithing}} |
||
| − | {{3D Cell|#f58cba|#d47aa1|#b46789|black|join=left|align=center}} 334 |
||
| − | {{3D Cell|#f58cba|#d47aa1|#b46789|black|join=right}} {{User:ArmoryProfileBot/Profession|Mining}} |
||
| − | {{3D Cell|#f58cba|#d47aa1|#b46789|black|join=left|align=center}} 375 |
||
| − | {{3D Cell|#f58cba|#d47aa1|#b46789|black|align=center}} |
||
| − | {{3D Cell|#f58cba|#d47aa1|#b46789|black|align=center}} 120 |
||
| − | {{3D Cell|#f58cba|#d47aa1|#b46789|black|align=center}} |
||
| − | {{3D Cell|#f58cba|#d47aa1|#b46789|black|align=center}} 225 |
||
| − | |}<noinclude>[[Category:User:Gourra|Characters]]</noinclude> |
||
Revision as of 21:18, 8 January 2011
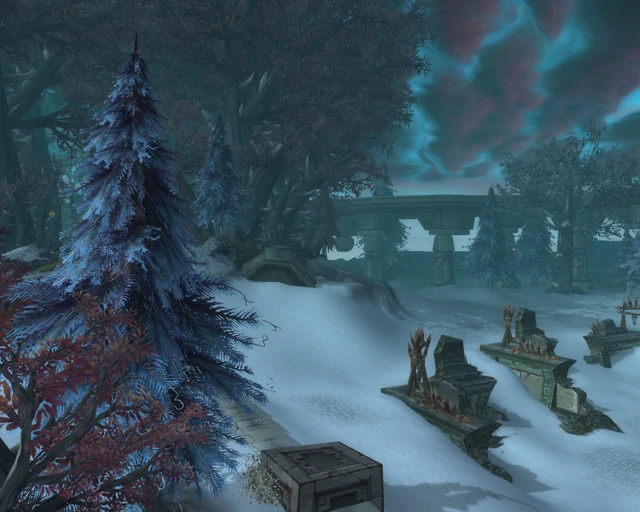 | |
| Location | Northeastern Northrend |
UNDER CONSTRUCTION related to Spider Kingdom Expansion Concept
Zul'Drak is an area located in eastern Northrend. For generations, the Drakkari ice trolls ruled a sprawling empire that filled the region with temples and cities. The wrath of the Lich King brought about the end of the troll's reign in a few short years. The Scourge invasion decimated the Drakkari, driving the survivors into a desperate gambit. Drakkari mystics began sacrificing their Loa animal gods, hoping to take the spirit beings' power for themselves and use it against the Scourge. Their dark plot failed, as the Drakkari were betrayed from within and overwhelmed from without, and all of their great champions who were imbued with the essence of the Loas were slain.
With the death of the Lich King, the Scourge forces in this region have been reduced to mindless undead. The great floating necropoli and plague-spreaders that the Scourge brought to wage war have fallen into ruin, releasing an unholy blight across the lower tiers of Zul'Drak. Undead are running wild, fueled by the plague, attacking anything that lives.
The Ashen Verdict maintains a presence in Zul'Drak, but their forces have begun to fracture under the weight of the danger in the region.
History

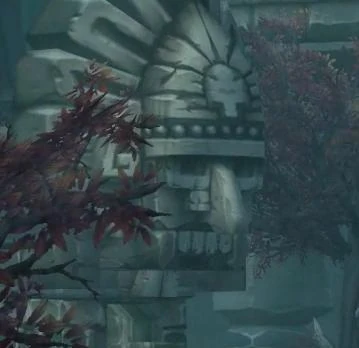
The Drakkari empire has devoted itself to chaos.
The Drakkari were one of the few civilizations in Northrend capable of withstanding the onslaught of the undead Scourge. The Scourge forces were only able to advance into Zul'Drak through subterfuge, recruiting the renegade ice troll Drakuru and using him as an agent against the magical defenses of Zul'Drak. After Drakuru unwound the protective enchantments of Drak'Tharon Keep, he was transformed into a death knight by the Lich King himself, and granted leadership over a vast army of the undead, which he led into Zul'Drak. Though Drakuru eventually fell from the Lich King's favor, the Scourge forces he brought into Zul'Drak have wrought terrible carnage, spreading the undead plague and blighting the landscape to the point where it may never recover.
To halt the onslaught of the Scourge, the Drakkari turned on and slew their animal gods, the Loa. Using the essence of the slain gods to empower their champions, the Drakkari hoped to create a force that could destroy the Scourge. In the end, all their power was only able to slow the advance of the undead, and eventually forces of the Alliance and the Horde were drawn into the conflict. The Drakkari were opposed by their fellow trolls and distant relatives, the Zandalari, who arrived in Zul'Drak to stop the ice trolls insane schemes. Eventually, with all of the empowered Drakkari were slain, and the majority of their forces withdrew to the upper regions of Zul'Drak and their primary fortress, Gundrak.
Cataclysm
The Drakkari saw the devastation of the Cataclysm as a judgment upon them for their sins against their animal gods. As the ground cracked apart and the sky rained fire, the trolls cried out to any force that might deliver them from the nightmare their lives had become. Their call was answered by the Twilight's Hammer. Agents of the vile cult arrived in Zul'Drak to find the Drakkari spiritually vulnerable, and moved quickly to introduce the ice trolls to the worship of the Old Gods. Eager to find a new focus of worship, the Drakkari rapidly converted their faith to honoring the Old Gods and calling upon their power. The Twilight's Hammer have taken advantage of both the Drakkari's fervent devotion and the tremendous natural energies that saturate Zul'Drak in the wake of their gods deaths.
Areas affected:
- Necropolis Zeramas and Necropolis Voltarus have fallen from the sky. Scourge Remnants remain holed up within.
- Blight has spread from the fallen necropoli, turning the lower tier of Zul'Drak into a swamp of plague and undeath.
- The Knights of the Ebon Blade are devoted to destroying the Scourge Remnants in the region, while the Argent Crusade wants to focus on cleansing the corruption and evacuating survivors.
- Drakuru's Blightblood trolls are running rampant, spreading carnage throughout Zul'Drak's lower levels.
- Portions of Drak'Sotra have sunk underground, and nerubians have risen up, bringing along Faceless Ones. The Argent Crusade is focused on holding back the tide.
- With many of the troll gods of Zul'Drak dead, the Drakkari are looking for something new to worship. The Twilight's Hammer have arrived to spread their dark gospel. Twilight's Hammer forces and elementals have replaced Scourge forces throughout Zul'Drak.
- Zim'Torga has been destroyed by the Drakkari and the Twilight's Hammer. The Zandalari there have been forced to retreat.
- The upper tier of Zul'Drak has been conquered by the Twilight's Hammer. Their rituals have already begun shaping elementium and twisting the region.
- The Mam'toth Crater has broken open, revealing underground tunnels infested with nerubians and encrusted with saronite deposits. A mining operation has been set up by the Twilight's Hammer, who have developed an interest in refining saronite.
- The Twilight's Hammer are corrupting the shrines of the Drakkari gods, attempting to resurrect them as twisted, evil shadows of their former selves.
- The upper temple at Gundrak has been rebuilt into a massive twilight portal, where the Drakkari and the Twilight's Hammer are attempting to summon forth a gigantic Faceless One - Zildrohar the Traveler.
People and culture
Zul'Drak is the Drakkari homeland. Their culture is believed to have existed long before the Great Sundering. Though their empire stood strong for thousands of years, the onslaught of the Scourge has reduced it to a shadow of its former self. As the hordes of undead swarmed through the ruins of Zul'Drak, the Drakkari turned on their own gods, the Loa. By destroying these ancient and powerful begins, the Drakkari hoped to acquire their power and use it against the Scourge.
In the wake of their gods death, the Drakkari were at a loss. Their gambit had held off the Scourge for a time, and the death of the Lich King had spared their empire, but without the focus of their worship, the Drakkari spirit seemed to have been crushed. When the Twilight's Hammer arrived in Northrend, they saw an opportunity to bring the Drakkari under their sway, replacing the Loas with worship of the Old Gods.
Geography
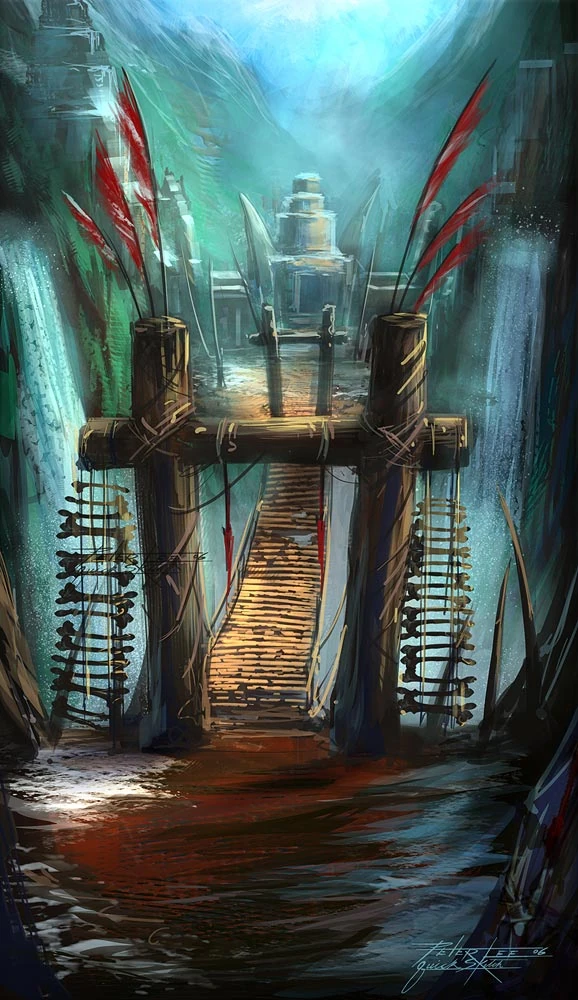
The lower tier of Zul'Drak has become a mire of death and decay, with the Scourge's blight spreading throughout the woodlands and poisoning everything it touches. The middle tier remains largely secure by the Argent Dawn and the Knights of the Ebon Blade, who are holding back the encroaching taint from the lower tier. In the upper tier, the once snow-covered plains have been twisted, transformed by the Twilight's Hammer and the eldritch corruption of their summonings. Elementium spires erupt from the earth, twining around and through the ruins of the Drakkari.
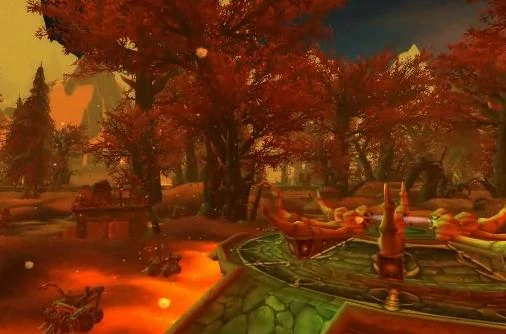
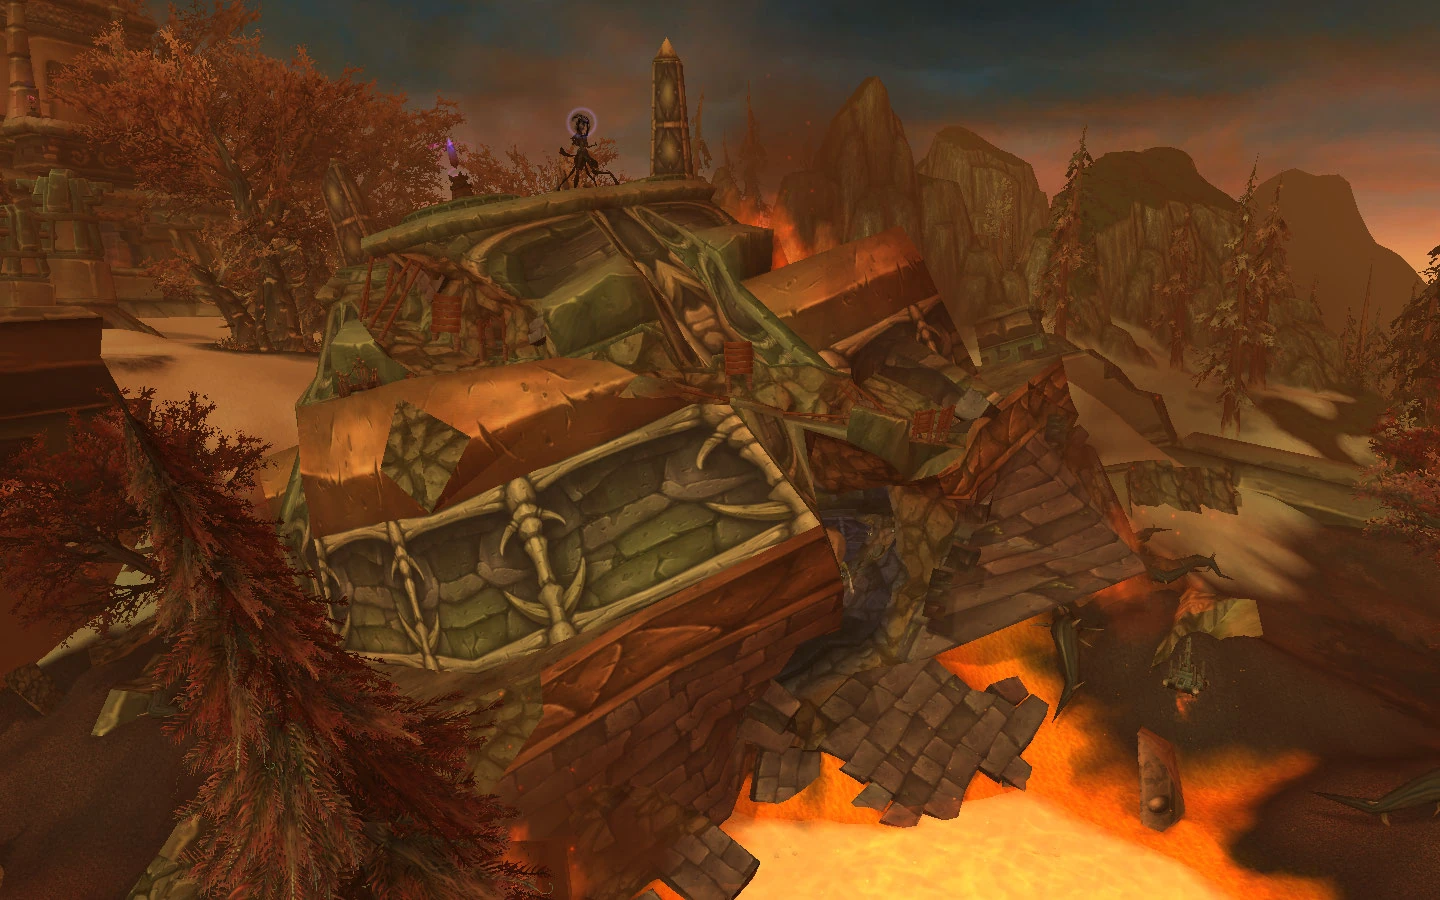
Map and subregions


Zul'Drak, post-Cataclysm
Instances
| Instance Name | Level Range | Approximate Run Time |
|---|---|---|
| 74-76 | 25 min - 40 min | |
| 76-78 | 20 min - 40 min |
Quests and Storylines
The Lower Tier
The crashed Scourge necropoli in the region have caused the blight to engulf the entire lower tier, turning it into the deadly Blightlands. Towering plague mushrooms have overtaken the forests, blotting out the sky and showering the earth with spores. Drakuru's Blightblood trolls are running rampant through the lower tier, spreading the plague further. Undead trolls have instinctively flocked to the side of these mighty creatures, making it extremely difficult to destroy them. The Knights of the Ebon Blade have a heavy presence in this region, being largely immune to the blight, and have many quests related to destroying the undead. The San'layn have a small presence in the ruins of the Necropoli, desperately trying to salvage what they can from the wreckage. Players will learn that their faction has been almost completely destroyed by Angerboda's forces, and the few San'layn that remain are being forced into subservience to Amal'thazad and his death cult.
The Middle Tier
The Argent Crusade has remained entrenched in the Argent Stand, fighting against marauding undead from the lower tier and the Drakkari of the upper tier. Several Zandalari trolls from Zim'Torga have joined the Argent Crusade, soliciting their help against the increased Drakkari hostility in the upper tier. The Crusaders will require aid both in securing their position, dealing with the local threats, and their efforts to cleanse the encroaching blight from the lower tier. Many Drakkari refugees have come to the Argent Stand as well seeking aid, driven nearly mad by their ordeals. Some of them babble that the slain Loa gods are returning for revenge.
Drakkari have retaken the ruins surrounding the Altar of Sseratus, and quests in the area involve fighting a path to the altar itself to witness ice troll druids conducting a ritual. The druids call upon the power of the Emerald Dream to restore the fallen god, but it becomes clear that they are tampering with evil forces, and Zandalari accompanying the player will sense the power of the Nightmare. The corpse of Sseratus is imbued with evil energy and returns as a dark, corrupted version of his former self - Madcoil. The Drakkari are driven into an insane frenzy by the return of their gods, forcing the Argent Crusade troops in the region to fall back to the Argent Stand. Further quests will direct the players to seek out the Zandalari at Zim'Torga for answers.
The Upper Tier
At Zim'Torga, Drakkari forces are joined by captive elementals and ice trolls who have gained twisted, druid-like powers of shape-shifting. The Zandalari are unable to hold out against the onslaught, and things go from bad to worse when the Drakkari unleash Madcoil upon the grove. The quest chain in the region culminates with Har'koa attacking Madcoil and slaying him. However, the forces of the Twilight Hammer suddenly arrive, with Faceless Ones in tow, led by Twilight Lord Urizen, one of the Hammer's most powerful agents in Northrend. Har'koa is slain and revived by Urizen as Nightfell, another evil Loa like Madcoil.
The Zandalari are forced to abadon Zim'Torga, and briefly fall back to the Argent Stand. From there, players will aid the Zandalari and the Crusaders in retaking the upper tier. First, Nightfell must be slain at the Altar of Har'koa. Players will also confront Gotarr, an evil version of Rhunok, and Gromul'Junn, the twisted mammoth god that was once Mam'toth. At the Altar of Quetz'lun, players discover that the wind serpent loa has gone completely insane, and the dark netherworld she has created threatens to spill over into the material plane. The Twilight's Hammer are feeding Quetz'lun's evil and insanity by sending in Drakkari troops to battle her and her undead minions, exploiting the carnage to fuel their dark rituals and summon more Faceless Ones to Zul'Drak.
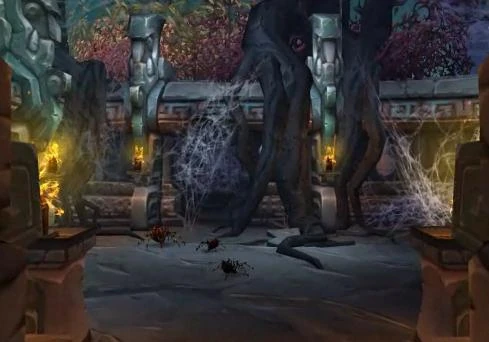
Gundrak
The steps to Gundrak are guarded by Icheron, the rhino god Akali's twisted double. The great temple at Gundrak itself has been dismantled by the Twilight's Hammer and rebuilt into a massive twilight portal. There, Urizen is conducting a ritual using the stolen energies of the Loas to summon forth a gigantic Facless One known as Zildrohar the Traveler. The final battle of Zul'Drak culminates with the Zandalari and the Argent Crusade launching an aerial assault upon the half-summoned Zildrohar. Players will ride an Argent Hippogryph into battle and use it and their Crusader and troll allies to banish Zildrohar back to the void he is trapped in.
Zildrohar's banishment causes many of the Twilight's Hammer forces, including Urizen, to be drawn into oblivion along with the giant Faceless One. In the aftermath, the Zandalari vow to continue their efforts to redeem their Drakkari relatives, and offer daily quests for players to continue the battle against the remaining Twilight's Hammer forces.
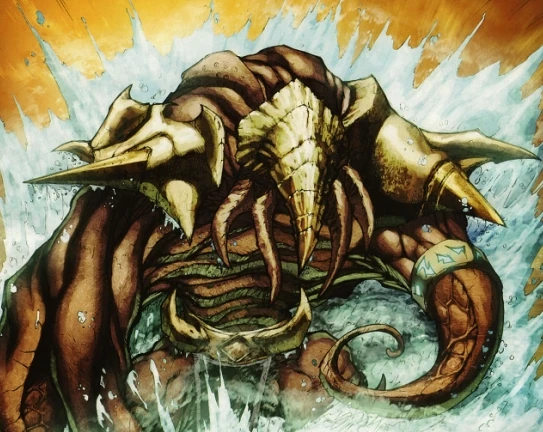

Zildrohar the Traveler is an ancient fiend on par with Soggoth the Slitherer and Sor'getha.
Changes to Instances in Zul'Drak
- References to the Scourge and the Lich King have been changed to involve the Scourge Remnants.
- Drakkari trolls in Gundrak have been joined by agents of the Twilight's Hammer.
- Slad'ran has been replaced by Hiss'Ruk, Avatar of Madcoil. They are functionally similar, but Hiss'Ruk's powers are themed around twilight energy rather than poison.
- The Drakkari Colossus has been replaced by the Avatar of Zildrohar.
- Moorabi has been replaced by Angr'ul, Avatar of Gromul'Junn. They are functionally similar.
- In heroic mode, the Shrine of Eck has been infested with Undying Tendrils.
- Gal'darah has been replaced by Frost King Malakk. Rather than transforming into a rhino, Malakk changes into a Faceless One.
Gallery

Zul'Drak is crumbling into ruin in the wake of the Cataclysm.

Twilight Lord Urizen has come to Zul'Drak to spread the gospel of the Old Gods.

The Drakkari sacrificed their own gods, and new, darker powers seek to replace them.

The Scourge blight engineered by Overlord Drakuru has spread throughout the lower tier.
- Zul'Drak10.jpg
The Amphitheater of Anguish boasts new challenges.
All of the Scourge Necropoli have fallen, but their danger is still grave.
- Zul'Drak12.jpg
The Argent Stand remains a stronghold of light against the darkness.
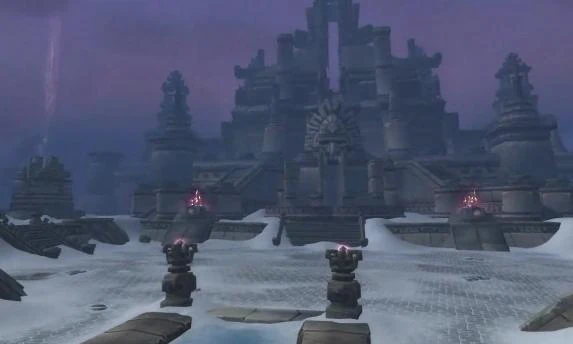
At Gundrak, the great ziggurat has been remade into a massive twilight portal.
