Kramm31977@legacy41552207 (talk | contribs) m (→Kalimdor: cata update) |
m (Reverted edit(s) by Killars (talk) to last version by Renemauricio) |
||
| Line 1: | Line 1: | ||
| + | {{npcbox |
||
| − | {{WorldEvent/Lunar Festival}} |
||
| + | |name = Ascendant Council |
||
| − | During the [[Lunar Festival]], there will be 75 '''Lunar Festival Elders''' spread around the world. Some are located in [[town]]s, some in [[instance]]s, and some in the wild. Each gives you a {{item|icon=|Coin of Ancestry}}. Note that each Elder may tell you the location up to 5 other Elders in nearby [[zone]]s. You can only receive one coin per Elder. The quests for receiving coins are reset from year to year (previously, some characters were affected by a bug that made seasonal quests unrepeatable in 2007, but this issue has been corrected, i.e. the quests were reset in 2008 and were all "re-doable". They were not reset in 2007. It is expected that they will be reset for 2009 and 2010). |
||
| + | |image = ascendantcouncil.jpg |
||
| + | |race = Elemental ascendant |
||
| + | |creature = Elemental |
||
| + | |type = Boss |
||
| + | |level = ?? |
||
| + | |location = [[Bastion of Twilight]] |
||
| + | |faction = Combat |
||
| + | |health =21,000,000 for Feludius and Ignacious. 14,500,000 for Arion and Terrastra. (25-man)<br/>6,871,360 for Feludius and Ignacious. 4,724,060 for Arion and Terrastra. (10-man) |
||
| + | |status= |
||
| + | |instance=Bastion of Twilight |
||
| + | }} |
||
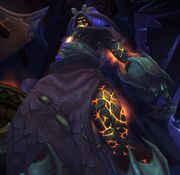
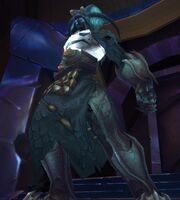
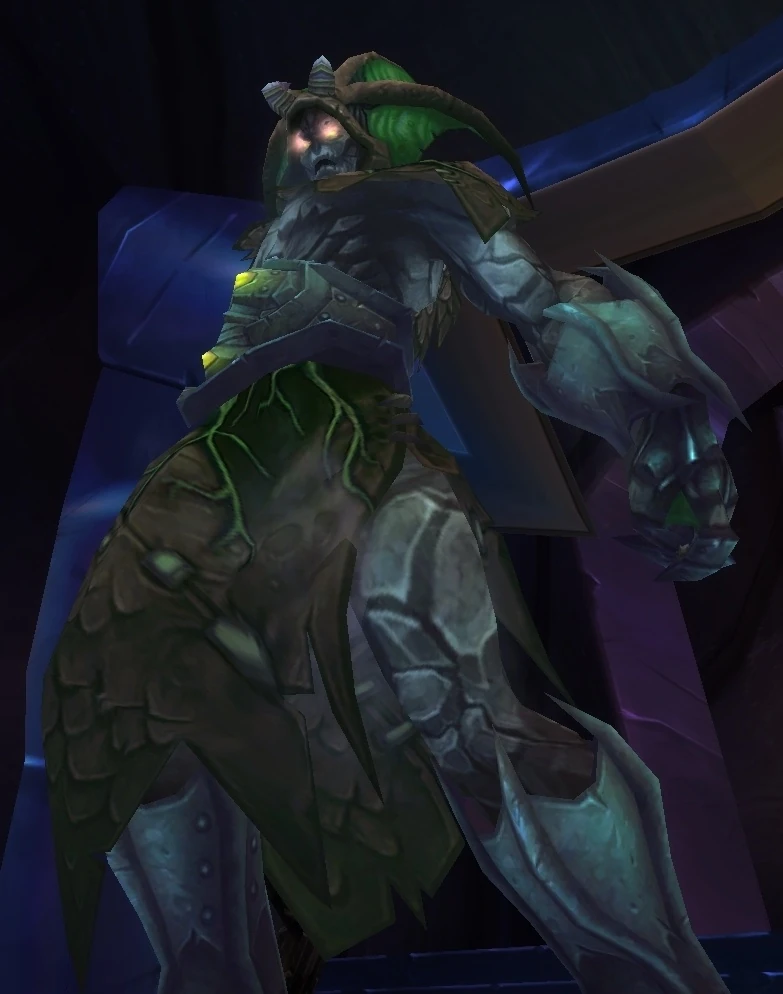
| + | '''Ascendant Council''' is a [[council encounter]] in the [[Bastion of Twilight]]. |
||
| + | They are [[Twilight's Hammer clan|Twilight's Hammer]] members who have ascended and become elementals. The world first heroic kill was by Paragon (25 person) on 2 January 2011. |
||
| − | [[Coin of Ancestry|Coins of Ancestry]] can be turned in for several tailoring and engineering patterns, as well as other items. Each coin you receive also generates 75 faction with either the [[Horde]] or [[Alliance]] for a total of 5625 for most races and 6187 for humans if all 75 {{item|icon=|Coin of Ancestry|coins}} are gathered. Furthermore, each Elder you visit will send you a {{item|icon=|Lucky Red Envelope}} via in-game [[mail]] which contains {{item|icon=|Lucky Rocket Cluster}} or an {{item|icon=|Elder's Moonstone}}. Using the {{item|icon=|Lucky Rocket Cluster}} gives you the [[Lunar Fortune]] buff (+250 health). |
||
| + | The Ascendant Council is a three phase council fight. During the first phase, you fight [[Feludius]] and [[Ignacious]] - water and fire ascendants. During the second phase, you face [[Arion]] and [[Terrastra]] - air and earth ascendants respectively. During the last phase, you must defeat all four, as they merge together into an Elementium Monstrosity. |
||
| − | {{wotlk-inline}} Through the [[Achievement]] system, players are rewarded for participating in the Lunar Festival. {{cost|ach=160}} achievement points are available through 14 achievements. Upon completing all of the Lunar Festival achievements, you will complete the [[World Events achievements|world event achievement]] {{achievement|To Honor One's Elders}} which gives the {{title|Elder}} title. |
||
| + | As the most powerful Twilight's hammer cultists to be twisted into elemental beings, the Ascendant Council members, have long forgotten their existences as mere mortals. From their wicked sanctum they oversee the selection of new ascension candidates. |
||
| − | To reach the elder in [[Frosthold]] without a flying mount a player can visit a goblin near the flight master in K3 to get a Loaned Windrider which can be used in Storm Peaks, Sholazar Basin, and Ice Crown even if you do not have cold weather flying. Also note that previously, [[Elder Ohanzee]] could only be reached in Heroic Gundrak, rendering anyone sub-80 unable to complete {{achievement|Elders of the Dungeons}}. [[Elder Ohanzee]] has been moved so that he can be reached in Normal Gundrak, and you do not have to be level 80 or higher to complete the meta achievement {{achievement|To Honor One's Elders}} and gain the <Elder> title. |
||
| + | <ref>[[Encounter Journal]]</ref> |
||
| + | ==Abilities== |
||
| − | == Elder locations == |
||
| + | ===Phase 1=== |
||
| − | '''NOTE:''' The coordinates displayed on the map pin tooltips are not ''precise''. Use the coordinates in the tables for navigation. This applies to all maps on this page. |
||
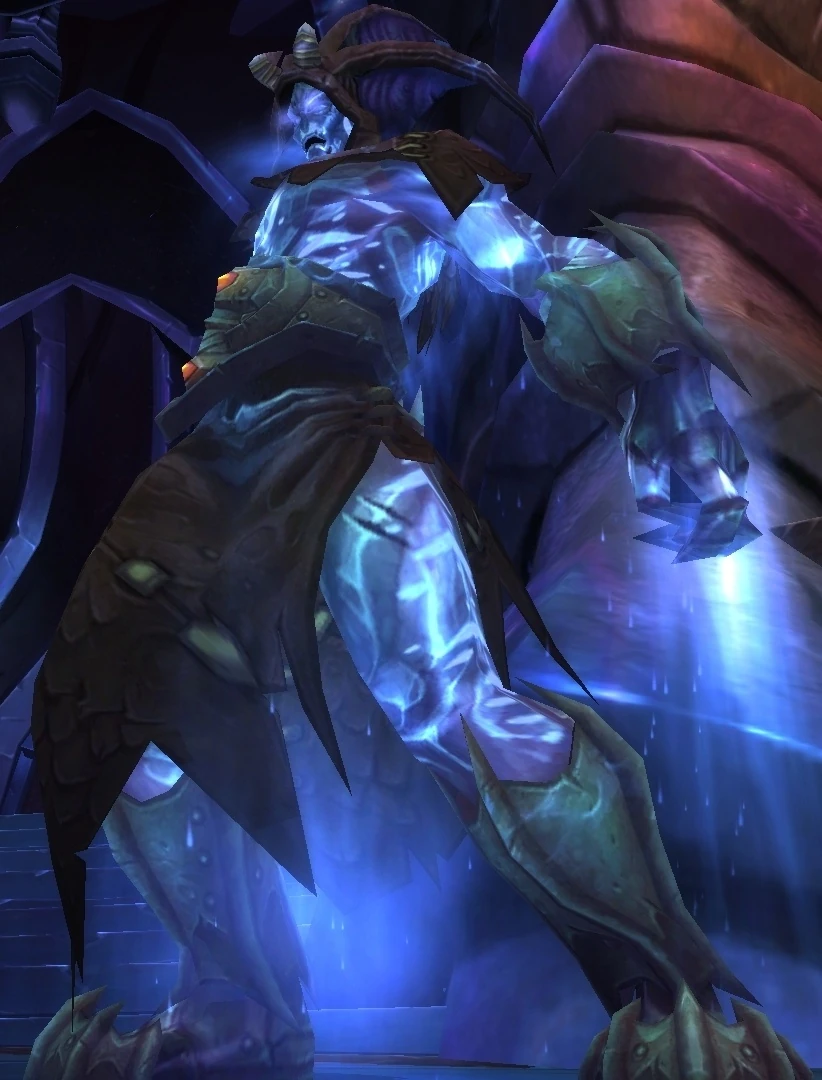
| − | === |
+ | ====Feludius==== |
| + | [[File:Feludius.jpg|thumb|Feludius]] |
||
| − | {| class="darktable sortable" |
||
| + | *{{abilities|Heart of Ice|An icy cold grips the target's heart, dealing increasing Frost damage every 2 sec (2,000/4,000/8,000 etc). Magic dispellable. If the target comes in contact with other allies, however, they are empowered with Frost energy. Frost Imbued players deal additional damage to Ignacious.|id=82667|image=spell frost frost|}} |
||
| − | |- |
||
| + | *{{abilities|Hydrolance|Deals 45000 to 55000 Frost damage to a random target.|id=92509|image=spell frost frostbolt|}} |
||
| − | |+ 3 [[Elders of the Alliance]] |
||
| + | *{{abilities|Waterbomb|Inflicts 9750 to 10250 frost damage to enemies within 6 yards, applying the Waterlogged debuff.|id=82700|image=inv elemental primal water|}} |
||
| − | ! width="80em" | Elder |
||
| + | *{{abilities|Waterlogged|Soaks an enemy with icy water, reducing movement speed by 25%. While soaked, enemies are susceptible to certain Frost-based attacks. Exposure to flame can remove this effect.|id=82762|image=inv elemental primal water|}} |
||
| − | ! width="120em" | Zone !! Coords !! Description |
||
| + | *{{abilities|Glaciate|Deals massive Frost damage to any nearby enemies, with damage decreasing with distance from the caster. Any enemies who are waterlogged will have the blood in their veins frozen.|id=82746|image=spell frost frostnova|}} |
||
| − | |- |
||
| + | *{{abilities|Frozen Blood|Freezes a waterlogged enemy solid, stunning and dealing 20000 Frost damage every 2 sec for 10 sec.|id=92505|image=ability mage deepfreeze|}} |
||
| − | | {{RaceIcon|NightElf|Male|Small}} {{quest|Bladeswift the Elder|Bladeswift}} || Darnassus || {{coords|33|14|Darnassus}} || Center of the Cenarion Enclave |
||
| − | |- |
||
| − | | {{RaceIconExt|EarthenSouth|Small}} {{quest|Bronzebeard the Elder|Bronzebeard}} || Ironforge || {{coords|29|16|Ironforge}} || Mystic Ward |
||
| − | |- |
||
| − | | {{RaceIconExt|EarthenSouth|Small}} {{quest|Hammershout the Elder|Hammershout}} || Elwynn Forest || {{coords|34.2|50.6|Elwynn Forest}} || Elwynn Forest |
||
| − | |} |
||
| + | ''Heroic Mode only'' |
||
| − | {{Zone Map|zone=Azeroth|notes= |
||
| + | *{{abilities|Frost Beacon|Marks the target for pursuit by a Frozen Orb. When the Frozen Orb reaches its target or a minute passes it will cast Glaciate as the spell above.|id=92307|image=spell frost wizardmark|}} |
||
| − | {{Zone Map Note|13|26|Blip|Bladeswift}} |
||
| − | {{Zone Map Note|79|62|Blip|Bronzebeard}} |
||
| − | {{Zone Map Note|76|75|Blip|Hammershout}} |
||
| − | }} |
||
| − | === |
+ | ====Ignacious==== |
| + | [[File:Ignacious.jpg|thumb|Ignacious]] |
||
| − | {| class="darktable sortable" |
||
| + | *{{abilities|Burning Blood|Deals increasing Fire damage to an enemy every 2 sec (2,000/4,000/8,000 etc). Magic dispellable. Nearby allies are empowered with fire energy each tick however. Fire imbued players deal additional damage to Feludius.|id=82660|image=inv elemental primal fire|}} |
||
| − | |+ 3 [[Elders of the Horde]] |
||
| + | *{{abilities|Aegis of Flame|Surrounds the caster with a radiant shield of flame, absorbing 1,000,000 damage and preventing spell interruption while active.|id=92512|image=spell fire sealoffire|}} |
||
| − | |- |
||
| + | *{{abilities|Flame Torrent|Inflicts 36075 to 41925 Fire damage every 1 sec for 3 sec in a 18 yard cone in front of the caster.|id=92518|image=ability mage firestarter|}} |
||
| − | ! width="80em" | Elder |
||
| + | *{{abilities|Inferno Leap|Leaps at an enemy, inflicting 23125 to 26875 Fire damage and knocking all nearby enemies away.|id=92521|image=spell fire burningspeed|}} |
||
| − | ! width="120em" | Zone !! Coords !! Description |
||
| + | *{{abilities|Inferno Rush|Ignacious rushes back to his primary aggro target leaving a trail of flames. The flame trail will inflict 4625 to 5375 Fire damage every 0.5 sec and remove Waterlogged.|id=92523|image=spell holy innerfire|}} |
||
| − | |- |
||
| + | *{{abilities|Rising Flames|Cast immediately after Aegis of Flame. Deals increasing Fire damage to every player in the room over time until interrupted.|id=82636|image=spell fire burnout|}} |
||
| − | | {{RaceIcon|Tauren|Female|Small}} {{quest|Darkhorn the Elder|Darkhorn}} || Orgrimmar || {{coords|52.3|60.0|Orgrimmar}} || Valley of Wisdom |
||
| − | |- |
||
| − | | {{RaceIcon|Tauren|Male|Small}} {{quest|Wheathoof the Elder|Wheathoof}} || Thunder Bluff || {{coords|72|23|Thunder Bluff}} || Elder Rise |
||
| − | |- |
||
| − | | {{RaceIconExt|EarthenSouth|Small}} {{quest|Darkcore the Elder|Darkcore}} || Undercity || {{coords|67|38|Undercity}} || Upstairs in the throne room |
||
| − | |} |
||
| + | ===Phase 2=== |
||
| − | {{Zone Map|zone=Azeroth|notes= |
||
| + | ====Arion==== |
||
| − | {{Zone Map Note|27.0|52.3|Blip|Darkhorn}} |
||
| + | [[File:Arion.jpg|thumb|Arion]] |
||
| − | {{Zone Map Note|18|61|Blip|Wheathoof}} |
||
| + | *{{abilities|Call Winds|Focuses and agitates the nearby air into a violent cyclone. Entering the Cyclone will cause 7,000 nature damage and give the player the swirling winds debuff which levitates the player into the air.|id=83491|image=spell nature cyclone|}} |
||
| − | {{Zone Map Note|76|41|Blip|Darkcore}} |
||
| + | *{{abilities|Lightning Rod|Marks an enemy to attract electrical attacks. Arion will cast his Chain Lightning at this player.|id=83099|image=inv rod enchantedcobalt|}} |
||
| − | }} |
||
| + | *{{abilities|Chain Lightning|Fires a blast of lightning at enemies who have been attuned to attract electricity, dealing 9500 to 10500 Nature damage and bouncing to additional nearby targets.|id=83300|image=spell nature chainlightning|}} |
||
| + | *{{abilities|Disperse|The caster dissolves into swirling wind and materializes elsewhere in the room.|id=83087|image=inv elemental primal air|}} |
||
| + | *{{abilities|Lightning Blast|Blasts an enemy with concentrated lightning, inflicting 72000 to 88000 Nature damage. Cast on Arion's tank immediately after Disperse.|id=83087|image=spell nature lightning|}} |
||
| + | *{{abilities|Thundershock|Deals 146250 to 153750 Nature damage to all nearby enemies. Less effective against grounded targets. More effective against airborne targets.|id=92470|image=spell nature lightningoverload|}} |
||
| + | ''Heroic Mode Only'' |
||
| − | === Kalimdor === |
||
| + | *{{abilities|Static Overload|Charges an enemy with energy that electrifies nearby allies, causing them to suffer 6475 to 7525 Nature damage every 2 sec for 10 sec. Powerful gravitational fields can cause this energy to dissipate harmlessly.|id=92067|image=spell nature lightningoverload|}} |
||
| − | {| class="darktable sortable" |
||
| − | |+ 21 [[Elders of Kalimdor]] |
||
| − | |- |
||
| − | ! width="80em" | Elder |
||
| − | ! width="120em" | Zone !! Coords !! Description |
||
| − | |- |
||
| − | | {{RaceIcon|NightElf|Female|Small}} {{quest|Riversong the Elder|Riversong}} || Ashenvale || {{coords|35|49|Ashenvale}} || NW edge of Astranaar |
||
| − | |- |
||
| − | | {{RaceIcon|NightElf|Male|Small}} {{quest|Skygleam the Elder|Skygleam}} || Azshara || {{coords|64.7|79.3|Azshara}} || Between the legs of Ravencrest Monument, SE Azshara |
||
| − | |- |
||
| − | | {{RaceIcon|Tauren|Male|Small}} {{quest|High Mountain the Elder|High Mountain}} || The Barrens || {{coords|45|58|The Barrens}} || At Vendetta Point in the Southern Barrens |
||
| − | |- |
||
| − | | {{RaceIcon|NightElf|Male|Small}} {{quest|Moonwarden the Elder|Moonwarden}} || The Barrens || {{coords|51|28|The Barrens}} || Next to Crossroads Wind Rider |
||
| − | |- |
||
| − | | {{RaceIcon|Tauren|Female|Small}} {{quest|Windtotem the Elder|Windtotem}} || The Barrens || {{coords|62|37|The Barrens}} || In Ratchet, outside the Engineering building north of the bank |
||
| − | |- |
||
| − | | {{RaceIcon|NightElf|Female|Small}} {{quest|Starweave the Elder|Starweave}} || Darkshore || {{coords|49.5|19.0|Darkshore}} || Just south of the tower at the SW of Lor'danel |
||
| − | |- |
||
| − | | {{RaceIcon|Tauren|Female|Small}} {{quest|Runetotem the Elder|Runetotem}} || Durotar || {{coords|54|44|Durotar}} || SE edge of Razor Hill |
||
| − | |- |
||
| − | | {{RaceIcon|NightElf|Male|Small}} {{quest|Nightwind the Elder|Nightwind}} || Felwood || {{coords|38.3|52.8|Felwood}} || East of Bloodvenom Post |
||
| − | |- |
||
| − | | {{RaceIcon|Tauren|Male|Small}} {{quest|Grimtotem the Elder|Grimtotem}} || Feralas || {{coords|76|37|Feralas}} || Lariss Pavilion, NE of Camp Mojache |
||
| − | |- |
||
| − | | {{RaceIcon|Tauren|Female|Small}} {{quest|Mistwalker the Elder|Mistwalker}} || Feralas || {{coords|59|40|Feralas}} || Inside the Dire Maul PVP arena |
||
| − | |- |
||
| − | | {{RaceIcon|Tauren|Male|Small}} {{quest|Bloodhoof the Elder|Bloodhoof}} || Mulgore || {{coords|48|53|Mulgore}} || North of Bloodhoof Village, next to the bridge |
||
| − | |- |
||
| − | | {{RaceIcon|NightElf|Female|Small}} {{quest|Bladesing the Elder|Bladesing}} || Silithus || {{coords|50|36|Silithus}} || Standing in the moonwell in Cenarion Hold |
||
| − | |- |
||
| − | | {{RaceIconExt|EarthenSouth|Small}} {{quest|Primestone the Elder|Primestone}} || Silithus || {{coords|23|12|Silithus}} || Center of the Crystal Vale, NW Silithus |
||
| − | |- |
||
| − | | {{RaceIcon|Tauren|Male|Small}} {{quest|Dreamseer the Elder|Dreamseer}} || Tanaris || {{coords|50|28|Tanaris}} || Gadgetzan |
||
| − | |- |
||
| − | | {{RaceIcon|Tauren|Female|Small}} {{quest|Ragetotem the Elder|Ragetotem}} || Tanaris || {{coords|36|80|Tanaris}} || Valley of the Watchers (Uldum) - West side |
||
| − | |- |
||
| − | | {{RaceIcon|NightElf|Male|Small}} {{quest|Bladeleaf the Elder|Bladeleaf}} || Teldrassil || {{coords|57|53|Teldrassil}} || South edge of Dolanaar |
||
| − | |- |
||
| − | | {{RaceIcon|Tauren|Male|Small}} {{quest|Skyseer the Elder|Skyseer}} || Thousand Needles || {{coords|45|50|Thousand Needles}} || Middle of Freewind Post |
||
| − | |- |
||
| − | | {{RaceIcon|NightElf|Female|Small}} {{quest|Morningdew the Elder|Morningdew}} || Thousand Needles || {{coords|79|77|Thousand Needles}} || Mirage Raceway, near the race starting line |
||
| − | |- |
||
| − | | {{RaceIcon|Tauren|Male|Small}} {{quest|Thunderhorn the Elder|Thunderhorn}} || Un'Goro Crater || {{coords|51|75|Un'Goro Crater}} || Just north of the Slithering Scar |
||
| − | |- |
||
| − | | {{RaceIcon|NightElf|Female|Small}} {{quest|Brightspear the Elder|Brightspear}} || Winterspring || {{coords|53.2|56.8|Winterspring}} || South Eastern edge of Lake Kel'Theril |
||
| − | |- |
||
| − | | {{RaceIcon|Tauren|Male|Small}} {{quest|Stonespire the Elder|Stonespire}} || Winterspring || {{coords|60.0|49.9|Winterspring}} || Center of Everlook |
||
| − | |} |
||
| − | {{Zone Map|zone=Kalimdor|notes= |
||
| − | {{Zone Map Note|47|41|Blip|Riversong}} |
||
| − | {{Zone Map Note|65.2|42.1|Blip|Skygleam}} |
||
| − | {{Zone Map Note|52|62|Blip|High Mountain}} |
||
| − | {{Zone Map Note|54|56|Blip|Moonwarden}} |
||
| − | {{Zone Map Note|57|58|Blip|Windtotem}} |
||
| − | {{Zone Map Note|46.9|22.0|Blip|Starweave}} |
||
| − | {{Zone Map Note|59|51|Blip|Runetotem}} |
||
| − | {{Zone Map Note|47.8|31.4|Blip|Nightwind}} |
||
| − | {{Zone Map Note|47|70|Blip|Grimtotem}} |
||
| − | {{Zone Map Note|44|69|Blip|Mistwalker}} |
||
| − | {{Zone Map Note|48|63|Blip|Bloodhoof}} |
||
| − | {{Zone Map Note|43|81|Blip|Bladesing}} |
||
| − | {{Zone Map Note|41|79|Blip|Primestone}} |
||
| − | {{Zone Map Note|55|81|Blip|Dreamseer}} |
||
| − | {{Zone Map Note|54|90|Blip|Ragetotem}} |
||
| − | {{Zone Map Note|43|12|Blip|Bladeleaf}} |
||
| − | {{Zone Map Note|52|74|Blip|Skyseer}} |
||
| − | {{Zone Map Note|56|77|Blip|Morningdew}} |
||
| − | {{Zone Map Note|49|88|Blip|Thunderhorn}} |
||
| − | {{Zone Map Note|58.0|25.8|Blip|Brightspear}} |
||
| − | {{Zone Map Note|59.1|24.7|Blip|Stonespire}} |
||
| − | }} |
||
| − | === |
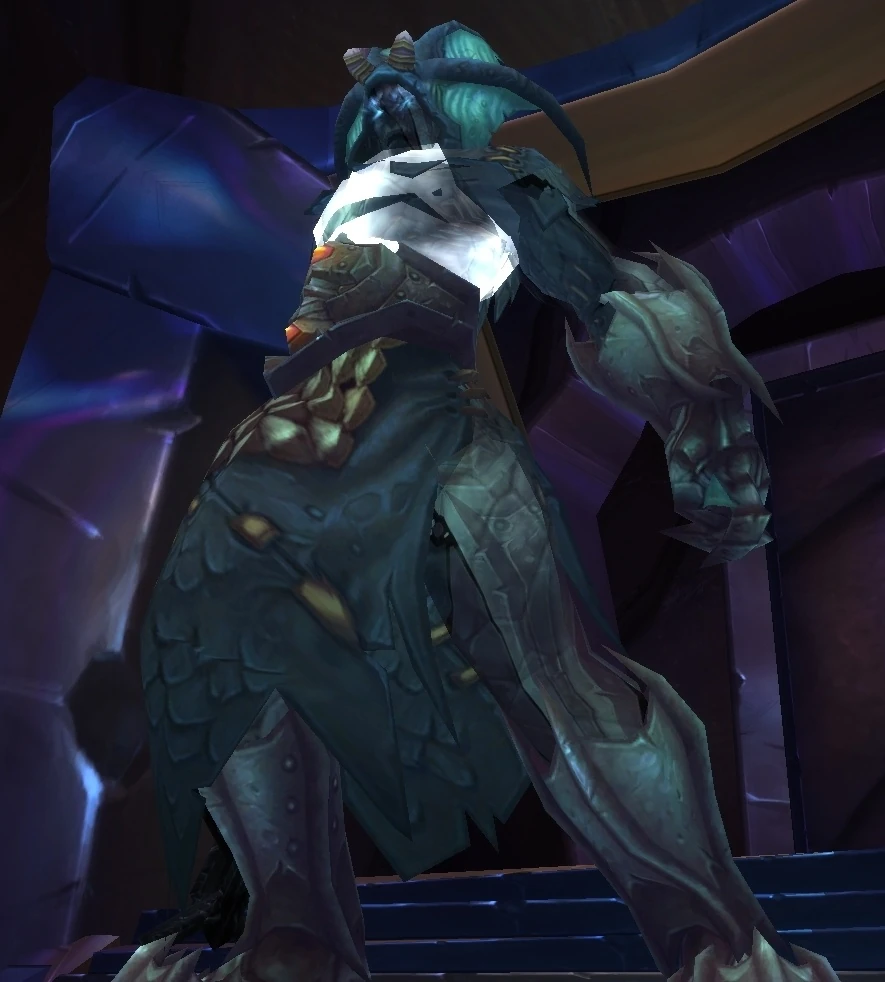
+ | ====Terrastra==== |
| + | [[File:Terrastra.jpg|thumb|Terrastra]] |
||
| − | {| class="darktable sortable" |
||
| + | *{{abilities|Gravity Well|Creates a Gravity Well that firmly connects nearby players to the earth, granting resistance to some powerful electrical attacks. Lasts 2 min or until another force lifts the target from the ground.|id=79244|image=ability druid eclipse|}} |
||
| − | |+ 17 [[Elders of the Eastern Kingdoms]] |
||
| + | *{{abilities|Harden Skin|The caster's skin hardens into solid rock, increasing Physical damage dealt by 100% and absorbing 50% of all damage taken, up to 650000. If the caster suffers enough damage, this barrier will shatter, grievously wounding the caster.|id=92542|image=ability golemthunderclap|}} |
||
| − | |- |
||
| + | *{{abilities|Eruption|Fires a spike through the floor, impaling all targets within 4 yards, dealing 47125 to 52875 damage and knocking them up in the air. This attack ignores armor. |
||
| − | ! width="80em" | Elder |
||
| + | |id=95321|image=spell nature earthquake|}} |
||
| − | ! width="120em" | Zone !! Coords !! Description |
||
| + | *{{abilities|Quake|Sends massive shockwaves through the earth, dealing 146250 to 153750 damage to all enemies who are in contact with the ground. More effective against (gravity well) grounded targets. (Note Priest levitate will NOT help you.)|id=92545|image=spell nature earthquake|}} |
||
| − | |- |
||
| − | | {{RaceIconExt|EarthenSouth|Small}} {{quest|Bellowrage the Elder|Bellowrage}} || Blasted Lands || {{coords|58|55|Blasted Lands}} || Dark Portal |
||
| − | |- |
||
| − | | {{RaceIconExt|EarthenSouth|Small}} {{quest|Rumblerock the Elder|Rumblerock}} || Burning Steppes || {{coords|82|46|Burning Steppes}} || Dreadmaul Rock |
||
| − | |- |
||
| − | | {{RaceIcon|Tauren|Female|Small}} {{quest|Dawnstrider the Elder|Dawnstrider}} || Burning Steppes || {{coords|64|24|Burning Steppes}} || Flame Crest |
||
| − | |- |
||
| − | | {{RaceIconExt|EarthenSouth|Small}} {{quest|Goldwell the Elder|Goldwell}} || Dun Morogh || {{coords|46|51|Dun Morogh}} || Kharanos |
||
| − | |- |
||
| − | | {{RaceIcon|NightElf|Male|Small}} {{quest|Windrun the Elder|Windrun}} || Eastern Plaguelands || {{coords|35|68|Eastern Plaguelands}} || Crown Guard Tower, north of Darrowshire |
||
| − | |- |
||
| − | | {{RaceIconExt|EarthenSouth|Small}} {{quest|Snowcrown the Elder|Snowcrown}} || Eastern Plaguelands || {{coords|75|54|Eastern Plaguelands}} || Light's Hope Chapel |
||
| − | |- |
||
| − | | {{RaceIconExt|EarthenSouth|Small}} {{quest|Stormbrow the Elder|Stormbrow}} || Elwynn Forest || {{coords|40|63|Elwynn Forest}} || Pond at Goldshire |
||
| − | |- |
||
| − | | {{RaceIconExt|EarthenSouth|Small}} {{quest|Highpeak the Elder|Highpeak}} || Hinterlands || {{coords|49|48|Hinterlands}} || Creeping Ruin |
||
| − | |- |
||
| − | | {{RaceIconExt|EarthenSouth|Small}} {{quest|Silvervein the Elder|Silvervein}} || Loch Modan || {{coords|33|46|Loch Modan}} || Thelsamar |
||
| − | |- |
||
| − | | {{RaceIconExt|EarthenSouth|Small}} {{quest|Ironband the Elder|Ironband}} || Searing Gorge || {{coords|21|78|Searing Gorge}}|| Blackchar Cave |
||
| − | |- |
||
| − | | {{RaceIconExt|EarthenSouth|Small}} {{quest|Obsidian the Elder|Obsidian}} || Silverpine Forest || {{coords|45|41|Silverpine Forest}} || The Sepulcher |
||
| − | |- |
||
| − | | {{RaceIcon|NightElf|Male|Small}} {{quest|Starglade the Elder|Starglade}} || Stranglethorn Vale || {{coords|53|18|Stranglethorn Vale}} || Zul'Gurub (in the right "courtyard" in front of the steps up to instance entrance) |
||
| − | |- |
||
| − | | {{RaceIcon|Tauren|Male|Small}} {{quest|Winterhoof the Elder|Winterhoof}} || Stranglethorn Vale || {{coords|26|76|Stranglethorn Vale}} || Booty Bay (near Horde flight master on top of the bank) |
||
| − | |- |
||
| − | | {{RaceIconExt|EarthenSouth|Small}} {{quest|Graveborn the Elder|Graveborn}} || Tirisfal Glades || {{coords|61|53|Tirisfal Glades}} || Brill |
||
| − | |- |
||
| − | | {{RaceIcon|NightElf|Female|Small}} {{quest|Moonstrike the Elder|Moonstrike}} || Western Plaguelands || {{coords|69|73|Western Plaguelands}} || Caer Darrow (Scholomance), upstairs in the tower |
||
| − | |- |
||
| − | | {{RaceIcon|NightElf|Female|Small}} {{quest|Meadowrun the Elder|Meadowrun}} || Western Plaguelands || {{coords|66|47|Western Plaguelands}} || North of the road, south of The Weeping Cave |
||
| − | |- |
||
| − | | {{RaceIcon|Tauren|Female|Small}} {{quest|Skychaser the Elder|Skychaser}} || Westfall || {{coords|56|47|Westfall}} || Sentinel Hill (on top of the tower, NE of Sentinel Hill) |
||
| − | |} |
||
| + | ''Heroic Mode Only'' |
||
| − | {{Zone Map|zone=Eastern Kingdoms|notes= |
||
| + | *{{abilities|Gravity Core|Applied on entering a Gravity Well. Crushes an enemy with intense gravitational force, inflicting 10000 Physical damage every 2sec for 10 sec. While the target is affected, the gravitational field periodically hinders the movement and actions of nearby allies.|id=92075|image=spell nature earthbind|}} |
||
| − | {{Zone Map Note|52|84|Blip|Bellowrage}} |
||
| − | {{Zone Map Note|51|71|Blip|Rumblerock}} |
||
| − | {{Zone Map Note|49|68|Blip|Dawnstrider}} |
||
| − | {{Zone Map Note|45|62|Blip|Goldwell}} |
||
| − | {{Zone Map Note|53|34|Blip|Windrun}} |
||
| − | {{Zone Map Note|58|32|Blip|Snowcrown}} |
||
| − | {{Zone Map Note|45|74|Blip|Stormbrow}} |
||
| − | {{Zone Map Note|52|40|Blip|Highpeak}} |
||
| − | {{Zone Map Note|51|61|Blip|Silvervein}} |
||
| − | {{Zone Map Note|46|67|Blip|Ironband}} |
||
| − | {{Zone Map Note|40|39|Blip|Obsidian}} |
||
| − | {{Zone Map Note|48|85|Blip|Starglade}} |
||
| − | {{Zone Map Note|43|93|Blip|Winterhoof}} |
||
| − | {{Zone Map Note|44|33|Blip|Graveborn}} |
||
| − | {{Zone Map Note|50|36|Blip|Moonstrike}} |
||
| − | {{Zone Map Note|49|32|Blip|Meadowrun}} |
||
| − | {{Zone Map Note|42|80|Blip|Skychaser}} |
||
| − | }} |
||
| − | === |
+ | ===Phase 3=== |
| + | ====Elementium Monstrosity==== |
||
| − | {| class="darktable sortable" |
||
| + | [[File:Elementium Monstrosity.jpg|thumb|175px|The Elementium Monstrosity]] |
||
| − | |+ 13 [[Elders of the Dungeons]] |
||
| + | *{{abilities|Lava Seed|Showers the surrounding area with kernels of pure Flame energy, each of which erupts to deal 35000 to 45000 Fire damage to nearby enemies as Lava Plume|id=84913|image=inv elemental mote fire01|}} |
||
| − | |- |
||
| + | *{{abilities|Liquid Ice|The Monstrosity is preturnaturally cold, freezing the ground beneath it. The pools of ice will grow with continued exposure to the Monstrosity, dealing increasing Frost damage to enemies exposed to them. Essentially this ability is Defile from the Lich King but expands when the boss stands in it, rather than players.|id=92497|image=spell frost stun|}} |
||
| − | ! width="80em" | Elder |
||
| + | *{{abilities|Electric Instability|Constant nature damage to random raid members, increasing in intensity the longer the Elementium Monstrosity is alive. Overloaded with raw lightning energy, the caster zaps nearby enemies for 5655 to 6345 Nature damage, chaining to nearby targets. Functions identically to [[Entropius]]' Negative Energy in [[Sunwell Plateau]].|id=92480|image=spell nature lightningoverload|}} |
||
| − | ! width="120em" | Zone !! Description |
||
| + | *{{abilities|Gravity Crush|Traps an enemy in a gravity bubble, lifting them off the ground and crushing them for 10% of their maximum health every 0.5 sec for 6 sec. When the effect ends, the target will be left to fall to the ground.|id=92488|image=spell nature earthbind|}} |
||
| − | |- |
||
| − | | {{RaceIconExt|EarthenSouth|Small}} {{quest|Morndeep the Elder|Morndeep}} || [[Blackrock Depths]] || Inside the Ring of Law |
||
| − | |- |
||
| − | | {{RaceIconExt|EarthenSouth|Small}} {{quest|Stonefort the Elder|Stonefort}} || [[Lower Blackrock Spire]] || At the first of the rope bridges |
||
| − | |- |
||
| − | | {{RaceIconExt|EarthenSouth|Small}} {{quest|Splitrock the Elder|Splitrock}} || [[Maraudon]] || In the tunnel that leads from Rotgrip towards the Goblin |
||
| − | |- |
||
| − | | {{RaceIcon|NightElf|Male|Small}} {{quest|Farwhisper the Elder|Farwhisper}} || [[Stratholme]] || North part of Festival Lane (Near [[The Unforgiven]]). |
||
| − | |- |
||
| − | | {{RaceIcon|NightElf|Female|Small}} {{quest|Starsong the Elder|Starsong}} || [[Temple of Atal'Hakkar]] || Sunken Temple (first left up spiral stairs, through dragonkin at top landing, stay left into main room with dragonkin) |
||
| − | |- |
||
| − | | {{RaceIcon|Tauren|Female|Small}} {{quest|Wildmane the Elder|Wildmane}} || [[Zul'Farrak]] || SE corner of the room where the gong to summon Gahz'rilla is |
||
| − | |- |
||
| − | | {{RaceIconExt|EarthenNorth|Small}} {{quest|Jarten the Elder|Jarten}} || [[Utgarde Keep]] {{wotlk-inline}}|| Past the Prince Keleseth's room. To the left after the first set of stairs. |
||
| − | |- |
||
| − | | {{RaceIcon|Taunka|Male|Small}} {{quest|Igasho the Elder|Igasho}} || [[The Nexus]] {{wotlk-inline}}|| Ormorok the Tree-Shaper's ramp, to the right. |
||
| − | |- |
||
| − | | {{RaceIconExt|EarthenNorth|Small}} {{quest|Nurgen the Elder|Nurgen}} || [[Azjol-Nerub]] {{wotlk-inline}} || Jump down the hole after Hadronox. |
||
| − | |- |
||
| − | | {{RaceIconExt|EarthenNorth|Small}} {{quest|Kilias the Elder|Kilias}} || [[Drak'Tharon Keep]] {{wotlk-inline}} || To the left in King Dred's pen. |
||
| − | |- |
||
| − | | {{RaceIcon|Taunka|Male|Small}} {{quest|Ohanzee the Elder|Ohanzee}} || [[Gundrak]] {{wotlk-inline}} || Ohanzee can be found behind the [[Drakkari Colossus]]. |
||
| − | |- |
||
| − | | {{RaceIconExt|EarthenNorth|Small}} {{quest|Yurauk the Elder|Yurauk}} || [[Halls of Stone]] {{wotlk-inline}} || Yurauk the Elder the is located on the way to Krystallus. |
||
| − | |- |
||
| − | | {{RaceIcon|Taunka|Male|Small}} {{quest|Chogan'gada the Elder|Chogan'gada}} || [[Utgarde Pinnacle]] {{wotlk-inline}} || Under the stairs after Skadi the Ruthless. |
||
| − | |} |
||
| + | ==Strategy== |
||
| − | {{Zone Map|zone=Azeroth|notes= |
||
| + | ===Phase 1=== |
||
| − | {{Zone Map Note|79|69|Blip|Morndeep, Stonefort}} |
||
| + | The first phase pits players against Feludius (ice) and Ignacious (fire) while the others watch from the balcony. It lasts until one of the elementals reaches 25% health. For the first phase, put ranged DPS on Feludius, melee DPS on Ignacious and take them down together. Because the Elementium Monstrosity's hitpoints in phase three depend on how much health the individual elementals had before they despawned, it is ideal to get both Feludius and Ignacious down to 25%. |
||
| − | {{Zone Map Note|11|62|Blip|Splitrock}} |
||
| − | {{Zone Map Note|84|34|Blip|Farwhisper}} |
||
| − | {{Zone Map Note|85|78|Blip|Starsong}} |
||
| − | {{Zone Map Note|24|79|Blip|Wildmane}} |
||
| − | {{Zone Map Note|63|29|Blip|Jarten, Chogan'gada}} |
||
| − | {{Zone Map Note|38|22|Blip|Igasho}} |
||
| − | {{Zone Map Note|53|14|Blip|Nurgen}} |
||
| − | {{Zone Map Note|57|19|Blip|Kilias}} |
||
| − | {{Zone Map Note|59|14|Blip|Ohanzee}} |
||
| − | {{Zone Map Note|55|6|Blip|Yuruak}} |
||
| − | }} |
||
| + | Heart of Ice is a magic debuff by Feludius that causes nearby players to deal additional damage to Ingacious. Burning Blood is the same kind of debuff cast by Ignacious that causes nearby players to deal additional damage to Feludius. It's debatable whether to move to the groups of players that are assigned to one boss, or to dispel the debuff. |
||
| − | === Northrend === |
||
| − | {| class="darktable sortable" |
||
| − | |+ 18 [[Elders of Northrend]]{{wotlk-inline}} |
||
| − | |- |
||
| − | ! width="80em" | Elder |
||
| − | ! width="120em" | Zone !! Coords !! Description |
||
| − | |- |
||
| − | | {{RaceIconExt|EarthenNorth|Small}} {{quest|Arp the Elder|Arp}} || Borean Tundra || {{coords|57|44|Borean Tundra}} || D.E.H.T.A camp. |
||
| − | |- |
||
| − | | {{RaceIconExt|EarthenNorth|Small}} {{quest|Northal the Elder|Northal}} || Borean Tundra || {{coords|34|34|Borean Tundra}} || Transitus Shield. |
||
| − | |- |
||
| − | | {{RaceIcon|Taunka|Male|Small}} {{quest|Pamuya the Elder|Pamuya}} || Borean Tundra || {{coords|43|50|Borean Tundra}} || Just north of Warsong Hold. |
||
| − | |- |
||
| − | | {{RaceIconExt|EarthenNorth|Small}} {{quest|Sardis the Elder|Sardis|}} || Borean Tundra || {{coords|59|66|Borean Tundra}}|| Just north of Valiance Keep. |
||
| − | |- |
||
| − | | {{RaceIconExt|EarthenNorth|Small}} {{quest|Morthie the Elder|Morthie}} || Dragonblight || {{coords|30|56|Dragonblight}}|| Star's Rest. |
||
| − | |- |
||
| − | | {{RaceIcon|Taunka|Male|Small}} {{quest|Skywarden the Elder|Skywarden}} || Dragonblight || {{coords|35|48|Dragonblight}} || Agmar's Hammer. |
||
| − | |- |
||
| − | | {{RaceIconExt|EarthenNorth|Small}} {{quest|Thoim the Elder|Thoim}} || Dragonblight || {{coords|49|78|Dragonblight}}|| The docks of Moa'ki Harbor. |
||
| − | |- |
||
| − | | {{RaceIconExt|EarthenNorth|Small}} {{quest|Beldak the Elder|Beldak}} || Grizzly Hills || {{coords|61|28|Grizzly Hills}} || Westfall Brigade Encampment. |
||
| − | |- |
||
| − | | {{RaceIcon|Taunka|Male|Small}} {{quest|Lunaro the Elder|Lunaro}} || Grizzly Hills || {{coords|81|37|Grizzly Hills}} || Ruins of Tethys. |
||
| − | |- |
||
| − | | {{RaceIcon|Taunka|Male|Small}} {{quest|Whurain the Elder|Whurain}} || Grizzy Hills || {{coords|64|47|Grizzly Hills}} || Camp Onequah. |
||
| − | |- |
||
| − | | {{RaceIcon|Taunka|Male|Small}} {{quest|Bluewolf the Elder|Bluewolf}} || Lake Wintergrasp || {{coords|49|14|Wintergrasp}} || In the WG fortress, your faction must control it. |
||
| − | |- |
||
| − | | {{RaceIconExt|EarthenNorth|Small}} {{quest|Sandrene the Elder|Sandrene}} || Sholazar Basin || {{coords|50|64|Sholazar Basin}} || Near Lakeside Landing at River's Heart. |
||
| − | |- |
||
| − | | {{RaceIcon|Taunka|Male|Small}} {{quest|Wanikaya the Elder|Wanikaya}} || Sholazar Basin || {{coords|64|49|Sholazar Basin}} || Near Avatar of Freya, Rainspeaker Rapids. |
||
| − | |- |
||
| − | | {{RaceIconExt|EarthenNorth|Small}} {{quest|Fargal the Elder|Fargal}} || Storm Peaks || {{coords|29|74|Storm Peaks}} || Frosthold. |
||
| − | |- |
||
| − | | {{RaceIcon|Taunka|Male|Small}} {{quest|Graymane the Elder|Graymane}} || Storm Peaks || {{coords|41|85|Storm Peaks}} || K3. |
||
| − | |- |
||
| − | | {{RaceIcon|Taunka|Male|Small}} {{quest|Muraco the Elder|Muraco}} || Storm Peaks || {{coords|64|51|Storm Peaks}} || Camp Taunka'lo. |
||
| − | |- |
||
| − | | {{RaceIconExt|EarthenNorth|Small}} {{quest|Stonebeard the Elder|Stonebeard}} || Storm Peaks || {{coords|31|38|Storm Peaks}} || Inside Bouldercrag's Refuge. |
||
| − | |- |
||
| − | | {{RaceIcon|Taunka|Male|Small}} {{quest|Tauros the Elder|Tauros}} || Zul'Drak || {{coords|59|56|Zul'Drak}}|| Zim'Torga. |
||
| − | |} |
||
| + | After Ignacius has cast Inferno Leap (similar to [[Rajh]] in [[Halls of Origination]]) he will move to the tank and leave a trail of fire. Players should move to the fire to remove the Waterlogged debuff, or they will be stunned and take significant damage when Feludius cast Frozen Blood. |
||
| − | {{Zone Map|zone=Northrend|notes= |
||
| − | {{Zone Map Note|22|62|Blip|Arp}} |
||
| − | {{Zone Map Note|14|59|Blip|Northal}} |
||
| − | {{Zone Map Note|18|64|Blip|Pamuya}} |
||
| − | {{Zone Map Note|23|69|Blip|Sardis}} |
||
| − | {{Zone Map Note|41|60|Blip|Morthie}} |
||
| − | {{Zone Map Note|42|57|Blip|Skywarden}} |
||
| − | {{Zone Map Note|47|67|Blip|Thoim}} |
||
| − | {{Zone Map Note|77|51|Blip|Beldak}} |
||
| − | {{Zone Map Note|82|54|Blip|Lunaro}} |
||
| − | {{Zone Map Note|77|56|Blip|Whurain}} |
||
| − | {{Zone Map Note|36|44|Blip|Bluewolf}} |
||
| − | {{Zone Map Note|25|44|Blip|Sandrene}} |
||
| − | {{Zone Map Note|29|40|Blip|Wanikaya}} |
||
| − | {{Zone Map Note|53|30|Blip|Fargal}} |
||
| − | {{Zone Map Note|56|38|Blip|Graymane}} |
||
| − | {{Zone Map Note|67|22|Blip|Muraco}} |
||
| − | {{Zone Map Note|54|19|Blip|Stonebeard}} |
||
| − | {{Zone Map Note|72|41|Blip|Tauros}} |
||
| − | }} |
||
| + | Calling out when Ignacius is about to cast Aegis of Flame is important since the raid will need to focus DPS at that time. If the DPS is focused enough, the Aegis will be brought down before the fire AoE causes too much damage from Rising Flames. |
||
| − | == Alliance Walkthrough for Kalimdor and Eastern Kingdoms coins == |
||
| − | '''See also in-game walkthrough in External Links section below.''' |
||
| + | ===Phase 2=== |
||
| − | This is fairly easy to solo at level 70 to 80. Even in instances like LBRS, you can just walk past most of the mobs. The only real challenge is the enemy racial cities where buffed guards and enemy faction players can make achieving your goal difficult. |
||
| + | Now Arion (wind) and Terrastra (earth) will come in. Once again, split DPS with ranged on Arion and melee on Terrastra, and try to get them both down to 25% at the same time. |
||
| + | When the phase starts players should be on the lookout for the black tornadoes that spawn - these should not be confused with the Gravity Well that causes players to be grounded. When players have touched the tornado they get Swirling Winds, which will make players avoid the Quake ability by Terrastra that causes about 100k damage. After Quake has been cast, players should move to the Gravity Well to make them Grounded. This will make players immune to the Thundershock ability by Arion, causing about 100k damage. |
||
| − | ;START AT [[Ironforge|IRONFORGE]]: |
||
| − | # [[Ironforge]] - [[Mystic Ward]]<br />'''[[Image:Pointer flight on 32x32.png]]Fly gryphon to [[Thorium Point]]''' |
||
| − | # [[Searing Gorge]] - Southwest corner in [[Blackchar Cave]]: {{co|21|79|Searing Gorge}} |
||
| − | # [[Blackrock Spire]] - After a few pulls into [[LBRS]], the Elder will be across the first wooden bridge (Head right then left). |
||
| − | # [[Blackrock Depths]] - In the middle of the [[Ring of Law]]. |
||
| − | # [[Burning Steppes]] - Flame Crest (that cave with the Libram guy): {{co|64|24|Burning Steppes}} |
||
| − | # [[Burning Steppes]] - On top of [[Dreadmaul Rock]] north of [[Morgan's Vigil]]: {{co|82|46|Burning Steppes}} <br />'''[[Image:Pointer flight on 32x32.png]]Fly gryphon to [[Stormwind]] (via Morgan's Vigil)''' |
||
| − | # [[Stormwind]] - Outside main gates. (NOT in Park ruins) |
||
| − | # [[Elwynn Forest]] - In [[Goldshire]], behind blacksmith: {{co|39|63|Elwynn Forest}} |
||
| − | # [[Westfall]] - Atop the [[Sentinel Hill]] tower: {{co|56|47|Westfall}}<br />'''[[Image:Pointer flight on 32x32.png]]Fly gryphon to Nethergarde Keep (via Sentinel Hill)''' |
||
| − | # [[Blasted Lands]] - Just North of the [[Dark Portal]]: {{co|57|54|Blasted Lands}} |
||
| − | # [[Sunken Temple]], [[Swamp of Sorrows]] - The Elder is in the instance, in the first room to the left.<br />'''[[Image:Pointer flight on 32x32.png]]Fly (via Nethergarde) or ride to [[Rebel Camp]]''' |
||
| − | # [[Stranglethorn Vale]] - Elder Starglade is outside [[Zul'Gurub]] zone-in to the right of the stair. : {{co|53|18|Stranglethorn Vale}} |
||
| − | # [[Stranglethorn Vale]] - Above the bank in [[Booty Bay]]: {{co|26|76|Stranglethorn Vale}}<br />'''Take the boat to Ratchet'''<br />Because this continent is more horde friendly you will basically follow this route on your mount rather than searching out flight points. |
||
| − | # [[The Barrens]] - In [[Ratchet]], behind the bank: {{co|62|36|The Barrens}} |
||
| − | # ''[[Orgrimmar]] - [[Valley of Wisdom]]: {{co|40|34|Orgrimmar}} (Luckily for you, Orgrimmar is the most populated Horde city, and just like Ironforge, the most crowded places are the bank, the mailbox, and the Auction House. Orgrimmar has two entrances. One in the south and one in the west. You would like to enter the western entrance, since this is the entrance with the least players, however, you still have to outrun guards!)'' |
||
| − | # [[Durotar]] - [[Razor Hill]]: {{co|53|43|Durotar}} |
||
| − | # [[The Barrens]] - [[Crossroads]]: {{co|51|30|The Barrens}} |
||
| − | # [[The Barrens]] - [[Camp Taurajo]]: This elder is in '''Vendetta Point''': {{co|41.6|47.6|Southern Barrens}} |
||
| − | # [[Mulgore]] - North end of [[Bloodhoof Village]] by bridge: {{co|48|53|Mulgore}} |
||
| − | # ''[[Thunder Bluff]] - [[Elder Rise]]: {{co|72|23|Thunder Bluff}} (Unlike Orgrimmar, Thunder Bluff is not a very big city, therefore, you are much more likely to meet enemy players. However, Thunderbluff is just as popular a city as Darnassus is, and so you have a great chance of not being outnumbered. At least not by anything more than level 15 tauren druids. Enter by the north lift, and go east towards the elder rise.)'' |
||
| − | # [[Thousand Needles]] - In [[Freewind Post]]: {{co|45|50|Thousand Needles}} |
||
| − | # [[Thousand Needles]] - On [[Fizzle & Pozzik's Speedbarge]]: {{co|77.1|75.6|Thousand Needles}} |
||
| − | # [[Tanaris]] - In [[Gadgetzan]]: {{co|51|27|Tanaris}} |
||
| − | # [[Zul'Farrak]] - In [[Gahz'rilla]]'s room by the gong. |
||
| − | # [[Tanaris]] - Outside [[Uldum]], far south Tanaris: {{co|36|80|Tanaris}} |
||
| − | # [[Un'goro Crater]] - By [[Slithering Scar]], above ground: {{co|50|76|Un'goro Crater}} |
||
| − | # [[Silithus]] - In [[Cenarion Hold]]: {{co|50|36|Silithus}} |
||
| − | # [[Silithus]] - Northwest in the [[Crystal Vale]]: {{co|23|11|Silithus}}<br />'''[[Image:pointer hearth on 32x32.png]]Hearth back to Dalaran and take the portal to Ironforge''' |
||
| − | # [[Dun Morogh]] - In [[Kharanos]] by the inn: {{co|46|51|Dun Morogh}} |
||
| − | # [[Loch Modan]] - In [[Thelsamar]]: {{co|33|46|Loch Modan}}<br />'''[[Image:Pointer flight on 32x32.png]]Fly to Aerie Peak |
||
| − | # [[Hinterlands]] - In the middle of Hinterlands by the [[Creeping Ruin]]: {{co|49|48|Hinterlands}} |
||
| − | # [[Western Plaguelands]] - Elder Moonstrike is atop the [[Scholomance]] tower, outside the instance: {{co|69|74|Western Plaguelands}} |
||
| − | # [[Western Plaguelands]] - In the Northeast, inside [[Weeping Cave]]: {{co|63.5|36.1|Western Plaguelands}} |
||
| − | # [[Eastern Plaguelands]] - At [[Crown Guard Tower]] in the south: {{co|35|68|Eastern Plaguelands}} |
||
| − | # [[Eastern Plaguelands]] - By Light's Hope Chapel: {{co|75|54|Eastern Plaguelands}} |
||
| − | # [[Stratholme]] - North of the [[Festival Lane]] mailbox. Enter through the back door, also called the Elder's Square Service Entrance{{co|43.5|19.5|Eastern Plaguelands}}. Make your first left in the instance, go through the gate, turn right, and the Elder will be standing at the back. It requires "The Key to the City", the master key of Stratholme to enter. If you do not have the key, you will need to use the front entrance{{co|27|9|Eastern Plaguelands}}, which also leads to [[Elder Farwhisper]]. |
||
| − | '''[[Image:Pointer flight on 32x32.png]]Fly from Light's Hope Chapel to Chillwind Camp at Western Plaguelands |
||
| − | # [[Tirisfal Glades]] - Slightly south of the town of [[Brill]]: {{co|61|53|Tirisfal Glades}} |
||
| − | # [[Silverpine Forest]] - By The Sepulcher: {{co|45|41|Silverpine Forest}} |
||
| − | # ''[[Undercity]] - In the middle of Undercity, above ground: {{co|66|38|Undercity}}<br />'''While in Undercity, use the {{item|Lunar Festival Invitation}} to port to [[Moonglade]]''' - (note: This is totally doable. The greater moonlight required for the scroll is above ground before the elevators to Undercity proper. The guards appear to have been removed. However, Horde players may well interrupt transport - if using the moonlight here proves impossible, hearth and use one from a neutral or Alliance capital)''' <br /> [[Image:Pointer flight on 32x32.png]]Fly to [[Everlook]]''' |
||
| − | # [[Winterspring]] - In Everlook: {{co|61|37|Winterspring}} |
||
| − | # [[Winterspring]] - [[Ruins of Kel'Theril]], southwest of Everlook: {{co|55|43|Winterspring}}<br />'''[[Image:Pointer flight on 32x32.png]]Fly to [[Emerald Sanctuary]]''' |
||
| − | # [[Felwood]] - North of [[Jaedenar]]: {{co|37|53|Felwood}}<br />'''[[Image:Pointer flight on 32x32.png]]Fly to [[Azshara]]''' |
||
| − | # [[Azshara]] - Far Southeast corner in [[Ravencrest Monument]], right between the statue's feet: {{co|72|85|Azshara}}<br />'''[[Image:pointer hearth on 32x32.png]]Hearth back to Dalaran and take the portal to Darnassus.''' |
||
| − | # [[Darnassus]], in [[Cenarion Enclave]]: {{co|33|14|Darnassus}} |
||
| − | # [[Teldrassil]] - Southern end of [[Dolanaar]]: {{co|57|60|Teldrassil}} |
||
| − | # [[Darkshore]], Ruins of Auberdine: {{co|39.1|43.2|Darkshore}}<br />'''[[Image:Pointer flight on 32x32.png]]Fly to [[Astranaar]]''' |
||
| − | # [[Ashenvale]], Astranaar - in the gazebo near the hippogryph: {{co|35|49|Ashenvale}}<br />'''[[Image:Pointer flight on 32x32.png]]Fly to [[Nijel's Point]]''' |
||
| − | # [[Maraudon]] - When you enter Maraudon, early on you will have three choices of direction. Take the center choice, which leads to the Earth Song Falls Portal into the instance; it's the shortest run through the tunnels leading to the instance, and the shortest run inside the instance itself (see maps linked at left). When you approach the end, jump into the water by [[Princess Theradras]] and [[Rotgrip]]. Swim to the east and head up the ramp (you will have to pass through a smallish archway). Turn right and head up a 2nd ramp. The Elder will be in front of you. To exit quickly, join a group with someone - it doesn't matter where they are - and leave group. You will be teleported to the graveyard in Desolace after one minute. |
||
| − | # [[Feralas]] - [[Dire Maul]], in the [[The Maul|Arena]] in the center of the [[Broken Commons]], outside the instance: {{co|62|31|Feralas}} |
||
| − | # [[Feralas]] - [[Lariss Pavilion]], North East of [[Camp Mojache]]: {{co|76|37|Feralas}} |
||
| + | ===Phase 3=== |
||
| − | == Horde Walkthrough for Kalimdor and Eastern Kingdoms coins == |
||
| + | Once the elementals combine into the Elementium Monstrosity, it will have the combined HP of whatever the four individual mobs had when they despawned. Although Elementium Monstrosity is a tank and spank, the damage from its Electric Instability ability increases with time, hence it is easier if the previous bosses were kept as close to 25% health as possible. |
||
| − | '''See also in-game walkthrough in External Links section below.''' |
||
| + | An achievement, {{achievement|Elementary}}, is available for only allowing a single Liquid Ice patch. |
||
| − | You should have your Hearthstone set to in [[Dalaran]] and start in [[Orgrimmar]]. |
||
| − | Expect to spend 3–4 hours on the trip! |
||
| + | ==Quotes== |
||
| − | ;START AT [[Orgrimmar|ORGRIMMAR]]:<br />'''[[Image:Pointer flight on 32x32.png]]Fly to [[Valormok]], located at {{co|21|49|Azshara}}''' |
||
| + | ;Intro |
||
| − | # [[Azshara]] - Far Southeast corner in [[Ravencrest Monument]]: {{co|72.5|85|Azshara}}<br />'''[[Image:Pointer flight on 32x32.png]]Fly to Everlook''' |
||
| + | *{{text|yell|Cho'gall|Brothers of Twilight! The Hammer calls to you! (Fire water earth air). Leave your mortal shell behind. (Fire water earth air). Embrace your new forms for here and everafter! (Burn and drown and crush and suffocate). And use your gifts to destroy the unbelievers. (Burn and drown and crush and suffocate)!!}} |
||
| − | # [[Winterspring]] - In [[Everlook]]: {{co|61|37|Winterspring}} |
||
| − | # [[Winterspring]] - [[Ruins of Kel'Theril]], southwest of [[Everlook]]: {{co|55|43|Winterspring}}<br />'''[[Image:Pointer flight on 32x32.png]]Fly to [[Bloodvenom Post]]''' |
||
| − | # [[Felwood]] - North of [[Jaedenar]]: {{co|37|53|Felwood}}<br />'''[[Image:Pointer flight on 32x32.png]]Fly to [[Zoram'gar Outpost]]''' |
||
| − | # [[Ashenvale]] - West side [[Astranaar]]: {{co|35|48|Ashenvale}} [Elder Riversong] |
||
| − | # [[Darkshore]] - Just south of [[Auberdine]]: {{co|36|46|Darkshore}}<br />'''Take the northern boat from the docks west of [[Auberdine]] to get to Darnassus''' |
||
| − | # [[Teldrassil]] - [[Darnassus]], in [[Cenarion Enclave]]: {{co|33|14|Darnassus}} (if you die here you end up at the next one) |
||
| − | # [[Teldrassil]] - Southern end of [[Dolanaar]]: {{co|57|60|Teldrassil}} <br />'''[[Image:pointer hearth on 32x32.png]]Hearth to [[Dalaran]] & take the portal to [[Orgrimmar]]''' |
||
| − | # [[Orgrimmar]] - [[Valley of Wisdom]]: {{co|40|34|Orgrimmar}} |
||
| − | # [[Durotar]] - [[Razor Hill]]: {{co|53|43|Durotar}} |
||
| − | # [[The Barrens]] - [[Ratchet]], behind the bank: {{co|62|36|The Barrens}}<br />'''[[Image:Pointer flight on 32x32.png]]Fly to [[Crossroads]]''' |
||
| − | # [[The Barrens]] - [[Crossroads]]: {{co|51|30|The Barrens}}<br />'''[[Image:Pointer flight on 32x32.png]]Fly to [[Camp Taurajo]]''' |
||
| − | #: If you are going to skip the [[Maraudon]] instance, then [[Crossroads]] - [[Thunder Bluff]] - Bloodhoof - Taurajo - [[Feralas]] is quicker |
||
| − | # [[The Barrens]] - Camp Taurajo: {{co|45|57|The Barrens}} |
||
| − | # [[Mulgore]] - North end of [[Bloodhoof Village]], by the bridge: {{co|48|53|Mulgore}} |
||
| − | # [[Thunder Bluff]] - Elder Rise: {{co|72|23|Thunder Bluff}}<br />'''[[Image:Pointer flight on 32x32.png]]Fly to [[Shadowprey Village]]''' |
||
| − | # [[Maraudon]] - When you enter Maraudon, early on you will have three choices of direction. Take the center choice, which leads to the Earth Song Falls Portal into the instance; it's the shortest run through the tunnels leading to the instance, and the shortest run inside the instance itself (see maps linked at left). When you approach the end, jump into the water by the [[Princess Theradras]] and [[Rotgrip]]. Swim to the east and head up the ramp (you will have to pass through a smallish archway). Turn right and head up a 2nd ramp. The Elder will be in front of you. To exit quickly, join a group with someone - it doesn't matter where they are - and leave group. You will be teleported to the graveyard in Desolace after one minute. <br />'''[[Image:Pointer flight on 32x32.png]]Fly to [[Camp Mojache]]''' |
||
| − | # [[Feralas]] - [[Lariss Pavilion]], North East of [[Camp Mojache]]: {{co|76|37|Feralas}} |
||
| − | # [[Feralas]] - [[Dire Maul]], in the [[The Maul|Arena]] in the center of the [[Broken Commons]], outside the instance: {{co|62|31|Feralas}} <br />'''[[Image:Pointer flight on 32x32.png]]Fly to [[Freewind Post]]''' |
||
| − | # [[Thousand Needles]] - Freewind Post: {{co|45|50|Thousand Needles}} |
||
| − | # [[Thousand Needles]] - [[Shimmering Flats]] by [[Mirage Raceway]]: {{co|79|77|Thousand Needles}} |
||
| − | # [[Tanaris]] - [[Gadgetzan]]: {{co|51|27|Tanaris}} |
||
| − | # [[Zul'Farrak]] - In Ghazrilla's room by the gong. |
||
| − | # [[Tanaris]]- In [[Uldum]], far south Tanaris: {{co|36|80|Tanaris}} |
||
| − | # [[Un'Goro Crater]] - By Slithering Scar, above ground: {{co|50|76|Un'goro Crater}} |
||
| − | # [[Silithus]] - In [[Cenarion Hold]]: {{co|48|37|Silithus}} |
||
| − | # [[Silithus]] - Northwest in the [[Crystal Vale]]: {{co|23|11|Silithus}}<br />'''[[Image:pointer hearth on 32x32.png]]Hearth to [[Dalaran]] & take the portal to [[Undercity]]''' |
||
| − | # [[Undercity]] - In the middle of Undercity, above ground: {{co|66|38|Undercity}} <br />'''[[Image:Pointer flight on 32x32.png]]Fly to [[Light's Hope Chapel]]''' |
||
| − | # [[Eastern Plaguelands]] - By [[Light's Hope Chapel]]: {{co|75.7|54.6|Eastern Plaguelands}} |
||
| − | # [[Stratholme]] - North of the Festival Lane mailbox, north of Pierce's Pistols. If you go in via the back door{{co|43.5|19.5|Eastern Plaguelands}}, make your first left in the instance, go through the archway, turn right, and the Elder will be standing just past the next turn on the left. This method requires "The Key to the City", the master key of Stratholme to enter. If you do not have a key, you will need to use the main entrance{{co|27|9|Eastern Plaguelands}}. The route to the Elder will be more convoluted, but most of the mobs will not aggro level 80 characters as long as you don't walk into them. |
||
| − | # [[Eastern Plaguelands]] - At [[Crown Guard Tower]] in the south: {{co|35|68|Eastern Plaguelands}} |
||
| − | # [[Western Plaguelands]] - In the East, south of the [[Weeping Cave]] on the north side of the road: {{co|66|48|Western Plaguelands}} |
||
| − | # [[Western Plaguelands]] - Atop the [[Scholomance]] tower, outside the instance: {{co|69|72|Western Plaguelands}} (enter Scholomance castle, go right, up step, left, left again — not straight — right, up stairs, up stairs to room lit by torch, right — not up wheelchair ramp — up and up stairs, she's on rampart). |
||
| − | # [[Tirisfal Glades]] - Slightly south of the town of Brill: {{co|61|53|Tirisfal Glades}}<br />'''[[Image:Pointer flight on 32x32.png]]Fly to [[The Sepulcher]] (If you have an epic land mount, just ride there. It's faster than flying.)''' |
||
| − | # [[Silverpine Forest]] - By The Sepulcher: {{co|45|41|Silverpine Forest}}<br />'''[[Image:Pointer flight on 32x32.png]]Fly to [[Revantusk Village]], [[Hinterlands]]''' |
||
| − | # [[The Hinterlands]] - In the middle of The Hinterlands by the [[Creeping Ruin]]: {{co|50|48|Hinterlands}}<br />'''[[Image:Pointer flight on 32x32.png]]Fly to [[Hammerfall]], run through [[Wetlands]] to [[Loch Modan]], or [[Image:Pointer flight on 32x32.png]]Fly to [[Kargath]] and then run up into Loch Modan''' |
||
| − | # [[Loch Modan]] - [[Thelsamar]]: {{co|33|46|Loch Modan}} |
||
| − | # [[Dun Morogh]] - [[Kharanos]] by the inn: {{co|46|51|Dun Morogh}} |
||
| − | # [[Ironforge]] - [[Mystic Ward]]<br />'''Run all the way to Stormwind or run to [[Kargath]], [[Image:Pointer flight on 32x32.png]]Fly to [[Grom'gol Base Camp]] and run to Stormwind or take the Deeprun Tram''' |
||
| − | # [[Stormwind City]] - [[Park]] |
||
| − | # [[Elwynn Forest]] - [[Goldshire]], behind blacksmith: {{co|39|63|Elwynn Forest}} |
||
| − | # [[Westfall]] - Atop the [[Sentinel Hill]] tower: {{co|56|47|Westfall}} |
||
| − | # [[Stranglethorn Vale]] - Outside [[Zul'Gurub]] zone-n: {{co|53|18|Stranglethorn Vale}}<br />'''[[Image:Pointer flight on 32x32.png]]Fly from Grom'Gol Base Camp to Booty Bay''' |
||
| − | # [[Stranglethorn Vale]] - Near the Horde Wind Rider Master in [[Booty Bay]]: {{co|26|76|Stranglethorn Vale}}<br />'''[[Image:Pointer flight on 32x32.png]]Fly from Booty Bay to Stonard''' |
||
| − | # [[Sunken Temple]] - [[Swamp of Sorrows]] - Head left when you zone-in. Go up the set of stairs, kill the first set of dragon (you can stealth through them at level 60), and enter the main room with all the dragons. The Elder is in the northeast corner. |
||
| − | # [[Blasted Lands]] - Just North of the [[Dark Portal]]: {{co|57|54|Blasted Lands}}<br />'''[[Image:Pointer flight on 32x32.png]]Fly from [[Stonard]] to [[Flame Crest]]''' |
||
| − | # [[Burning Steppes]] - Flame Crest (that cave with the Libram guy): {{co|64|24|Burning Steppes}} |
||
| − | # [[Burning Steppes]] - On [[Dreadmaul]] rock north of [[Morgan's Vigil]]: {{co|82|46|Burning Steppes}}<br />'''[[Image:Pointer flight on 32x32.png]]Fly from [[Flame Crest]] to [[Thorium Point]]''' |
||
| − | # [[Searing Gorge]] - Southwest corner in [[Blackchar Cave]]: {{co|21|79|Searing Gorge}} |
||
| − | # [[Blackrock Spire]] - After a few pulls into LBRS, the Elder will be across the first wooden bridge. |
||
| − | # [[Blackrock Depths]] - In the middle of the [[Ring of Law]]. |
||
| + | ;Aggro |
||
| − | == Walkthrough for Northrend coins == |
||
| + | *{{text|yell|Feludius|You dare invade our lord's sanctum?}} |
||
| − | '''See also in-game walkthrough in External Links section below.''' |
||
| + | *{{text|yell|Ignacious|You will die for your insolence!}} |
||
| + | ;Phase 2 |
||
| − | Start your journey in [[Dalaran]]. You will probably want to do this with a group of 5, as some dungeons need to be done on heroic. This walkthrough also expects you to have a flying mount (since you need to be 80 to enter heroics). |
||
| + | *{{text|yell|Arion|Enough of this foolishness!}} |
||
| + | *{{text|yell|Terrastra|We will handle them!}} |
||
| + | ;Phase 3 |
||
| − | All dungeons with the exception of [[Utgarde Pinnacle]] and [[Azjol-Nerub]] are soloable as a rogue, hunter or druid. |
||
| + | *{{text|yell|Arion|An impressive display...}} |
||
| + | *{{text|yell|Ignacious|To have made it this far.}} |
||
| + | *{{text|yell|Feludius|But now witness true power...}} |
||
| + | *{{text|yell|Terrastra|The fury of the elements!}} |
||
| + | *{{text|yell|Elementium Monstrosity|BEHOLD YOUR DOOM!}} |
||
| + | ===Feludius=== |
||
| − | '''The Storm Peaks''' |
||
| + | ;Glaciate |
||
| − | # [[Elder Fargal]] in [[Frosthold]] {{co|28.9|73.7|Storm Peaks}} |
||
| + | *{{text|yell|I will freeze the blood in your veins!}} |
||
| − | # [[Elder Graymane]] in [[K3]] {{co|41|84|Storm Peaks}} |
||
| − | # [[Elder Stonebeard]] in [[Bouldercrag's Refuge]] {{co|31|38|Storm Peaks}} - inside the mountain via the camp |
||
| − | # [[Elder Yurauk]] in [[Halls of Stone]] ([[Storm Peaks]]) - halfway through Krystallus' room (stealth-soloable) |
||
| − | # [[Elder Muraco]] in [[Camp Tunka'lo]] {{co|64.6|51.3|Storm Peaks}} |
||
| + | ;Killing a player |
||
| − | '''Zul'Drak''' |
||
| + | *{{text|yell|Perish!}} |
||
| − | # [[Elder Ohanzee]] in [[Gundrak]] ([[Zul'Drak]]) - behind [[Drakkari Colossus]] (stealth-soloable) |
||
| − | # [[Elder Tauros]] in [[Zim'Torga]] {{co|59|57|Zul'Drak}} |
||
| − | # [[Elder Kilias]] in [[Drak'tharon Keep]] ([[Zul'Drak]]) - just before [[King Dred]] (stealth-soloable) |
||
| + | ===Ignacious=== |
||
| − | '''Grizzly Hills''' |
||
| + | ;Rising Flames |
||
| − | # [[Elder Beldak]] in [[Westfall Brigade Encampment]] {{co|60.6|27.7|Grizzly Hills}} |
||
| + | *{{text|yell|BURN!}} |
||
| − | # [[Elder Lunaro]] in [[Ruins of Tethys]] {{co|80.5|37.1|Grizzly Hills}} |
||
| + | |||
| − | # [[Elder Whurain]] in [[Camp Oneqwah]] {{co|64.2|47.0|Grizzly Hills}} |
||
| + | ;Killing a player |
||
| + | *{{text|yell|More fuel for the fire!}} |
||
| + | |||
| + | ===Arion=== |
||
| + | ;Thundershock |
||
| + | *{{text|emote|The air around you crackles with energy...}} |
||
| + | |||
| + | ;Call Winds |
||
| + | *{{text|yell|Wind, hear my call!}} |
||
| + | |||
| + | ;Killing a player |
||
| + | *{{text|yell|Merely a whisper in the wind...}} |
||
| + | |||
| + | ===Terrastra=== |
||
| + | ;Ground Rupture |
||
| + | *{{text|yell|The earth will devour you!}} |
||
| + | |||
| + | ;Quake |
||
| + | *{{text|emote|The ground beneath you rumbles ominously...}} |
||
| + | |||
| + | ;Killing a player |
||
| + | *{{text|yell|The soil welcomes your bones!}} |
||
| + | |||
| + | ===Elementium Monstrosity=== |
||
| + | ;Gravity Crush |
||
| + | *{{text|yell|FEEL THE POWER!}} |
||
| + | |||
| + | ;Killing a player |
||
| + | *{{text|yell|ANNIHILATE...}} |
||
| + | |||
| + | ;Death |
||
| + | *{{text|yell|IMPOSSIBLE!}} |
||
| + | |||
| + | ==Loot== |
||
| + | {{lootbox|Normal |
||
| + | |Arion's Crown |
||
| + | |Crushing Weight |
||
| + | |Dispersing Belt |
||
| + | |Feludius' Mantle |
||
| + | |Glittering Epidermis |
||
| + | |Gravitational Pull |
||
| + | |Hydrolance Gloves |
||
| + | |Scepter of Ice |
||
| + | |Terrastra's Legguards |
||
| + | |Treads of Liquid Ice |
||
| + | |Heart of Ignacious |
||
| + | }} |
||
| + | |||
| + | {{lootbox|Heroic |
||
| + | |Arion's Crown (heroic) |
||
| + | |Crushing Weight (heroic) |
||
| + | |Dispersing Belt (heroic) |
||
| + | |Feludius' Mantle (heroic) |
||
| + | |Glittering Epidermis (heroic) |
||
| + | |Gravitational Pull (heroic) |
||
| + | |Hydrolance Gloves (heroic) |
||
| + | |Scepter of Ice (heroic) |
||
| + | |Terrastra's Legguards (heroic) |
||
| + | |Treads of Liquid Ice (heroic) |
||
| + | |Heart of Ignacious (heroic) |
||
| + | }} |
||
| + | ==Related achievements== |
||
| − | '''Howling Fjord''' |
||
| + | *{{achievement|Heroic: Ascendant Council}} |
||
| − | # [[Elder Jarten]] in [[Utgarde Keep]] ([[Howling Fjord]]) - in the second room after the first boss. Soloable, but requires attacking the Forge Masters. |
||
| − | # [[Elder Chogan'gada]] in [[Utgarde Pinnacle]] ([[Howling Fjord]]) - just after Skadi (not stealth-soloable) |
||
| + | ==Videos== |
||
| − | '''Dragonblight''' |
||
| − | # [[Elder Thoim]] in [[Moa'ki Harbor]] {{co|48.8|78.2|Dragonblight}} |
||
| − | # [[Elder Skywarden]] in [[Agmar's Hammer]] {{co|35.1|48.4|Dragonblight}} |
||
| − | # [[Elder Morthie]] in [[Stars' Rest]] {{co|29.8|55.9|Dragonblight}} |
||
| − | # [[Elder Nurgen]] in [[Azjol'Nerub]] ([[Dragonblight]]) - in the room you drop into after Hadronox (not stealth-soloable) |
||
| + | ===10-man Normal=== |
||
| − | '''Borean Tundra''' |
||
| + | {{Youtubelink|qEdaQFAIcsU|desc=[http://www.vagrantcorps.com/ Vagrant Corps], "Elementary" achievement - 1080p}} |
||
| − | # [[Elder Arp]] in [[Druids for the Ethical and Humane Treatment of Animals|D.E.H.T.A.]] Camp {{co|57.4|43.7|Borean Tundra}} |
||
| + | {{Youtubelink|9s-pQn8nFZs|desc=Aeon}} |
||
| − | # [[Elder Sardis]] in [[Valiance Keep]] {{co|59.1|65.3|Borean Tundra}} - NE Side |
||
| + | {{Youtubelink|UolE08LTeRY|desc=OMFGCATA}} |
||
| − | # [[Elder Pamuya]] in [[Warsong Hold]] {{co|42.9|49.6|Borean Tundra}} - NE Side |
||
| + | {{Youtubelink|871nnbhp47U|desc=LoD}} |
||
| − | # [[Elder Northal]] in [[Transitus Shield]] {{co|33.8|34.4|Borean Tundra}} |
||
| + | {{Youtubelink|a8ER9mMYs_g|desc=alpha1337}} |
||
| − | # [[Elder Igasho]] in [[Nexus]] ([[Borean Tundra]]) - just before the tree boss (stealth-soloable) |
||
| + | {{Youtubelink|rBB2hUPtJ2w|desc=Cause and Effct, on screen guide, voice chat, low in game sound}} |
||
| + | ===25-man Normal=== |
||
| − | '''Sholazar Basin''' |
||
| + | {{Youtubelink|FmEVPbKwneA|desc=Learntoraid}} |
||
| − | # [[Elder Sandrene]] in [[Lakeside Landing]] {{co|49.8|63.6|Sholazar Basin}} |
||
| + | {{Youtubelink|t_vatShnpLY|desc=Nitros14}} |
||
| − | # [[Elder Wanikaya]] in [[Rainspeaker Rapids]] {{co|63.8|49.0|Sholazar Basin}} |
||
| + | {{Youtubelink|9Ijs0byvFCU|desc=dovvids}} |
||
| + | {{Youtubelink|RRVcgDw5Yck|desc=Millenium}} |
||
| + | {{Youtubelink|aiijiQPKFrk|desc=Reckoning - Anachronos EU (24 man) 720p}} |
||
| + | == Patch changes == |
||
| − | '''Wintergrasp''' |
||
| + | *{{Patched|date=2011-01-18|bluenote=The hotfix on January 5 to increase the damage of Liquid Ice during phase 3 of the Ascendant Council fight has been reverted. Due to a separate bug with the size of the Elementium Monstrosity's hitbox, it is often impossible for melee classes to avoid damage from this ability. This issue is slated to be addressed in patch 4.0.6 so that Liquid Ice damage can again be increased.|link=http://us.battle.net/wow/en/blog/1232869}} |
||
| − | # [[Elder Bluewolf]] in [[Wintergrasp]] {{co|49.0|13.9|Wintergrasp}} - Inside the Artifact room (need to hold Wintergrasp, have the door down, or otherwise be able to enter) |
||
| + | * {{Patched|date=2011-01-05|bluenote= |
||
| + | ** Liquid Ice in phase 3 of the Ascendant Council encounter now deals more damage. |
||
| + | ** The damaging component of Eruption no longer interrupts Terrastra when casting Harden Skin or Quake.|link=http://us.battle.net/wow/en/blog/1232869}} |
||
| + | * {{Patched|date=2011-01-03|bluenote= |
||
| + | ** It was sometimes possible for Arion to instantly Chain Lightning the targets affected by Lightning Rod, with no time for them to react. This has been corrected. |
||
| + | ** If one of the three most distant targets from Ignacious was 20 or fewer yards away and Ignacious picked that target for Inferno Leap, the spell would fail entirely, but the cooldown would be consumed. Inferno Leap can now be cast on players 20 yards or fewer away from Ignacious. |
||
| + | ** The Elementium Monstrosity will now prefer ranged targets to melee targets with its Electrical Instability beams. If there are more beams active then there are ranged targets present, then the beams will start hitting melee targets.|link=http://us.battle.net/wow/en/blog/1232869}} |
||
| + | * {{Patch 4.0.3a|note=Added.}} |
||
| − | == |
+ | ==External links== |
<!-- Read http://www.wowpedia.org/Wowpedia:External_links before posting your links here. |
<!-- Read http://www.wowpedia.org/Wowpedia:External_links before posting your links here. |
||
Links that do not conform to the rules will be DELETED. |
Links that do not conform to the rules will be DELETED. |
||
Repeat violations may result in a BAN. |
Repeat violations may result in a BAN. |
||
Have a nice day. :) --> |
Have a nice day. :) --> |
||
| + | {{elinks-NPC|43735|armory=1}} |
||
| − | * {{Elink|link=http://wow.curse.com/downloads/wow-addons/details/tourguide_lunarfestival.aspx|type=curse|desc= TourGuide - The Lunar Festival.}} |
||
| + | {{elink|icon=L2R|site=Learntoraid.com|link=http://www.learntoraid.com/2011/02/11/twilight-ascendant-council-video-strategy-guide|desc=Ascendant Council Strategy Guide}} |
||
| − | * {{Elink|link=http://www.wowhead.com/?search=elders+of#achievements|site=Wowhead|type=wowhead}} |
||
| + | {{elink|icon=25man|site=25man.com|link=http://25man.com/cata-guides/ascendant-council|desc=Ascendant Council Tactics & Strategy Guide}} |
||
| − | * {{Elink|link=http://rrvs.blogspot.com/2009/01/elderly-and-venerable.html|site=Random Ravings|desc=The Elderly and Venerable}} |
||
| − | * {{Elink|link=http://www.warcraftoverachiever.com/world-events/to-honor-ones-elders/ |site=WarcraftOverachiever |desc=Complete Lunar Festival Achievements Guide}} |
||
| − | [[ru:Предки Лунного фестиваля]] |
||
| − | [[Category: |
+ | [[Category:The Bastion of Twilight mobs]] |
| + | [[Category:Elemental ascendants]] |
||
| + | [[Category:Bosses]] |
||
Revision as of 06:36, 3 July 2011
 | |||||||
| Race | Elemental ascendant (Elemental) | ||||||
| Level | ?? Boss | ||||||
| Location | Bastion of Twilight | ||||||
| |||||||
Ascendant Council is a council encounter in the Bastion of Twilight.
They are Twilight's Hammer members who have ascended and become elementals. The world first heroic kill was by Paragon (25 person) on 2 January 2011.
The Ascendant Council is a three phase council fight. During the first phase, you fight Feludius and Ignacious - water and fire ascendants. During the second phase, you face Arion and Terrastra - air and earth ascendants respectively. During the last phase, you must defeat all four, as they merge together into an Elementium Monstrosity.
As the most powerful Twilight's hammer cultists to be twisted into elemental beings, the Ascendant Council members, have long forgotten their existences as mere mortals. From their wicked sanctum they oversee the selection of new ascension candidates. [1]
Abilities
Phase 1
Feludius

Feludius
 Heart of Ice — An icy cold grips the target's heart, dealing increasing Frost damage every 2 sec (2,000/4,000/8,000 etc). Magic dispellable. If the target comes in contact with other allies, however, they are empowered with Frost energy. Frost Imbued players deal additional damage to Ignacious.
- Hydrolance — Deals 45000 to 55000 Frost damage to a random target.
- Waterbomb — Inflicts 9750 to 10250 frost damage to enemies within 6 yards, applying the Waterlogged debuff.
- Waterlogged — Soaks an enemy with icy water, reducing movement speed by 25%. While soaked, enemies are susceptible to certain Frost-based attacks. Exposure to flame can remove this effect.
- Glaciate — Deals massive Frost damage to any nearby enemies, with damage decreasing with distance from the caster. Any enemies who are waterlogged will have the blood in their veins frozen.
- Frozen Blood — Freezes a waterlogged enemy solid, stunning and dealing 20000 Frost damage every 2 sec for 10 sec.
Heroic Mode only
- Frost Beacon — Marks the target for pursuit by a Frozen Orb. When the Frozen Orb reaches its target or a minute passes it will cast Glaciate as the spell above.
Ignacious

Ignacious
- Burning Blood — Deals increasing Fire damage to an enemy every 2 sec (2,000/4,000/8,000 etc). Magic dispellable. Nearby allies are empowered with fire energy each tick however. Fire imbued players deal additional damage to Feludius.
- Aegis of Flame — Surrounds the caster with a radiant shield of flame, absorbing 1,000,000 damage and preventing spell interruption while active.
- Flame Torrent — Inflicts 36075 to 41925 Fire damage every 1 sec for 3 sec in a 18 yard cone in front of the caster.
- Inferno Leap — Leaps at an enemy, inflicting 23125 to 26875 Fire damage and knocking all nearby enemies away.
- Inferno Rush — Ignacious rushes back to his primary aggro target leaving a trail of flames. The flame trail will inflict 4625 to 5375 Fire damage every 0.5 sec and remove Waterlogged.
- Rising Flames — Cast immediately after Aegis of Flame. Deals increasing Fire damage to every player in the room over time until interrupted.
Phase 2
Arion
Arion
- Call Winds — Focuses and agitates the nearby air into a violent cyclone. Entering the Cyclone will cause 7,000 nature damage and give the player the swirling winds debuff which levitates the player into the air.
- Lightning Rod — Marks an enemy to attract electrical attacks. Arion will cast his Chain Lightning at this player.
- Chain Lightning — Fires a blast of lightning at enemies who have been attuned to attract electricity, dealing 9500 to 10500 Nature damage and bouncing to additional nearby targets.
- Disperse — The caster dissolves into swirling wind and materializes elsewhere in the room.
- Lightning Blast — Blasts an enemy with concentrated lightning, inflicting 72000 to 88000 Nature damage. Cast on Arion's tank immediately after Disperse.
- Thundershock — Deals 146250 to 153750 Nature damage to all nearby enemies. Less effective against grounded targets. More effective against airborne targets.
Heroic Mode Only
- Static Overload — Charges an enemy with energy that electrifies nearby allies, causing them to suffer 6475 to 7525 Nature damage every 2 sec for 10 sec. Powerful gravitational fields can cause this energy to dissipate harmlessly.
Terrastra

Terrastra
- Gravity Well — Creates a Gravity Well that firmly connects nearby players to the earth, granting resistance to some powerful electrical attacks. Lasts 2 min or until another force lifts the target from the ground.
- Harden Skin — The caster's skin hardens into solid rock, increasing Physical damage dealt by 100% and absorbing 50% of all damage taken, up to 650000. If the caster suffers enough damage, this barrier will shatter, grievously wounding the caster.
- Eruption — Fires a spike through the floor, impaling all targets within 4 yards, dealing 47125 to 52875 damage and knocking them up in the air. This attack ignores armor.
- Quake — Sends massive shockwaves through the earth, dealing 146250 to 153750 damage to all enemies who are in contact with the ground. More effective against (gravity well) grounded targets. (Note Priest levitate will NOT help you.)
Heroic Mode Only
- Gravity Core — Applied on entering a Gravity Well. Crushes an enemy with intense gravitational force, inflicting 10000 Physical damage every 2sec for 10 sec. While the target is affected, the gravitational field periodically hinders the movement and actions of nearby allies.
Phase 3
Elementium Monstrosity

The Elementium Monstrosity
- Lava Seed — Showers the surrounding area with kernels of pure Flame energy, each of which erupts to deal 35000 to 45000 Fire damage to nearby enemies as Lava Plume
- Liquid Ice — The Monstrosity is preturnaturally cold, freezing the ground beneath it. The pools of ice will grow with continued exposure to the Monstrosity, dealing increasing Frost damage to enemies exposed to them. Essentially this ability is Defile from the Lich King but expands when the boss stands in it, rather than players.
- Electric Instability — Constant nature damage to random raid members, increasing in intensity the longer the Elementium Monstrosity is alive. Overloaded with raw lightning energy, the caster zaps nearby enemies for 5655 to 6345 Nature damage, chaining to nearby targets. Functions identically to Entropius' Negative Energy in Sunwell Plateau.
- Gravity Crush — Traps an enemy in a gravity bubble, lifting them off the ground and crushing them for 10% of their maximum health every 0.5 sec for 6 sec. When the effect ends, the target will be left to fall to the ground.
Strategy
Phase 1
The first phase pits players against Feludius (ice) and Ignacious (fire) while the others watch from the balcony. It lasts until one of the elementals reaches 25% health. For the first phase, put ranged DPS on Feludius, melee DPS on Ignacious and take them down together. Because the Elementium Monstrosity's hitpoints in phase three depend on how much health the individual elementals had before they despawned, it is ideal to get both Feludius and Ignacious down to 25%.
Heart of Ice is a magic debuff by Feludius that causes nearby players to deal additional damage to Ingacious. Burning Blood is the same kind of debuff cast by Ignacious that causes nearby players to deal additional damage to Feludius. It's debatable whether to move to the groups of players that are assigned to one boss, or to dispel the debuff.
After Ignacius has cast Inferno Leap (similar to Rajh in Halls of Origination) he will move to the tank and leave a trail of fire. Players should move to the fire to remove the Waterlogged debuff, or they will be stunned and take significant damage when Feludius cast Frozen Blood.
Calling out when Ignacius is about to cast Aegis of Flame is important since the raid will need to focus DPS at that time. If the DPS is focused enough, the Aegis will be brought down before the fire AoE causes too much damage from Rising Flames.
Phase 2
Now Arion (wind) and Terrastra (earth) will come in. Once again, split DPS with ranged on Arion and melee on Terrastra, and try to get them both down to 25% at the same time.
When the phase starts players should be on the lookout for the black tornadoes that spawn - these should not be confused with the Gravity Well that causes players to be grounded. When players have touched the tornado they get Swirling Winds, which will make players avoid the Quake ability by Terrastra that causes about 100k damage. After Quake has been cast, players should move to the Gravity Well to make them Grounded. This will make players immune to the Thundershock ability by Arion, causing about 100k damage.
Phase 3
Once the elementals combine into the Elementium Monstrosity, it will have the combined HP of whatever the four individual mobs had when they despawned. Although Elementium Monstrosity is a tank and spank, the damage from its Electric Instability ability increases with time, hence it is easier if the previous bosses were kept as close to 25% health as possible.
An achievement, ![]() Elementary, is available for only allowing a single Liquid Ice patch.
Elementary, is available for only allowing a single Liquid Ice patch.
Quotes
- Intro
- Cho'gall yells: Brothers of Twilight! The Hammer calls to you! (Fire water earth air). Leave your mortal shell behind. (Fire water earth air). Embrace your new forms for here and everafter! (Burn and drown and crush and suffocate). And use your gifts to destroy the unbelievers. (Burn and drown and crush and suffocate)!!
- Aggro
- Feludius yells: You dare invade our lord's sanctum?
- Ignacious yells: You will die for your insolence!
- Phase 2
- Arion yells: Enough of this foolishness!
- Terrastra yells: We will handle them!
- Phase 3
- Arion yells: An impressive display...
- Ignacious yells: To have made it this far.
- Feludius yells: But now witness true power...
- Terrastra yells: The fury of the elements!
- Elementium Monstrosity yells: BEHOLD YOUR DOOM!
Feludius
- Glaciate
- I will freeze the blood in your veins!
- Killing a player
- Perish!
Ignacious
- Rising Flames
- BURN!
- Killing a player
- More fuel for the fire!
Arion
- Thundershock
- The air around you crackles with energy...
- Call Winds
- Wind, hear my call!
- Killing a player
- Merely a whisper in the wind...
Terrastra
- Ground Rupture
- The earth will devour you!
- Quake
- The ground beneath you rumbles ominously...
- Killing a player
- The soil welcomes your bones!
Elementium Monstrosity
- Gravity Crush
- FEEL THE POWER!
- Killing a player
- ANNIHILATE...
- Death
- IMPOSSIBLE!
Loot
|
Related achievements
Videos
10-man Normal
Template:Youtubelink Template:Youtubelink Template:Youtubelink Template:Youtubelink Template:Youtubelink Template:Youtubelink
25-man Normal
Template:Youtubelink Template:Youtubelink Template:Youtubelink Template:Youtubelink Template:Youtubelink
Patch changes
- Template:Patched
- Template:Patched
- Template:Patched
- Patch 4.0.3a (2010-11-23): Added.